Tutorials
User education and troubleshooting guides
Information to help guide you
With our step-by-step guides, learning 2D Transit is as easy as 1-2-3. Also check out our downloadable brochure and detailed Frequently Asked Questions sheet. If you don’t find the answers to your questions there, be sure to visit our Contact page and ask our customer assistance team for help.
- Get Started
- Manage your Workspaces
- Interpret the Dashboard
- Creating/Importing Shipment Plans
- Scan and Print Labels
- Manage Shipment Plans
- Manage Print History
- Set up PrintNode
- Select Default Printer
- Manage Custom Shipping Addresses
- Manage User Settings
- Manage Workspace Settings
- Print Vendor Central Labels
- Manage Custom Shipments
- Generate Efficiency Reports
- Generate Shipping Labels
- Managing FNSKU Items
Setting up your account
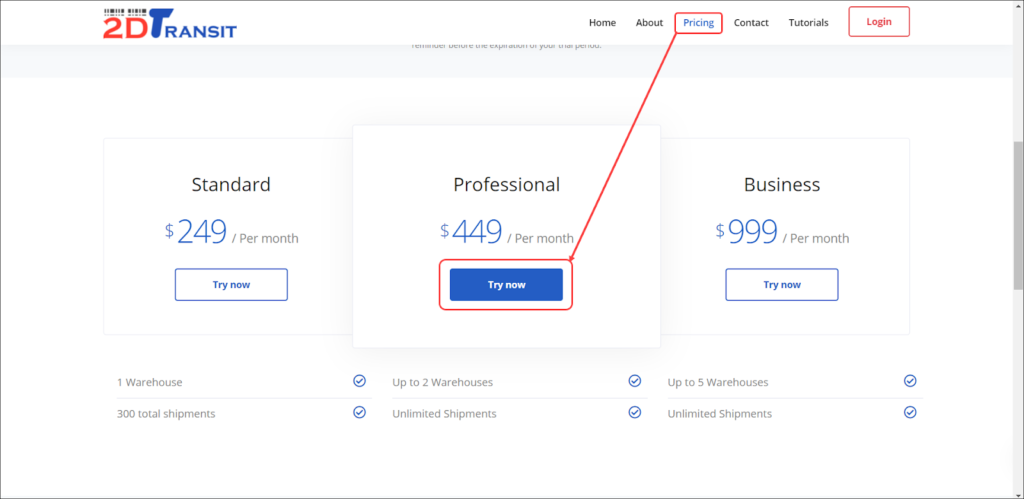
On the 2D Transit website, navigate to the Pricing page, find the plan you want to subscribe to, and click the Try now button to proceed with a 7-day free trial.
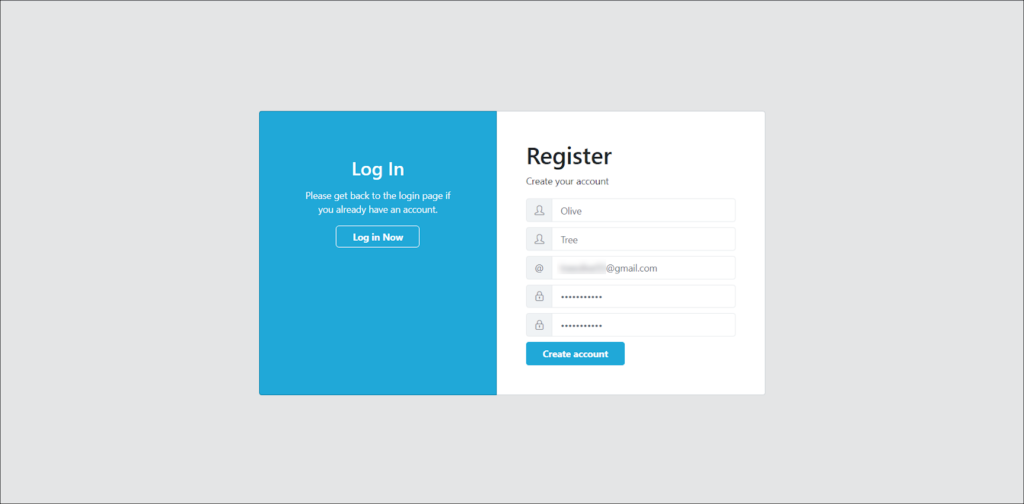
You will be redirected to the Registration page. Fill in the fields with your name, email address, and desired password and click the Create account button. Make sure to use a valid email address, as we will be sending an activation code for verification.
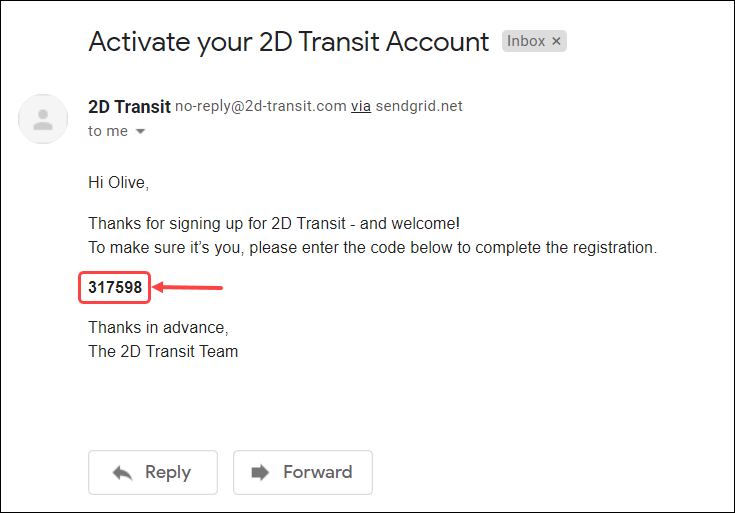
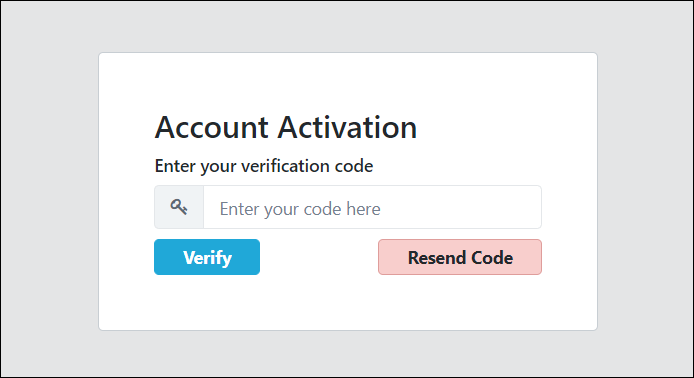
After creating your account, you will be redirected to the Account Activation page. We will email you an verification code. Copy and paste the code from your email inbox into the verification code box, and click the Verify button to proceed. If you don’t receive a code within five minutes, check your spam folder. If you still can’t find it, try clicking Resend Code.
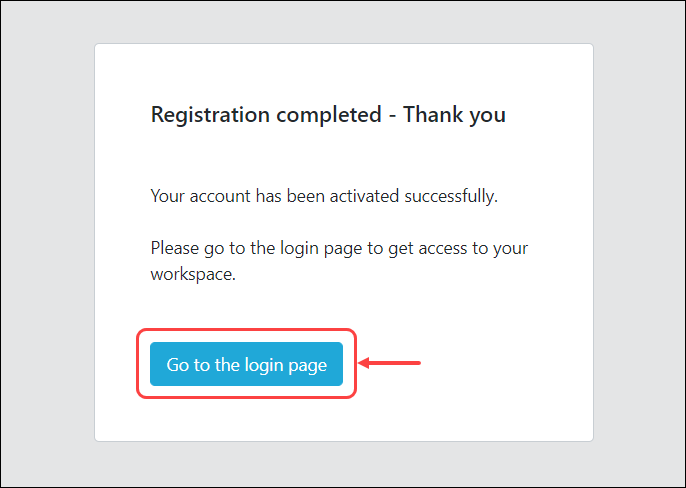
After your account is verified, click the Go to the login page button to proceed to the Login page.
Logging in and setting up your organization
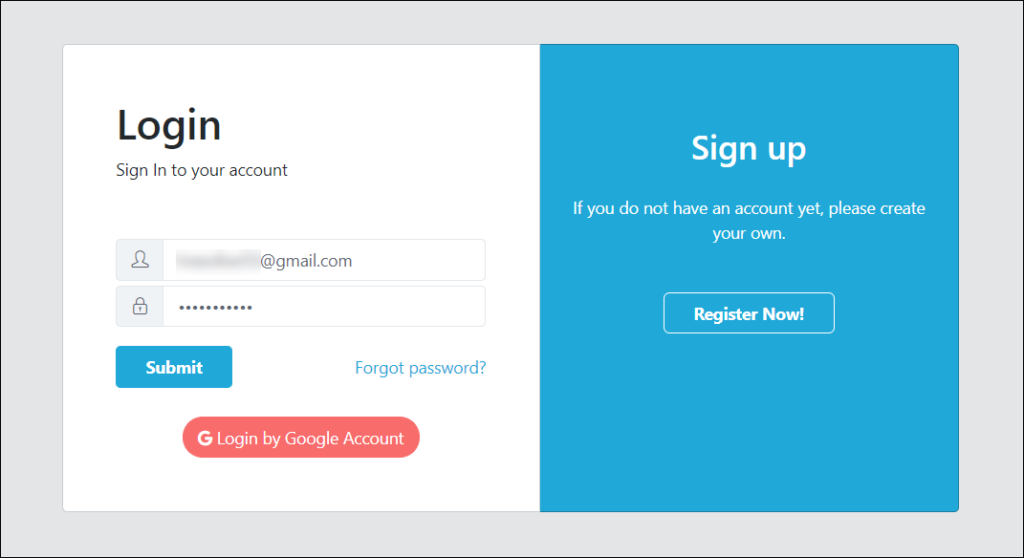
After successfully creating your account, you will be redirected to the Login page. Fill in your email address and password, and then click the Submit button.
The first time you log in, you will need to set up an organization. Just click the Create your own organization button to proceed.

Provide your organization’s name and click the Add button. Please note that you can edit or update the name of your organization at any time after initial setup.

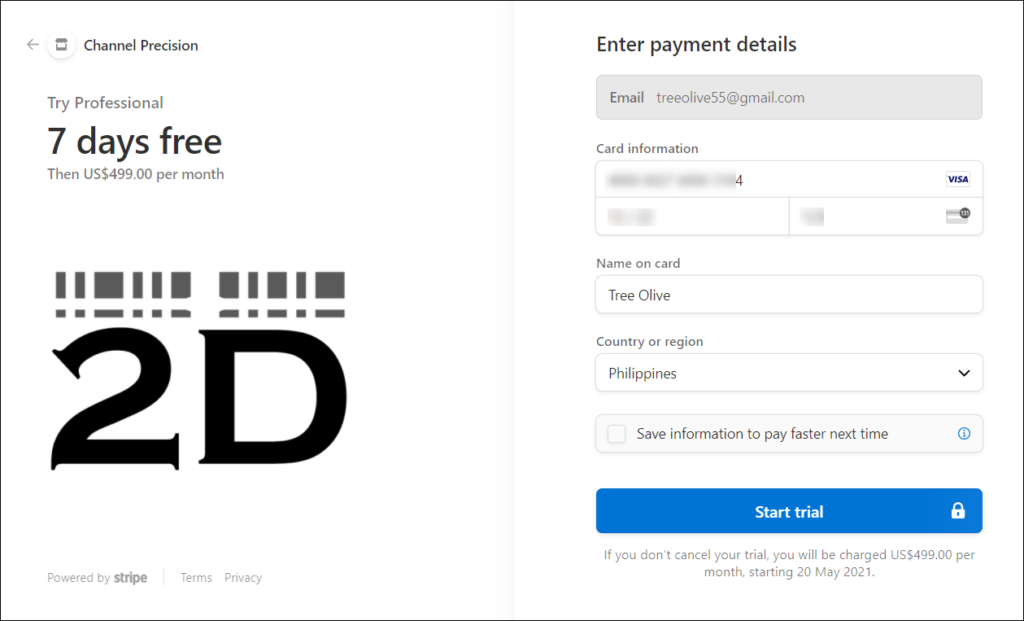
After initial setup, you will be redirected to the payment setup page. On this page, you are required to input your billing information. Note that since you’ve signed up for a 7-day free trial, your account will not be charged until your trial period is complete. We will notify you by email at least 24 hours before charging your account. If you cancel your subscription before the billing date, no charges will be applied.
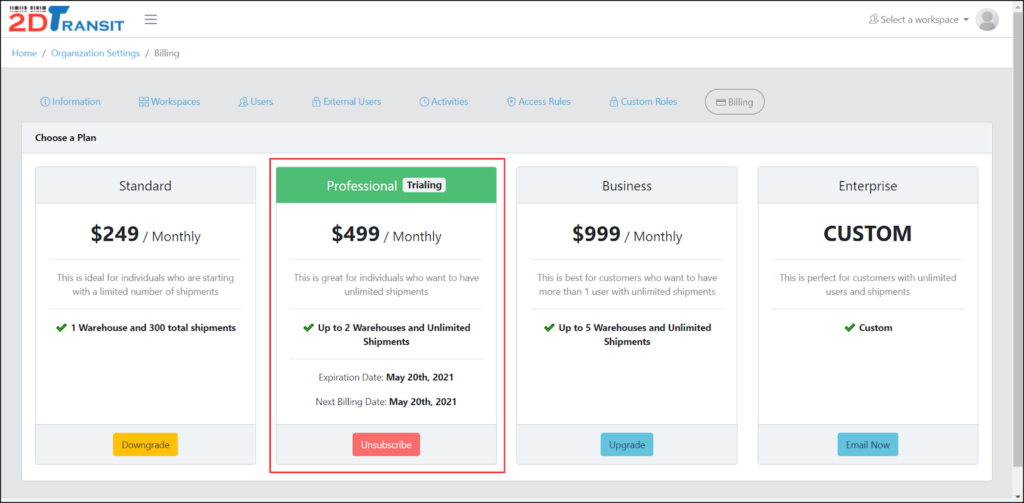
Once you’re done with payment setup, you will be redirected to the Billing page of your Organization Settings. Your status will show as Trialing until your trial expires.
Creating your first workspace
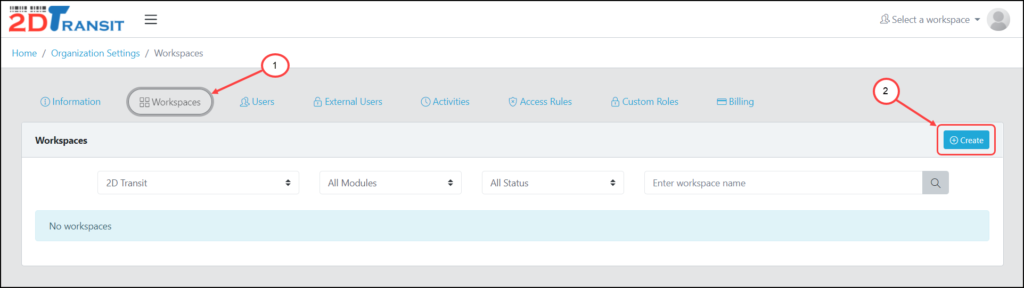
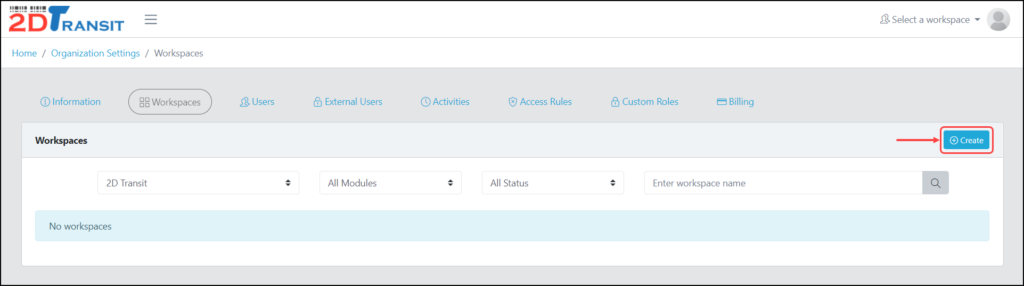
To create your first workspace, go to the Workspaces tab in your Organization Settings and click the Create button.
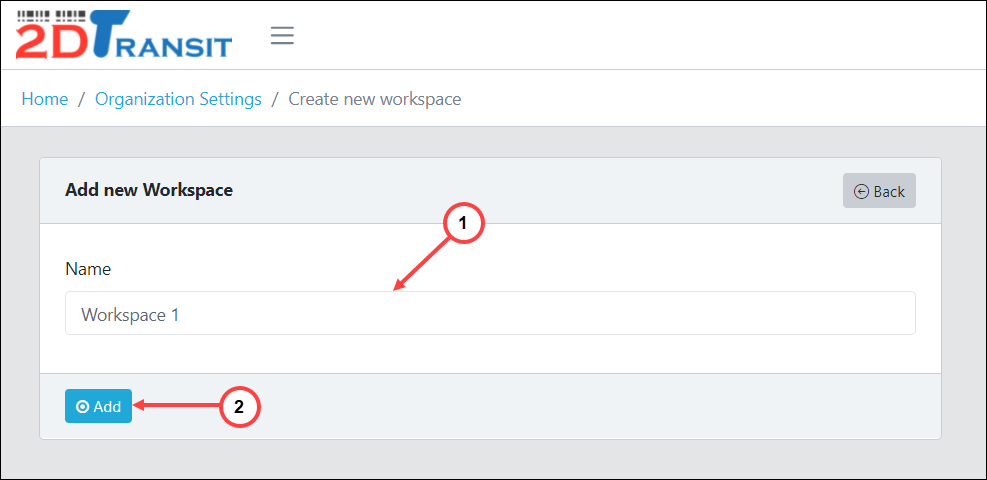
Enter your desired workspace name and click the Add button to proceed. If there are other workspaces on the same account, make sure you choose a unique and descriptive workspace name that won’t be confused with an existing workspace. We recommend that you use your vendor name in your workspace name so that account administrators can easily associate you with your workspace.
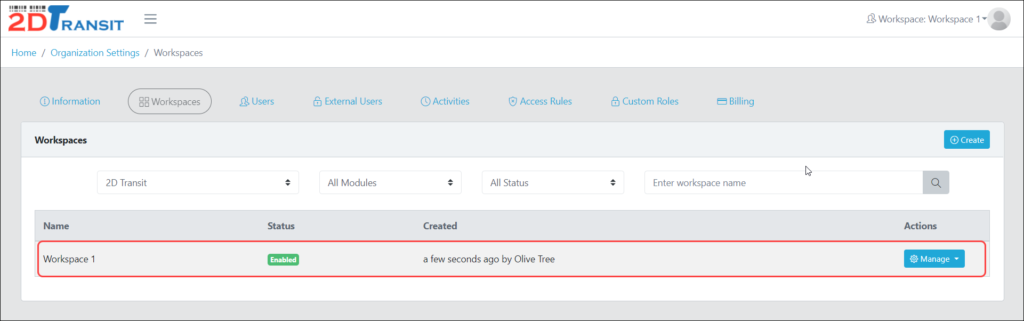
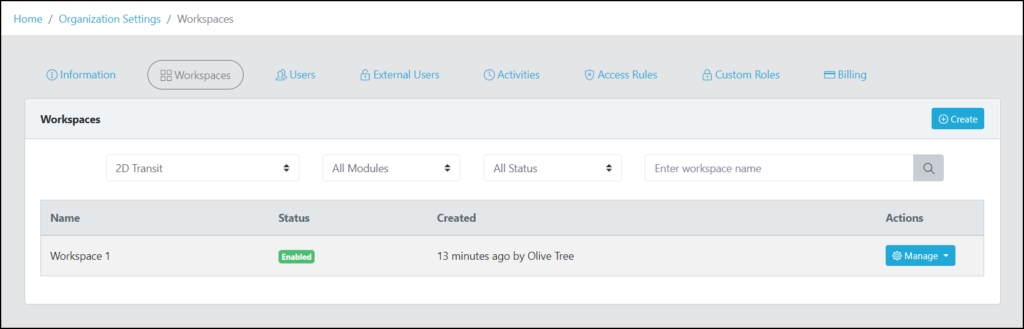
After you create a workspace, you will see it appear in the workspace table. To learn more about workspaces and how to manage them, navigate to the Manage your Workspace tab.
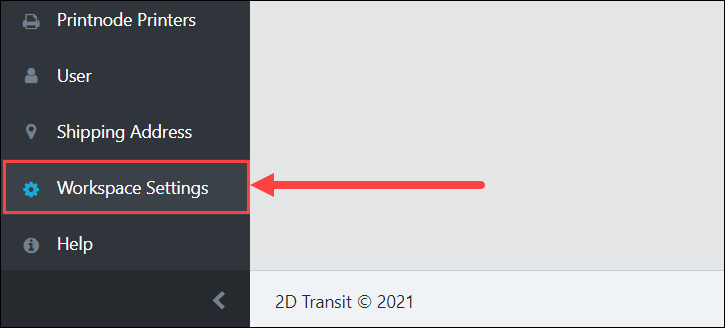
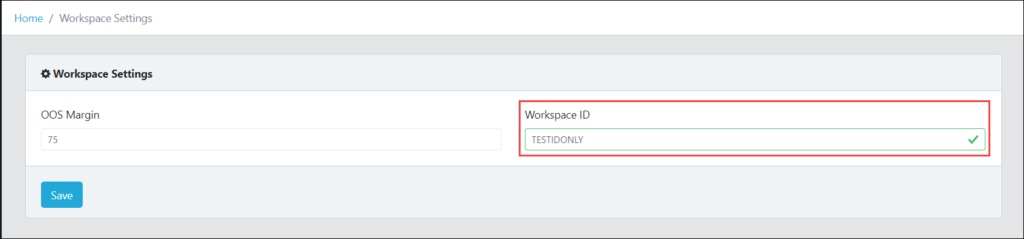
After you’ve created a workspace, the next thing you’ll need to do is set up an ID. This ID will act as a unique identifier to ensure that imported vendor shipment plans are not misplaced. To proceed, navigate to the Home page, Open the newly created workspace, and then navigate to the Workspace Settings page.
On the Workspace Settings page, you will see a Workspace ID field where you will fill in your desired workspace ID. The ID must be 10 characters in length. All characters must be alphanumeric and uppercase.
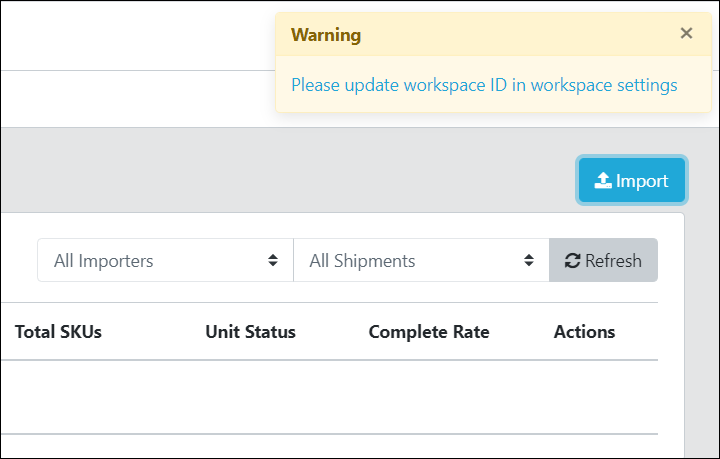
If you start importing your shipment plans without setting up a workspace ID, you will be prompted to set one. (If you’re importing a Vendor Default Template file you received from a partner, you may need to have them re-export the file with your new workspace ID to get it to import successfully.)
Connecting 2DTransit with Amazon Seller Central API
Requirements:
1. Make sure you’re logged in to an owner-privileged account, or ask someone who has one, to walk through these steps.
2. You or that same user must also be logged in to your Amazon Seller Central owner account, with the same browser session.
3. It is recommended that you connect both Amazon MWS and Amazon SP-API integrations; some 2DT features use only one or the other. We aim towards only needing SP-API in the near future.
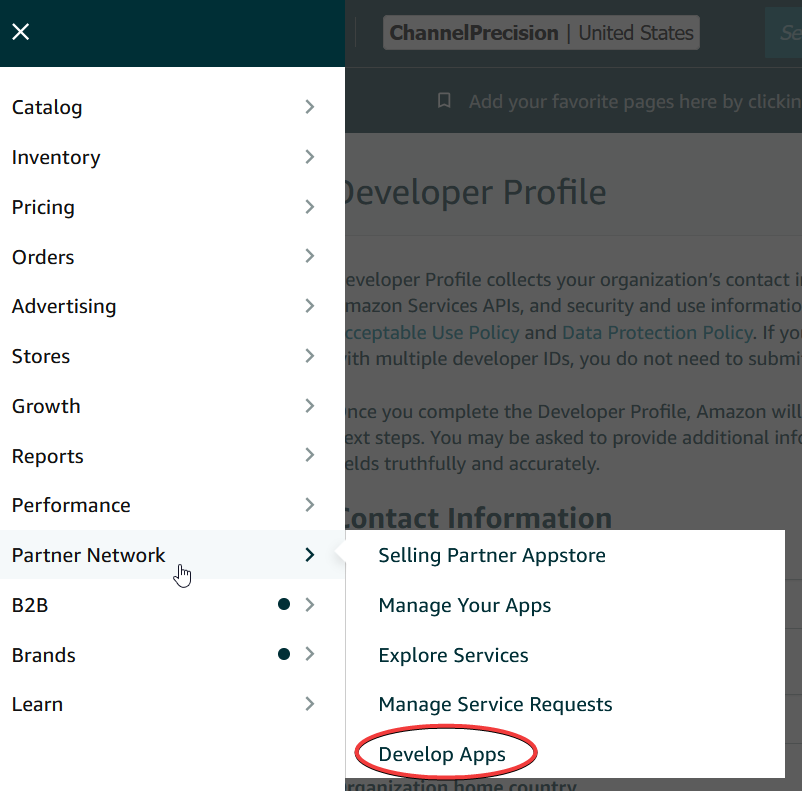
Amazon Developer Registration
1. Make sure you’re registered as an Amazon Selling Partner API Developer. Every seller can register as a developer simultaneously, and there’s no additional cost to do so. See more at: https://developer-docs.amazon.com/sp-api/docs/registering-as-a-developer
2. Go to https://sellercentral.amazon.com/sellingpartner/developerconsole ; If you do not see your Developer keys at the top of the page, you haven’t registered yet.
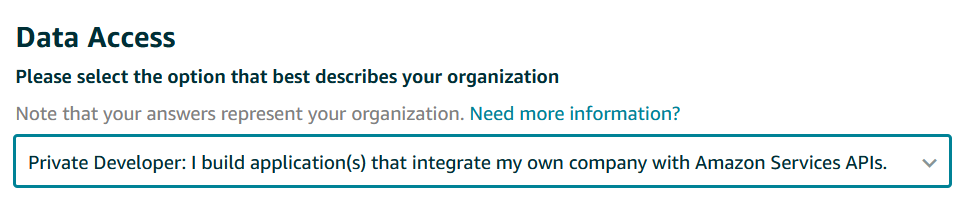
3. Complete the Developer Profile form at: https://sellercentral.amazon.com/developer/register
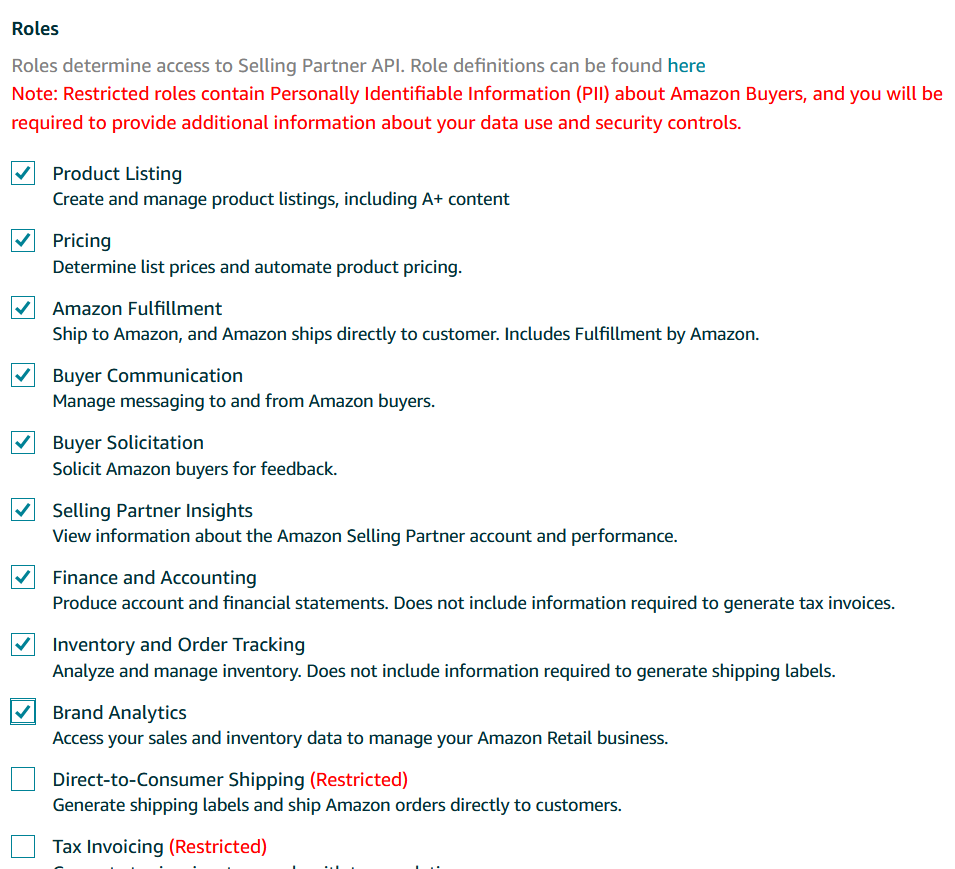
4. Choose “Private Developer”, and check all the non-restricted roles.
5. Choose Yes on all security questions, making sure you abide by all Amazon Policies when applicable. For outside parties and sources, you may cite Channel Precision as your partner.
6. Submit your registration form and wait for amazon’s authorization.
Seller Central Integration – MWS API
1. Once registered as a Developer you may find your Marketplace Web Services API keys here: https://sellercentral.amazon.com/sellingpartner/developerconsole/
2. Your developer ID is displayed here, and your API key-pair are displayed once you click the “View” link.
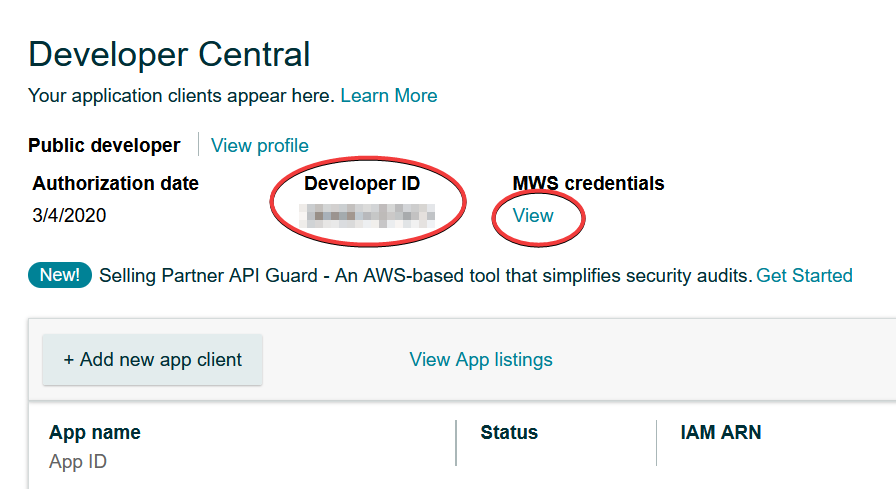

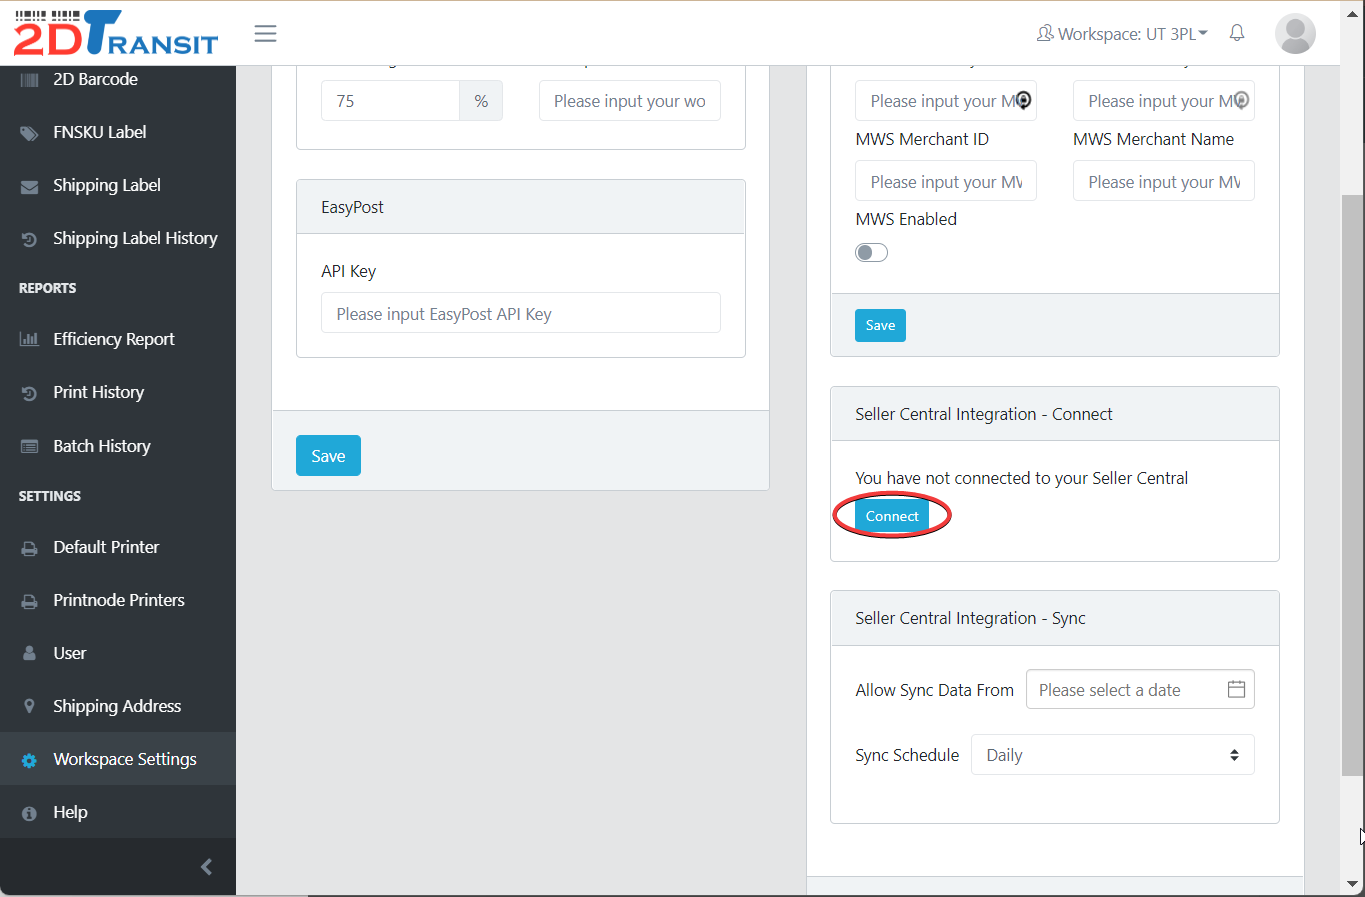
3. Copy this information and fill it in 2DTransit, over at the Workspace Settings page.

You can choose any merchant name, it does not need to match your Seller Central’s business name exactly.
Seller Central Integration – SP-API
1. Connecting to the SP-API is much simpler – simply click the button here in your Workspace Settings page…
2. Then review Amazon’s disclaimer, toggle the checkbox and Confirm.
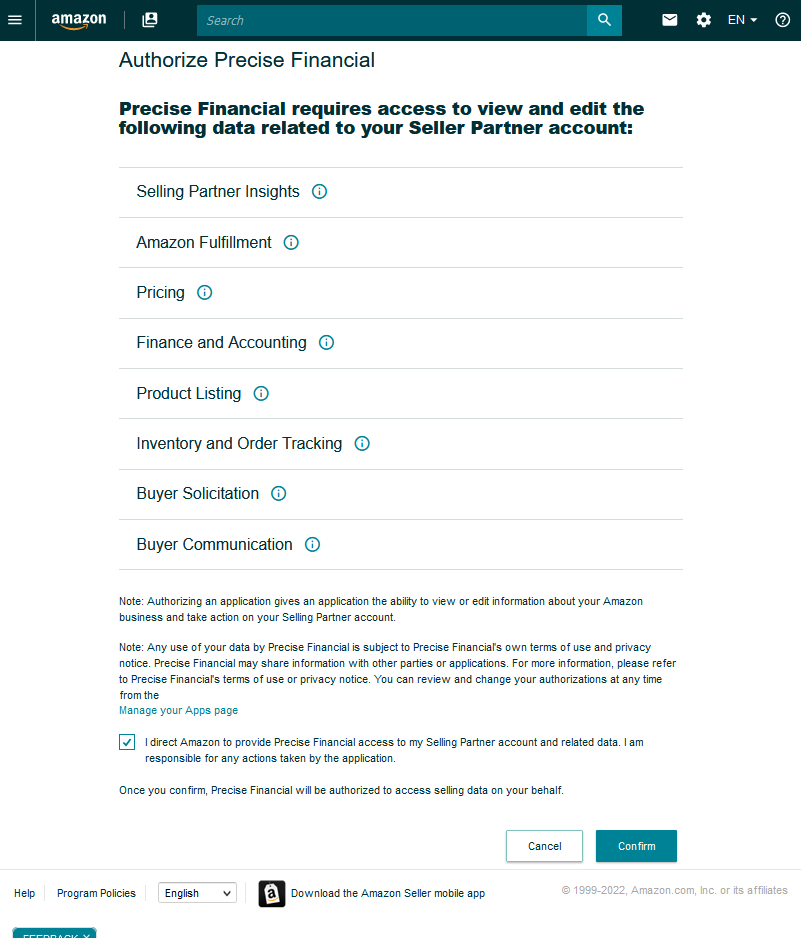
For this step to work it’s especially important that you are logged into your Seller Central owner account in the same browser session as 2DT’s.
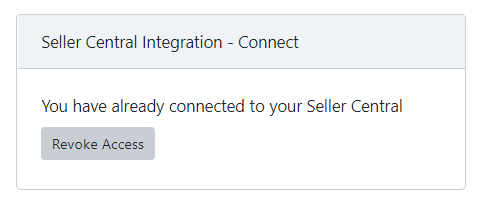
3. Once you hit confirm that should be it and you should see this notice on your Workspace Settings page, instead of the “Connect” button.
Support
If you have any questions or come across any issues please contact us at support@2dtransit.com
Updating organization information
To update your organization name, go to the Information tab in your organization settings.
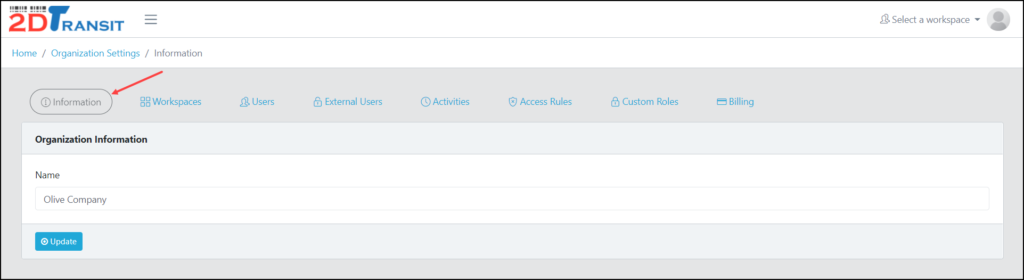
Enter your new organization name and click the Update button to proceed.
Managing your billing
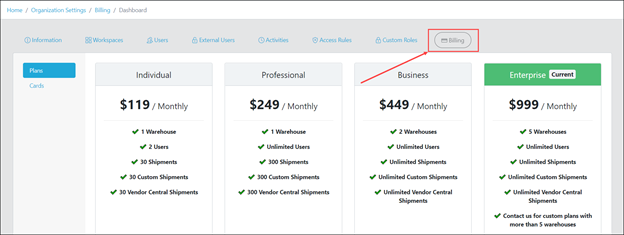
Manage your billing from the Billing tab on the Organization Settings page. To upgrade/downgrade your subscription plan, choose the plan you want and click the Upgrade/Downgrade button.
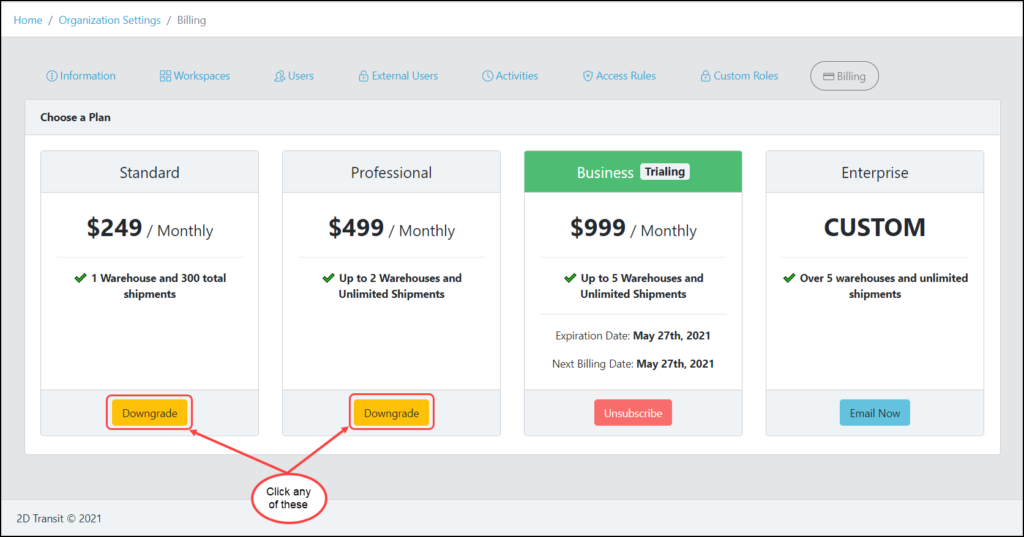
If you want a customized plan, just click the Email Now button, and the app will attempt to launch your email client. Or you can manually email us at info@2dtransit.com.

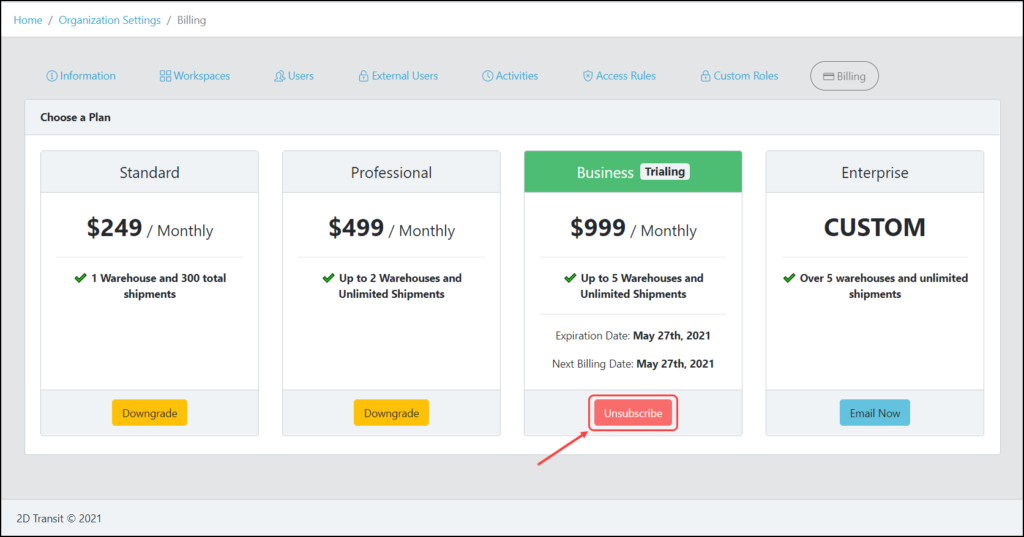
To unsubscribe, just click the red Unsubscribe button, and then click the Confirm button to proceed. Please note that unsubscribing will make your workspaces inaccessible until you resubscribe. We don’t delete your workspace data when you unsubscribe, so it will all be waiting for you if and when you come back.
Updating your payment information
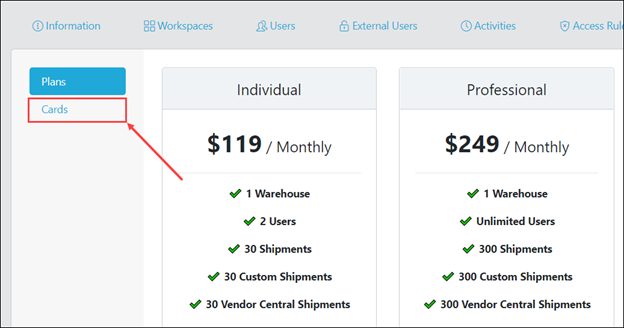
To update payment information for any 2D Transit subscription plan, navigate to the Home page from the left menu in the 2D Transit app. Then click the Manage button and go to the Billing tab. (Note that only a user with the “Admin” or “Owner” role will be able to see the Manage button.)
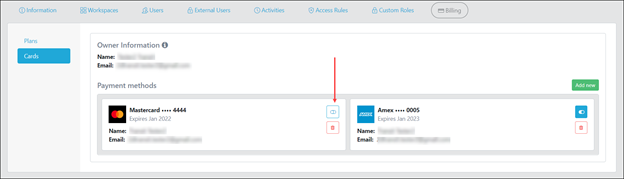
Click the Cards tab found at the left side of the page.
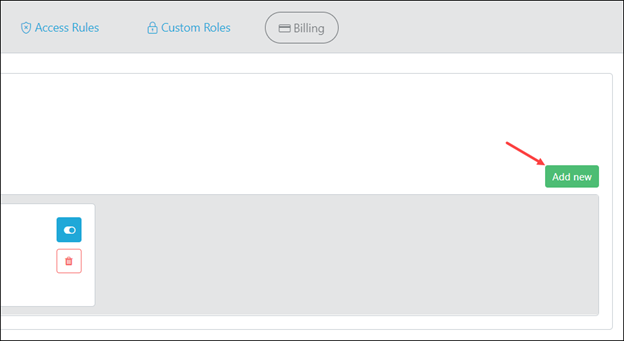
You will see a list of payment cards added by users. To add a new card, simply click the Add New button. Then you will be redirected to a new page where you can add the card.
Enter your new card information and click the Save Card button to proceed.
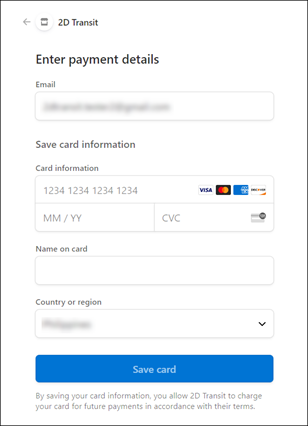
When the new card has been added successfully, it will appear in the list of payment cards. To set the card as your new default payment card, switch the toggle to the “on” position. Please note that the new payment information will take effect with your next payment.
Downloads
View our 2D Transit brochure to learn how 2D Transit can help your business grow.
Click here to download a printable version of the Getting Started tutorial.
Creating a workspace
To create a new workspace, navigate to the Workspaces tab on the Organization Settings page and click the Create button.
Fill in your desired workspace name and click the Add button to proceed. Please include your vendor or warehouse name in your workspace name so that account administrators can easily identify and interact with your workspace. To avoid confusion, please also make sure your workspace name isn’t too similar to other workspace names on the account.

Updating workspace name and color
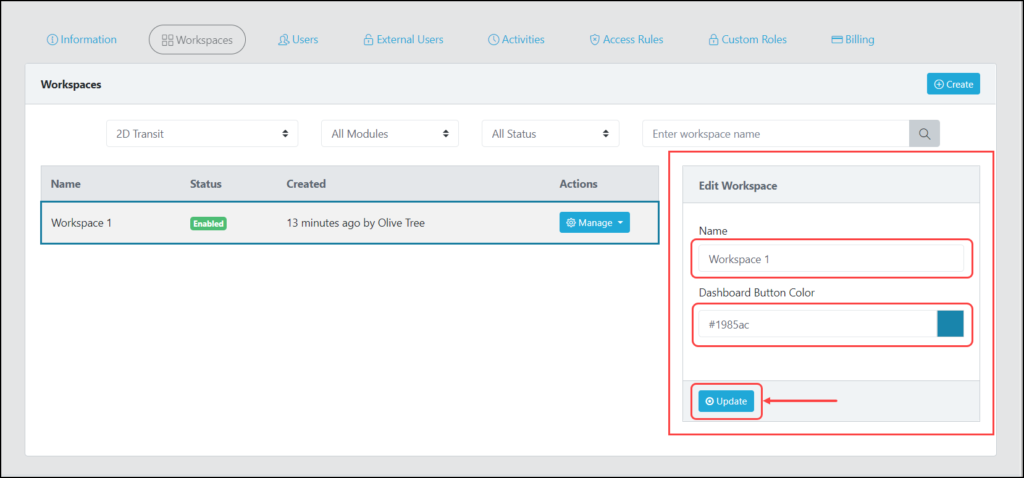
To update the name and color for an existing workspace, navigate to the Workspaces tab on the Organization Settings page.
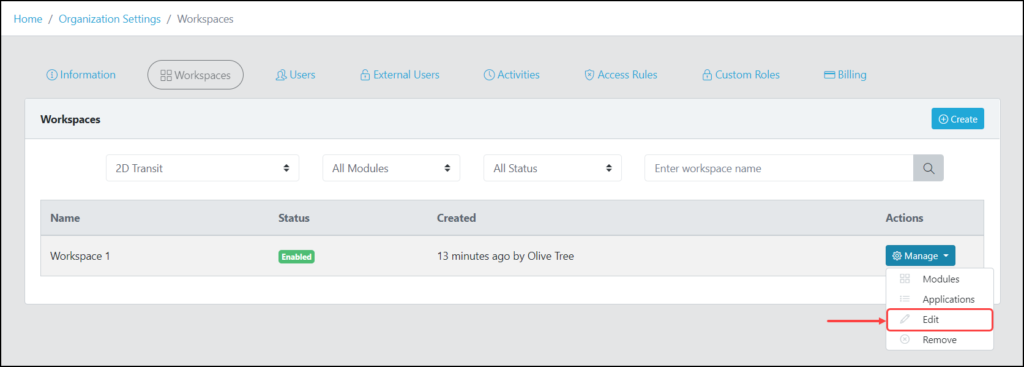
Find the workspace you want to update and click the Manage dropdown button, and then select the Edit option.
Update the workspace Name field or select color from the Dashboard Button Color picker. Once you’re set, click the Update button to proceed.
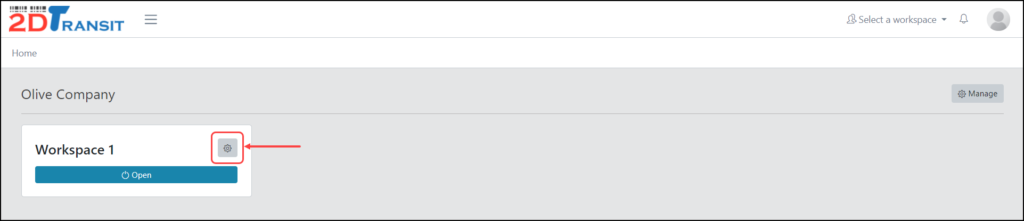
Workspace name and color can also be edited from the Home page. Find the workspace you want to update and click the cog icon to go to the Workspace Settings page.
In the Information tab, update the workspace Name field or select a color from the Dashboard Button Color picker.

Once you’re set, click the Update button to proceed.
Managing workspace users
To Invite a User
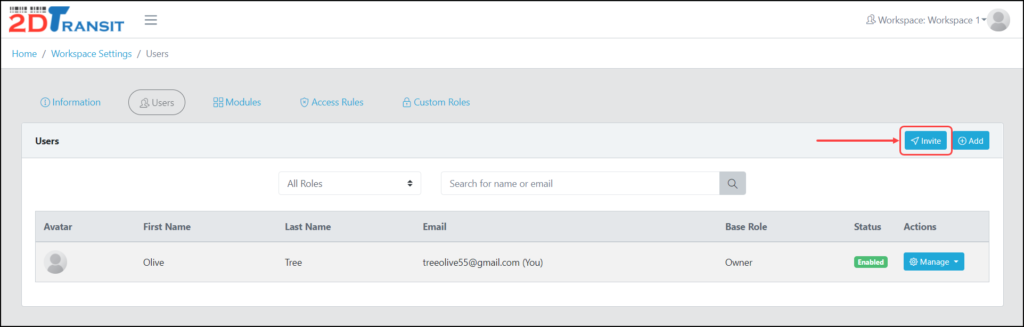
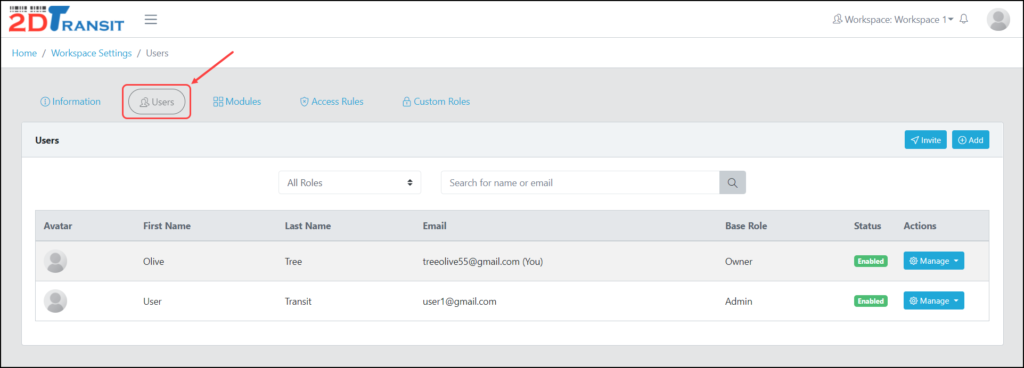
To invite a user to a workspace, navigate to the the Users tab of the Workspace Settings page and click the Invite button.
Fill in the fields and click the Invite button once you’re done.
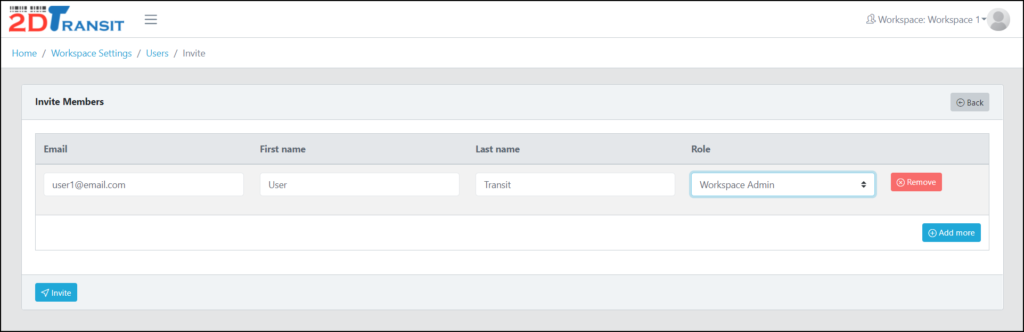
To invite multiple users simultaneously, click the Add more button.

Please note that invited users will need to accept the invitation by clicking a confirmation link sent to their email address. They will be prompted to set a password if they haven’t set up their account already.
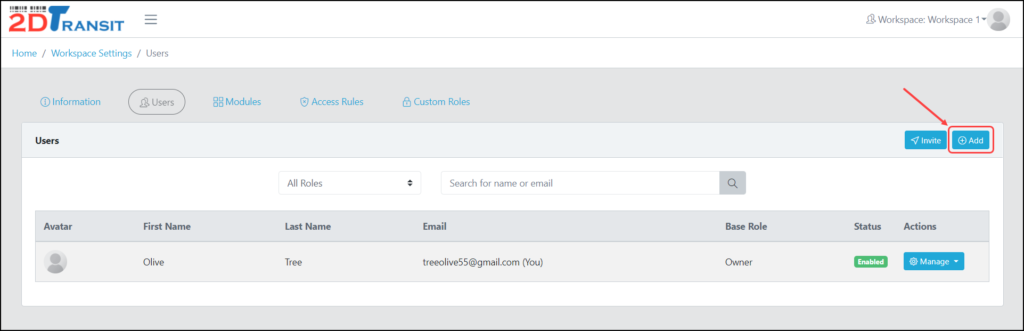
To Add a User
To directly add a user to a workspace without the need for a confirmation email, navigate to the Users tab of the Workspace Settings page and click the Add button.
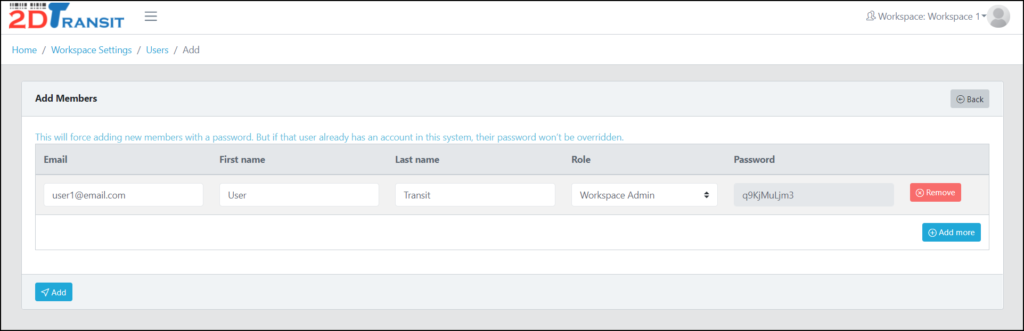
Fill in the fields and click the Add button once you’re done. Please note that we automatically generate a strong password for the new user. Don’t forget to save this password before clicking Add.
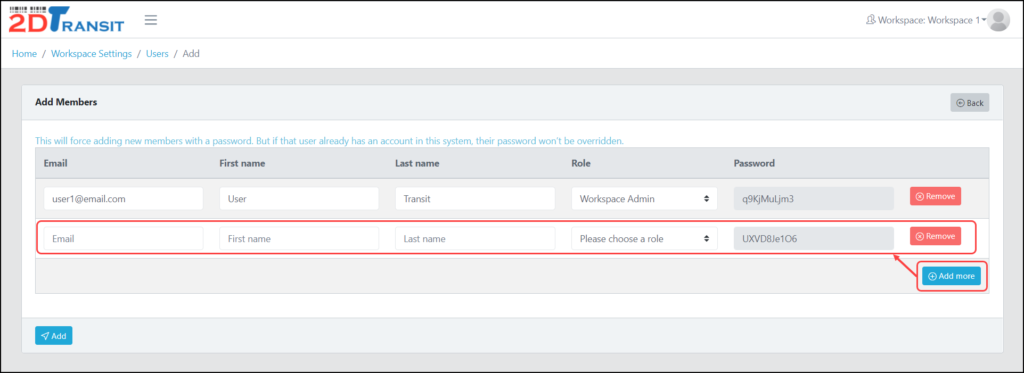
To add multiple users simultaneously, click the Add more button.
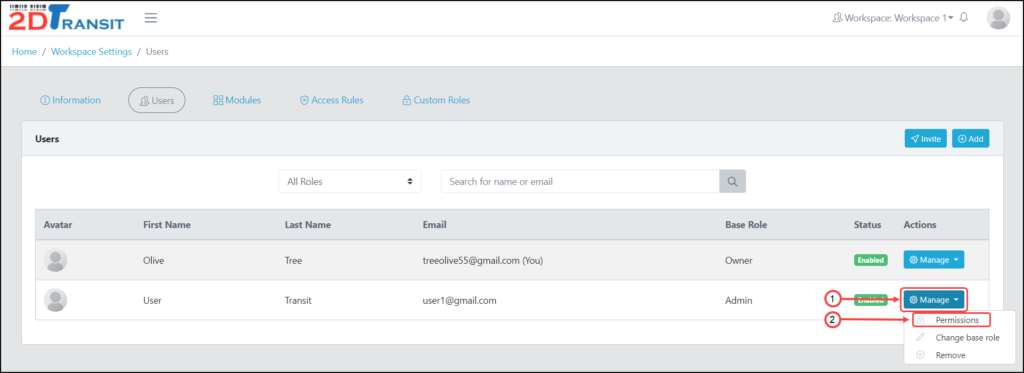
To Change a User’s Permissions
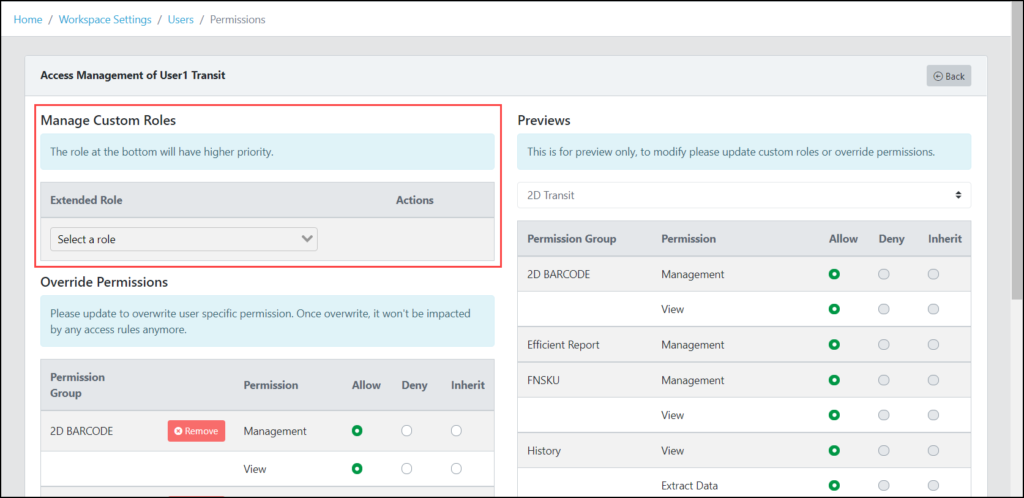
To change a user’s permissions, navigate to the Users tab on Workspace Settings page, find the user whose permissions you want to update, and then click the Manage dropdown button and select Permissions from the menu.
You can directly set permissions using a custom role if you’ve created one in the Custom Role tab in your Workspace Settings. Just go to the Manage Custom Roles section and select the role you want.
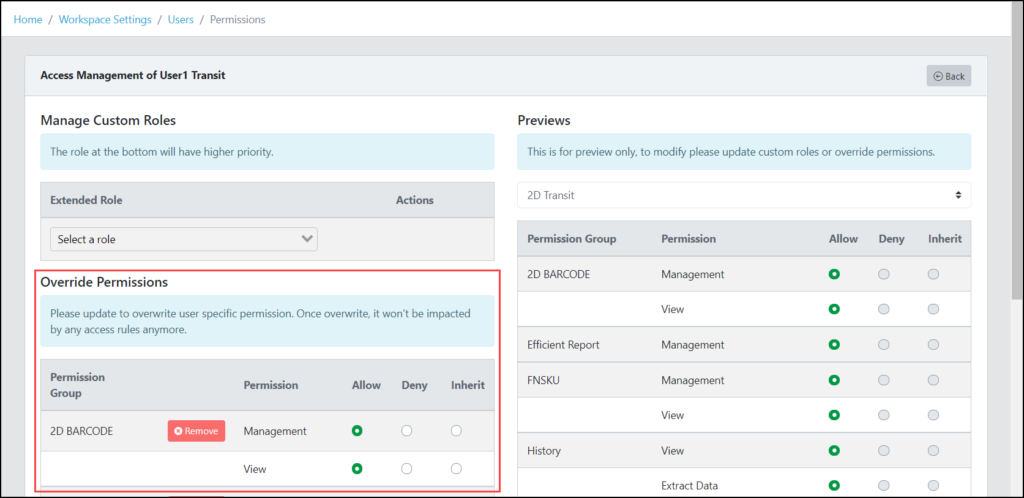
If you don’t have a custom role, you can manually update the permissions in the Override Permissions section. Just select any permissions group, and then select if you want to Allow or Deny a permission to the user.
To Remove a User
To remove a user from a workspace, go to the Workspace Settings page and select the Users tab.
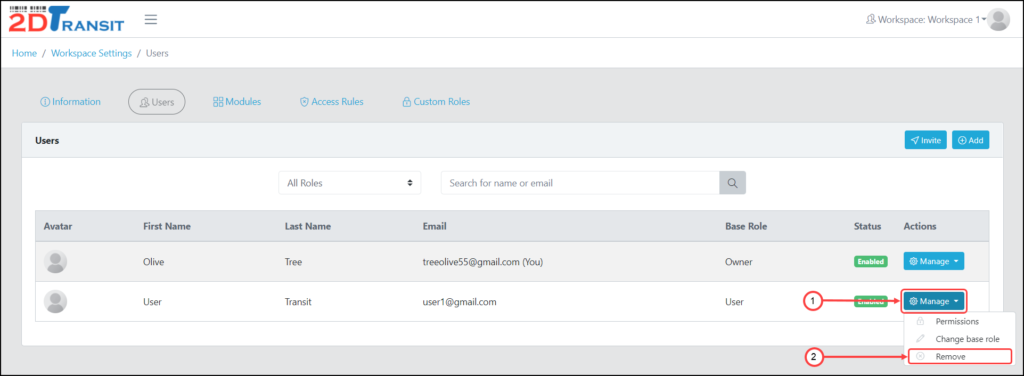
Find the user you want to remove and click the Manage dropdown button, and then select the Remove menu item.
A confirmation message will appear. Click the Yes, I understand & confirm! button if you want to proceed in removing, or click the No button if you want to cancel.

Removing a workspace
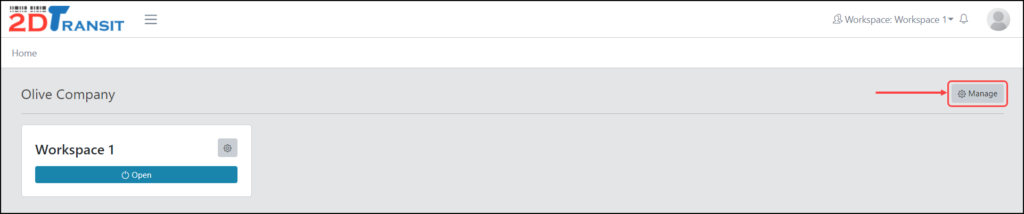
To remove a workspace, go to the Home page and click the Manage button for your organization to access the Organization Settings page.
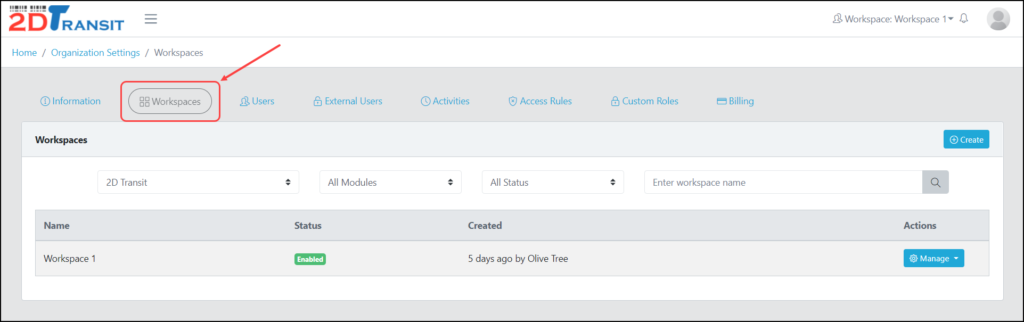
Go to the Workspaces tab.
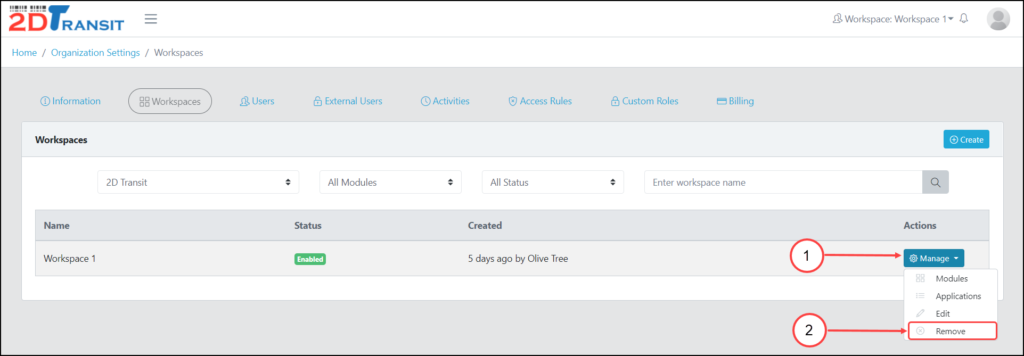
Find the workspace that you want to remove, click the Manage dropdown button, and then select the Remove menu item. Please note that removed workspaces are deleted from our database, and you will not be able to retrieve data from a removed workspace.
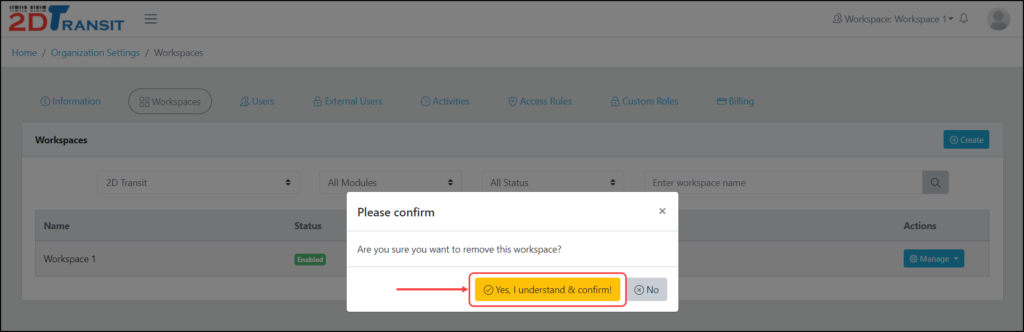
A confirmation message will appear. Click the Yes, I understand & confirm! button if you want to proceed, or the No button if you want to cancel.
Downloads
View our 2D Transit brochure and Frequently Asked Questions sheet to learn how 2D Transit can help your business grow.
Click here to download a printable version of the Getting Started tutorial.
Assessing workspace productivity at a glance
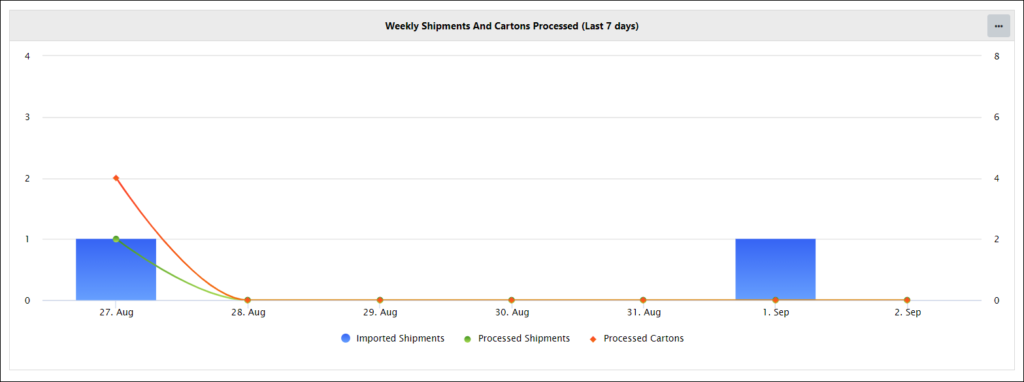
Upon opening a workspace, you will see the Dashboard page. From here, you can track the total productivity of your workspace over time, including the number of shipment plans imported and the number of shipments and cartons processed each day over the last week.

Downloads
View our 2D Transit brochure and Frequently Asked Questions sheet to learn how 2D Transit can help your business grow.
Click here to download a printable version of the Getting Started tutorial.
Creating Shipping Plan (New!)
With the help of Amazon developer APIs, 2D Transit can have access to Amazon Seller Central features such as creating Shipping Plans. This minimizes the time spent in moving back and forth between 2D Transit and Amazon Seller Central website, you can already do it in 2D Transit alone.
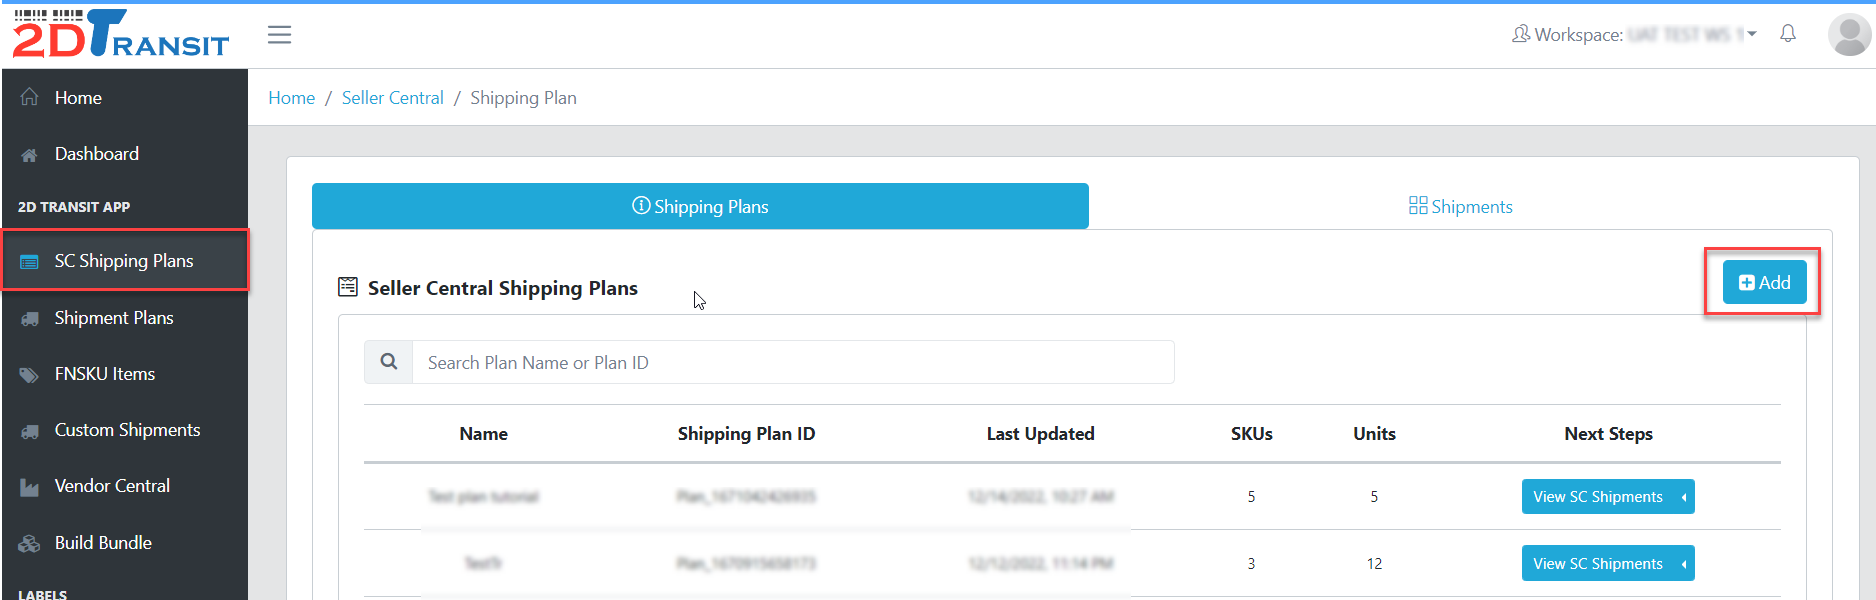
Now go to the 2D Transit app and navigate to SC Shipping Plans page using the left navigation menu. This is the table where you will see all your created shipping plans. You will see blank data in here if this is your first time creating shipping plan via 2D Transit. Click the Add button so that you will be redirected to the import page.
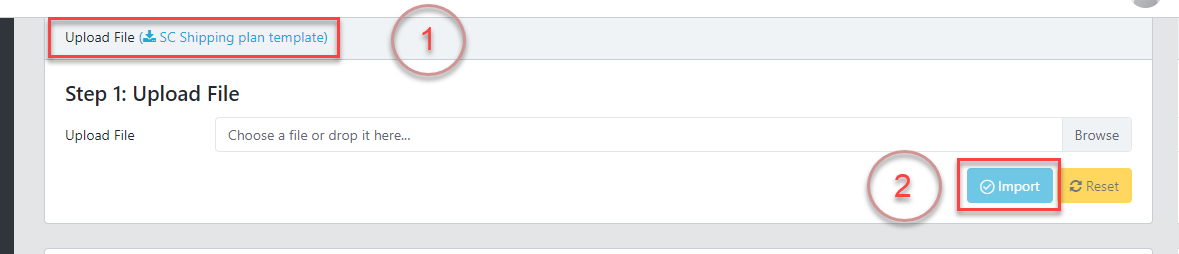
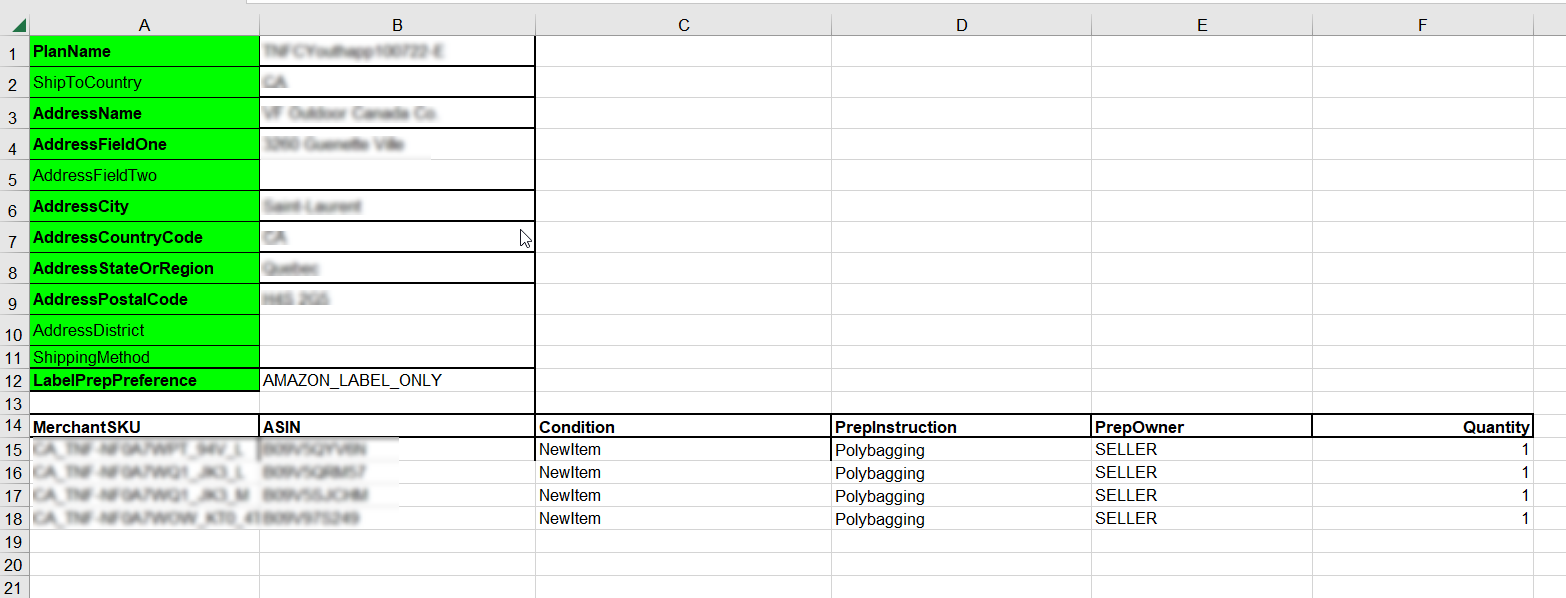
In this import page, download the SC Shipping plan template. Open the template and fill in the necessary data as you would in an Amazon shipping plan creation template. Please make sure to read the Data Definitions tab if you have confusions about the template columns. Please make sure to input valid values found in the Condition Value and Data Enum tabs. Take note you can input multiple PreInstruction value by separating them with semicolon “;”. Example: “Polybagging;Labeling”
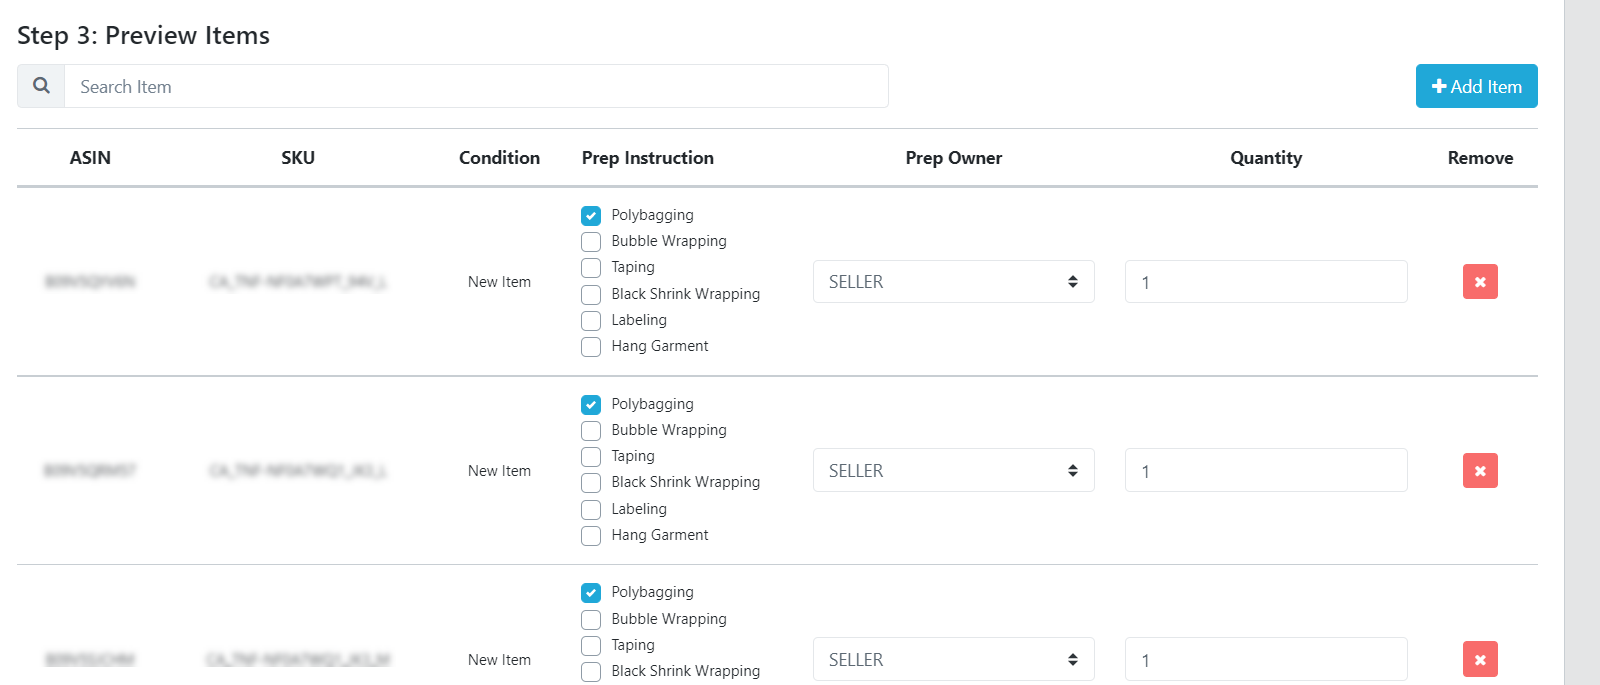
Once done, go back to the previous import page and upload the finished template file by clicking the Import button. The system will process and preview the headers, items, and errors about your SKUs and it cannot proceed to shipping plan creation unless all errors are fixed or faulty SKUs are removed.
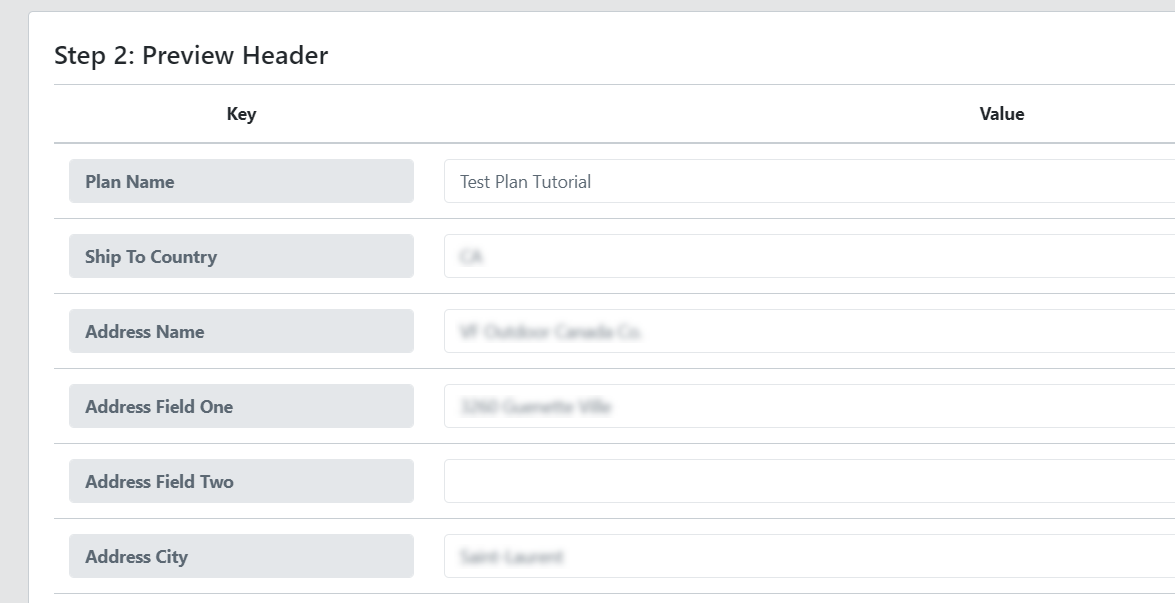
As an enhanced feature, 2D allows multiple Prep Instruction if ever Amazon API does not accept your initial Prep Instruction entry, you can click the checkbox for your second best suitable prep instruction for your products. Once you confirmed no more errors on all previews, click Submit button

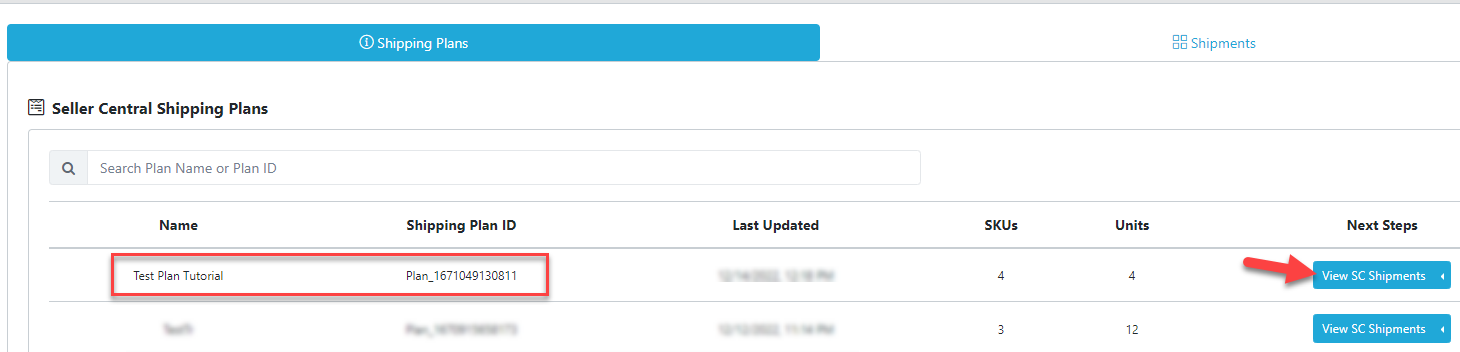
After submitting your plan, you will be redirected back to the table of lists of shipping plans and you will be able to see here the one you just submitted. The next step is to click the View SC Shipments button and here you can see the possible shipment IDs and other details about the shipping plan. You will then have to click Approve button in the Actions column so that this shipment will be finally processed into Seller Central. Please take note that 1 shipping plan might have multiple shipment IDs as a result so you would have to approve each one of them.

You can now proceed to importing of your shipping plan (if it is not yet auto-imported to Shipment Plans page) so that you can then proceed to scanning and labeling.
Importing created Shipping Plan (December 2022 workflow)
Download your SKU list based on the shipping plan you already created.

You can also find it in Amazon Shipping Queue page
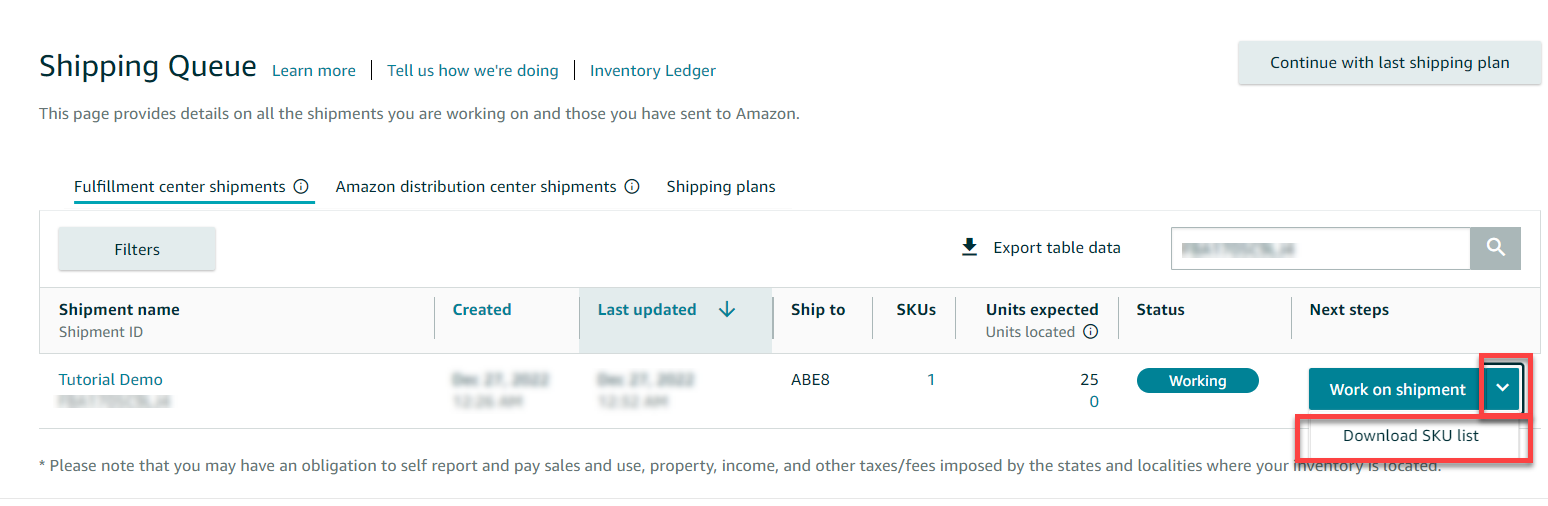
Import the downloaded SKU list in Shipment Plans page

Exporting a Vendor Default template for use by direct-to-FBA partners
In the event that a direct-to-FBA partner (i.e., a supplier who ships products directly to FBA on your behalf) doesn’t wish to use 2D Transit for shipment prep, you can export a shipment plan as a Vendor Default template file that your partner can fill out in spreadsheet software and then return to you for import back into 2D Transit.
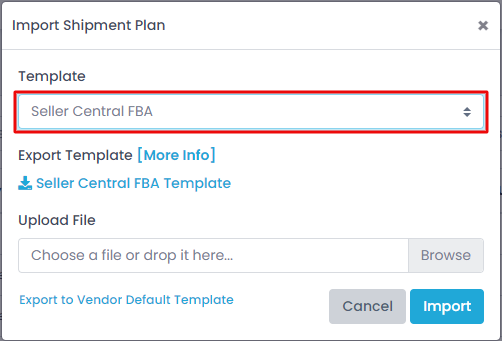
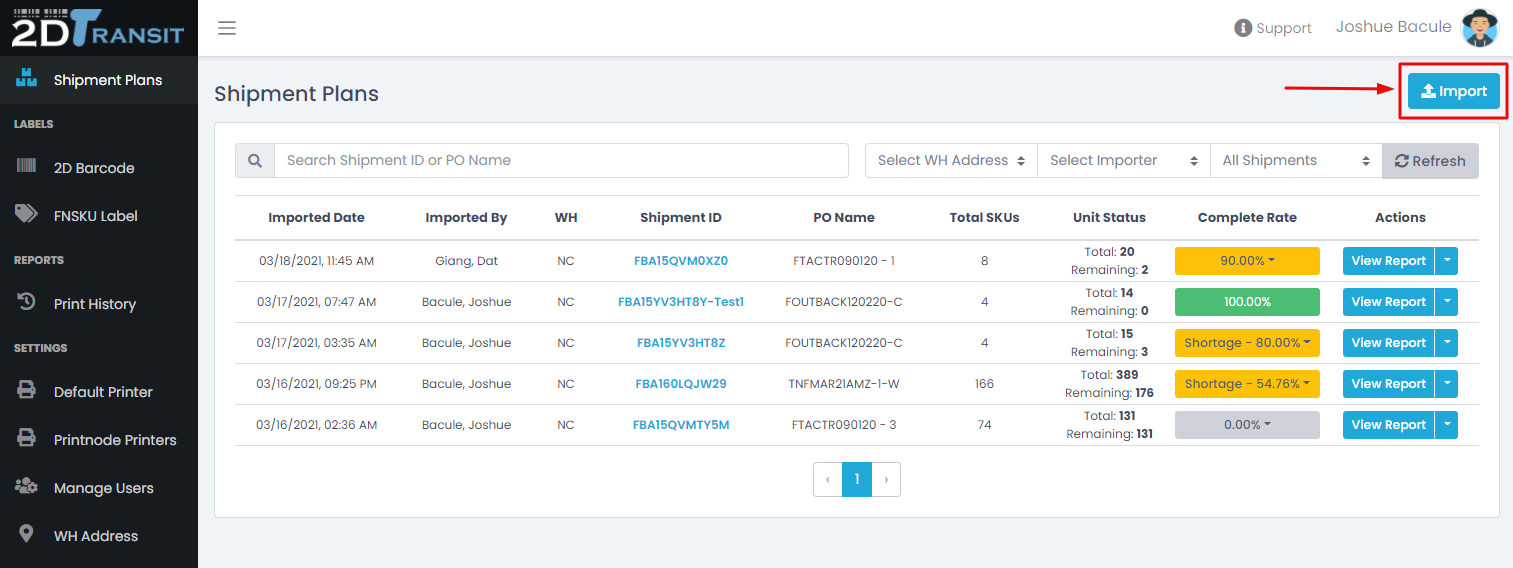
To convert a Seller Central file into a Vendor Default template, click the Import button found in the upper-right portion of the Shipment Plans page.

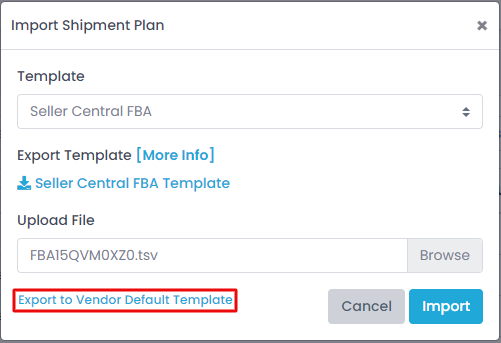
Select Seller Central FBA template and Browse to a SKU list file downloaded from Seller Central.
Then click Export to Vendor Default Template.
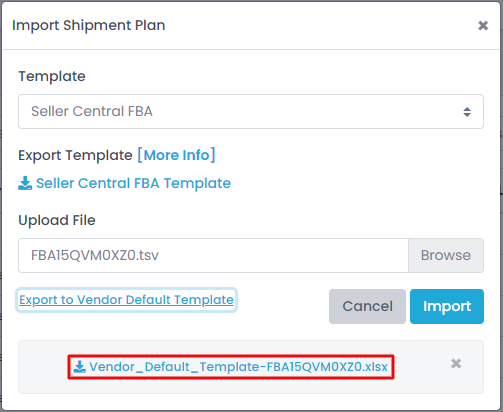
Click the link to download the converted file.
Creating a file from the Vendor Default template
To create a file from an exported Vendor Default template, open the exported template file. Note that the template file is already pre-populated with all the information for your shipment plan, including a list of SKUs and the expected quantity of each SKU. The only portion of the file you will need to edit is the area on the far right-hand side. In each cell, you will indicate the quantity of that row’s SKU that you have packed in that column’s box.
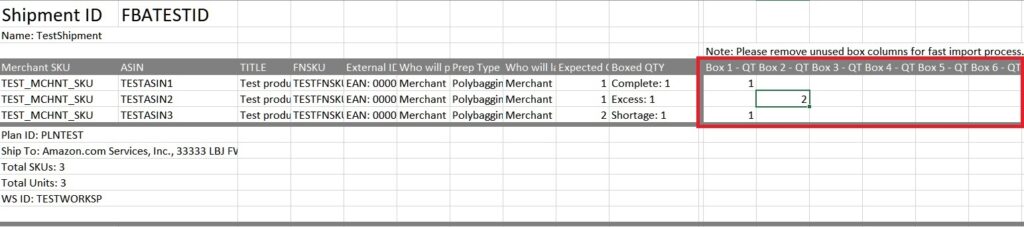
Note that the Boxed QTY column will automatically update as you populate the cells. If you indicate more units of a SKU than are expected on the shipment plan, the Boxed QTY will alert you to an “Excess” of that SKU. If you indicate fewer units than are expected on the shipment plan, the Boxed QTY will alert you to a “Shortage” of that SKU. If you indicate exactly the expected number of units, the Boxed QTY will alert you that the packing of that SKU is “Complete.”
This template supports up to 1,000 SKUs and up to 100 boxes. To speed up importing your file into 2D Transit, please delete unused box columns when you have finished populating the spreadsheet with your box contents.
Importing a Vendor Default template file
Navigate to the Shipment Plans page using the left navigation menu on the 2D Transit site and click the Import button found in the upper-right portion of the page.
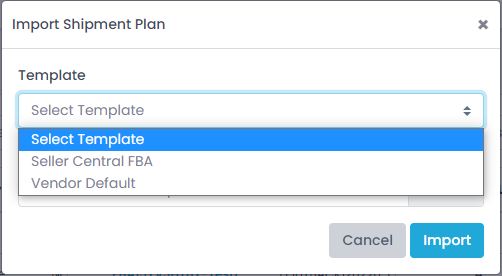
From the Template drop-down menu, select Vendor Default. Then click the Browse button, select a file created from the Vendor Default template, and click the Import button to import it as a shipment plan.
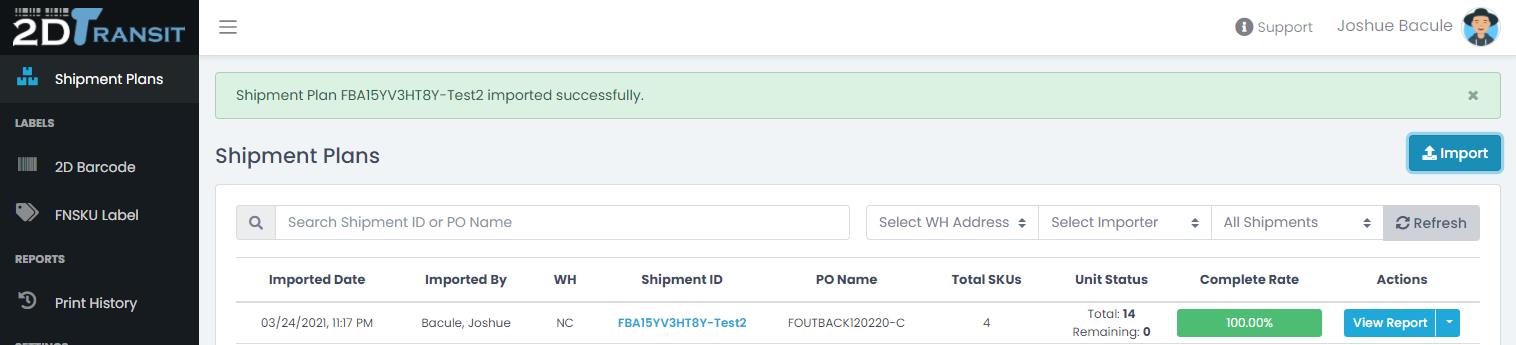
You should see your shipment plan appear in the Shipment Plans list. A green message bar above the list will inform you that your shipment plan was imported successfully. If the shipment plan already exists, you will see a red error message.
Downloads
View our 2D Transit brochure and Frequently Asked Questions sheet to learn how 2D Transit can help your business grow.
Click here to download a printable version of the Import Shipment Plans tutorial.
Opening a shipment plan to begin shipment prep
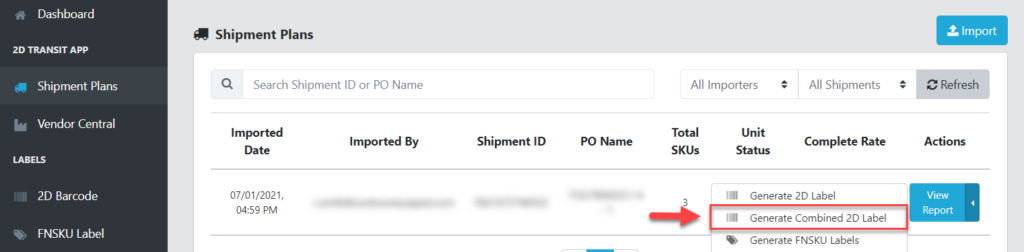
Once you’ve imported a shipment plan from Seller Central, you’re ready to begin prepping the shipment and generating labels. Navigate to the Shipment Plans page from the left menu, find the shipment plan you want to prep in the Shipment Plans list, and click the corresponding dropdown button in the Actions column.

From the dropdown menu, select the type of label you want to generate. We recommend selecting Generate Combined 2D Label. Selecting this option will generate an FBA label with built-in 2D barcode, and will also allow you to print FNSKUs if you choose. You can also choose to generate just a stand-alone 2D barcode label (if you already have an FBA label) or just standalone FNSKU labels (if you already have both an FBA label and a 2D barcode).
You should now find yourself on the 2D Barcode page. In the Shipment Plan Information section, 2D Transit will pre-populate the Shipment ID, PO Name, and Processor fields.
Entering shipment plan information
In the Shipment Plan Information section of the 2D Barcode page, all fields are required except for the Destination field, which is an optional descriptor most users won’t need.
Entering a valid Shipment ID will load the PO Name and SKU list for the corresponding shipment plan. (These fields will be pre-populated and the SKU pre-loaded if you arrived here from a dropdown menu item on the Shipment Plans page.) 2D Transit will pre-populate the Processor field with the name associated with your user account.
You will also need to enter your shipment’s origin and destination addresses in the Ship From and Ship To fields. We recommend adding custom shipping addresses in advance so that you can simply select them from the dropdown menus. See our Manage Custom Shipping Addresses tutorial for more on that.
Rather than scroll through all options in the dropdown menu, we suggest you type your four-digit Amazon Fulfillment Center code into the Ship To field to filter the menu results. Then select the menu item you want. (Amazon Seller Central should have assigned you a four-digit destination code when you created your shipment plan. You can find it in Seller Central on the View Shipments tab of the Send/Replenish Inventory page.)

Scanning items and auto-printing FNSKU labels
Once you’ve populated all required fields in the Shipment Plan Information section of the 2D Barcode page, you’re ready to begin scanning your items and printing your labels. We recommend that you have all your shipment’s items staged near your workstation before you begin.
For best results, you will need a computer with a barcode scanner, a compact 1” x 3” label printer, and a 4” x 6” label printer already set up on your machine and connected through PrintNode to the 2D Transit app. (If you have selected “browser” as your default printer, auto-printing an FNSKU will open a new browser tab and require at least one extra button click. See our Set up PrintNode tutorial for instructions on setting up label printers through PrintNode for rapid automatic printing of FNSKUs without the extra tabs and button clicks.)
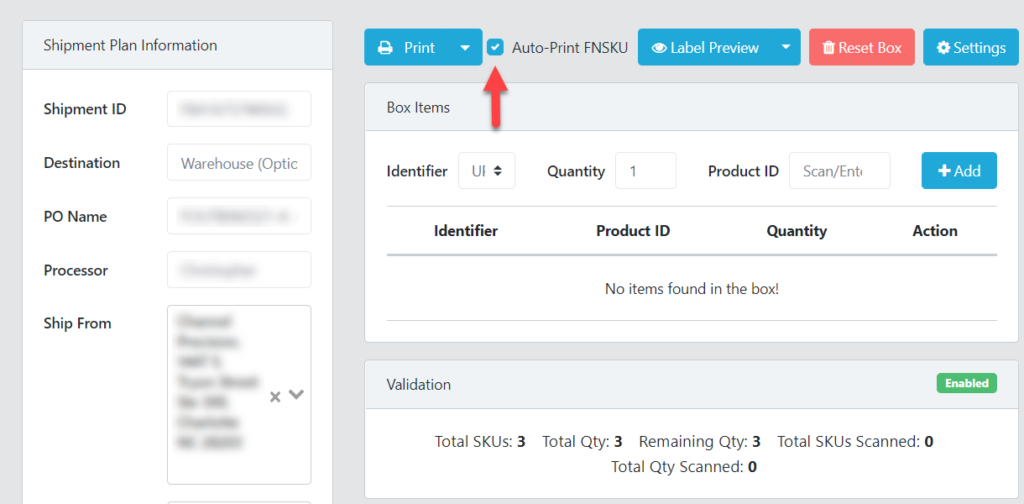
In the upper portion of the page, you can check or uncheck the Auto-Print FNSKU checkbox to tell 2D Transit whether to automatically print an FNSKU label for every item you add. By default, this box is checked.
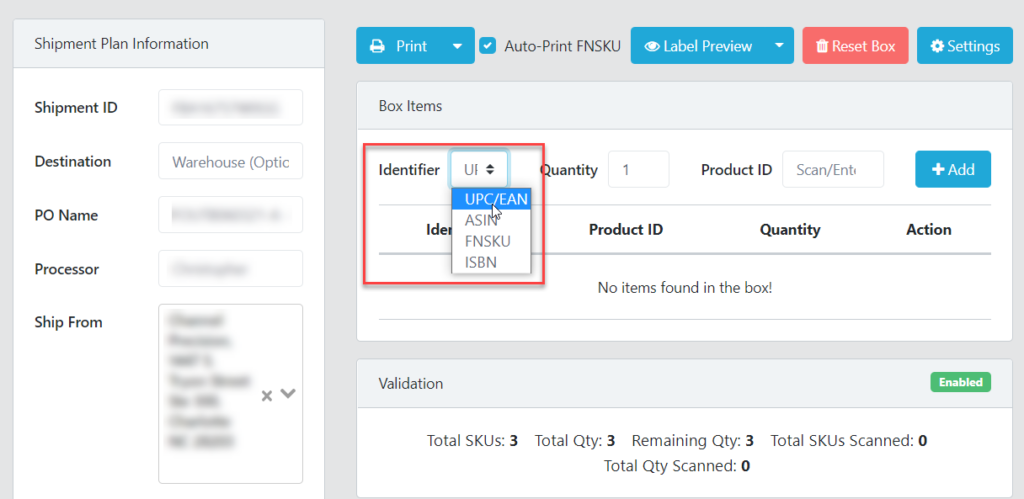
From the Identifier dropdown, you can indicate what type of identifier you want to use to add your item. The default and most common identifier is UPC.
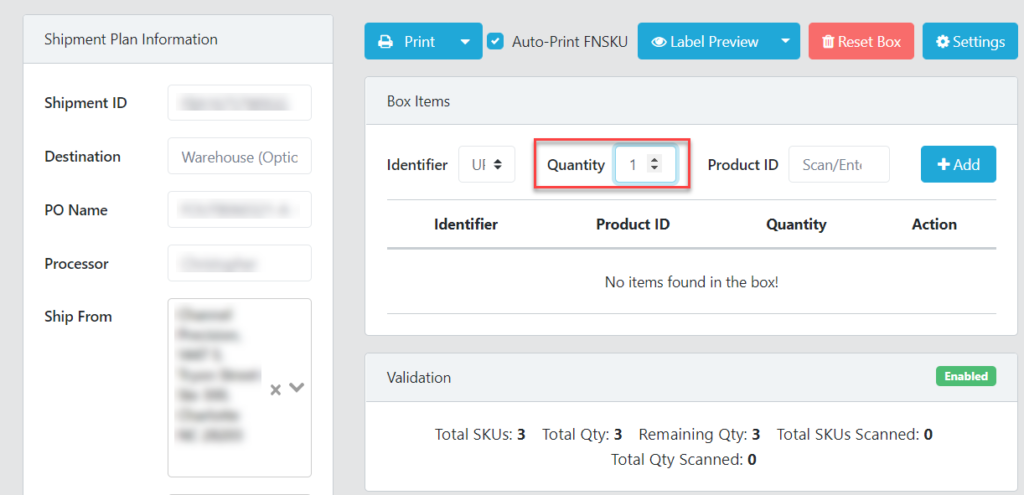
If you want to add more than one unit of the same product with a single barcode scan, enter the desired quantity in the Quantity field. The default quantity is 1. Note that we recommend leaving this field alone and separately scanning every single barcode in order to prevent human counting errors.
Click the Product ID field and scan a barcode with your barcode scanner. The item will automatically appear in your box contents list. Your shipment’s “Remaining Qty” count will decrease by the quantity of units you added. If auto-print is enabled, 2D Transit will print FNSKU labels for the quantity of units you added.

We recommend you scan and apply any auto-printed FNSKU label to each item as you add it to a shipment box. Proceed until you have either run out of items or filled your shipment box.
Printing 2D or combined 2D/FBA carton labels
Once your box is full, click the Print button to print your 2D label or combined label. If you’ve opted not to use FNSKU auto-print, you can select Print with FNSKUs from the dropdown button to print the 2D or combined label and the FNSKU labels all at once.

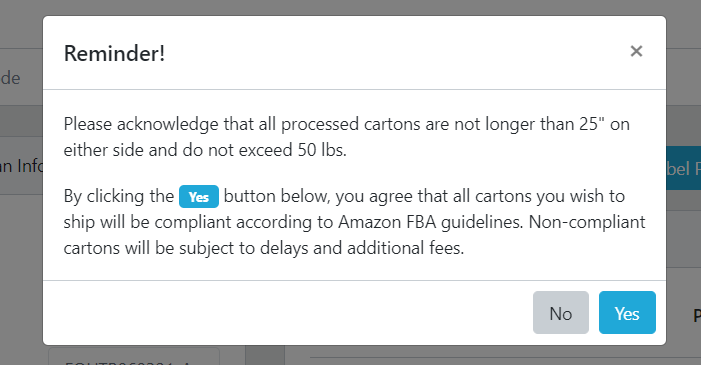
2D Transit will prompt you to confirm that your box weight and dimensions comply with Amazon requirements. Click Yes to confirm, and then your label(s) will print.
Apply any printed FNSKU labels to your box items, making sure to cover any visible UPC barcodes with the FNSKU barcode labels. Then tape up your box and apply the 2D or combined label to the box. If you’re reusing a box, make sure to remove or cover any other shipping labels or barcodes on the box. We recommend applying your label to the long side of the box. Make sure not to put any tape over your label, including clear packing tape.
After you print your labels, 2D Transit will clear your box contents list so that you can begin packing another box. Proceed until your shipment’s “Remaining Qty” is zero.
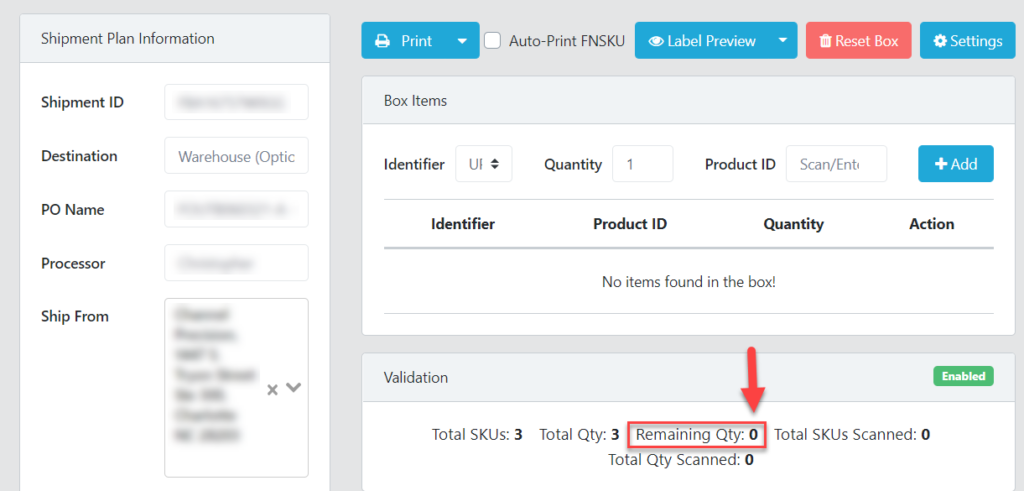
If you navigate to the Shipment Plans page from the left menu and find your shipment plan in the Shipment Plans list, its Complete Rate will now show as 100.00%.

Downloads
View our 2D Transit brochure and Frequently Asked Questions sheet to learn how 2D Transit can help your business grow.
Click here to download a printable version of the Scan and Print Labels tutorial.
Finding a shipment plan
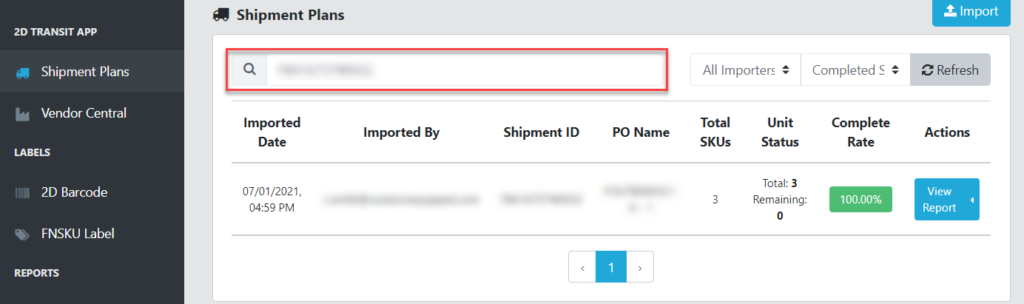
Navigate to the Shipment Plans page from the left menu, and you will see a list of all the shipment plans you have imported from Seller Central. To find a particular shipment plan, you can either search or filter this list. If you know your shipment’s Shipment ID or PO Name, copy (Ctrl-C) and paste (Ctrl-V) it into the Search Shipment ID or PO Name field.
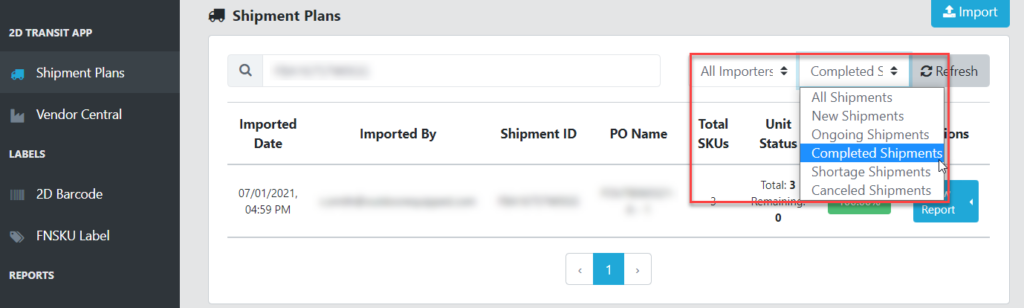
Alternatively, you can filter results by who imported the shipment plan or by shipment plan status. Filter options include New Shipments (0.00% complete), Ongoing Shipments (between 0.00% and 100.00% complete), and Completed Shipments (100.00% complete).
Viewing and downloading a shipment plan report
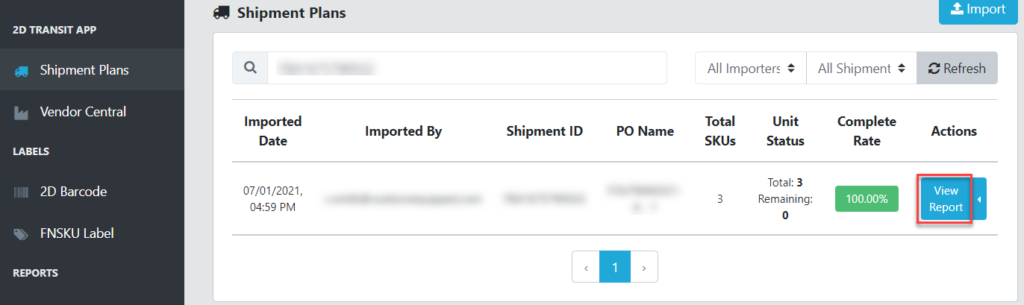
To view, download, or print a detailed report on a shipment plan, find your shipment plan on the Shipment Plans page and click the corresponding View Report button in the Actions column.
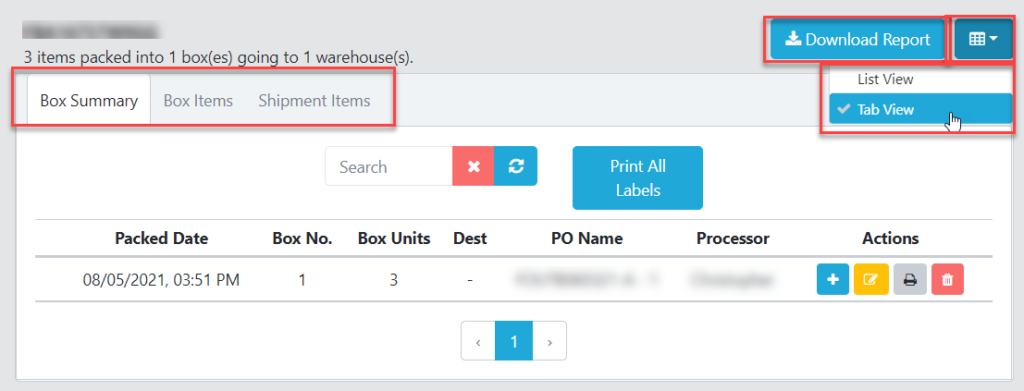
The shipment plan report is divided into three sections.
The Box Summary section lists all the boxes that have been packed and labeled for this shipment plan so far. Boxes are numbered in the sequence in which you finished packing them and printed their labels. The Box Units column indicates how many units of product you packed in the box. Also shown are the date on which the box was packed, the destination address, the shipment PO Name, and the processor who packed the box.

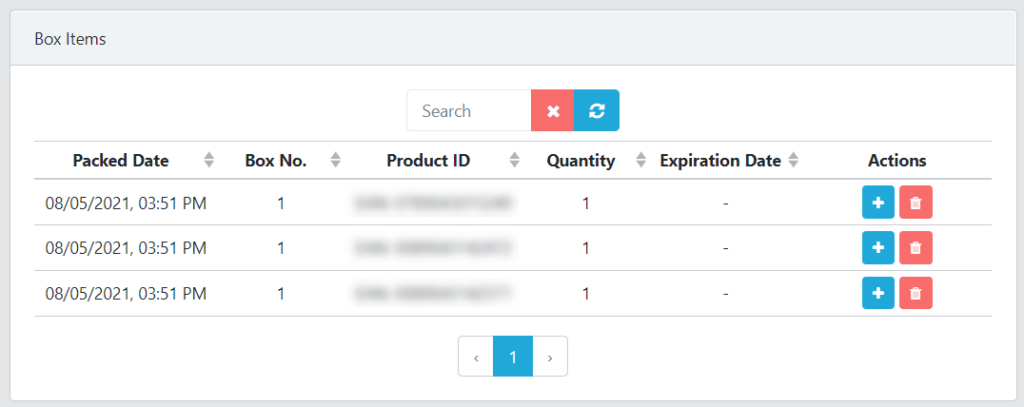
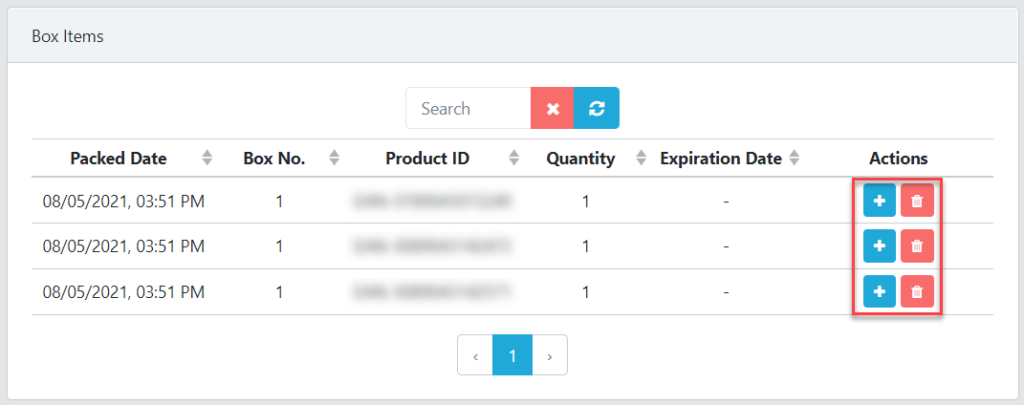
The Box Items section shows the units of product that have been packed for this shipment plan so far. Units are identified by their EAN Product ID number. The Box No. column indicates the box in which units are packed, and the Quantity column indicates how many units of the product are packed in that box. Also shown are the date one which the units were packed and the product’s expiration date, if any.
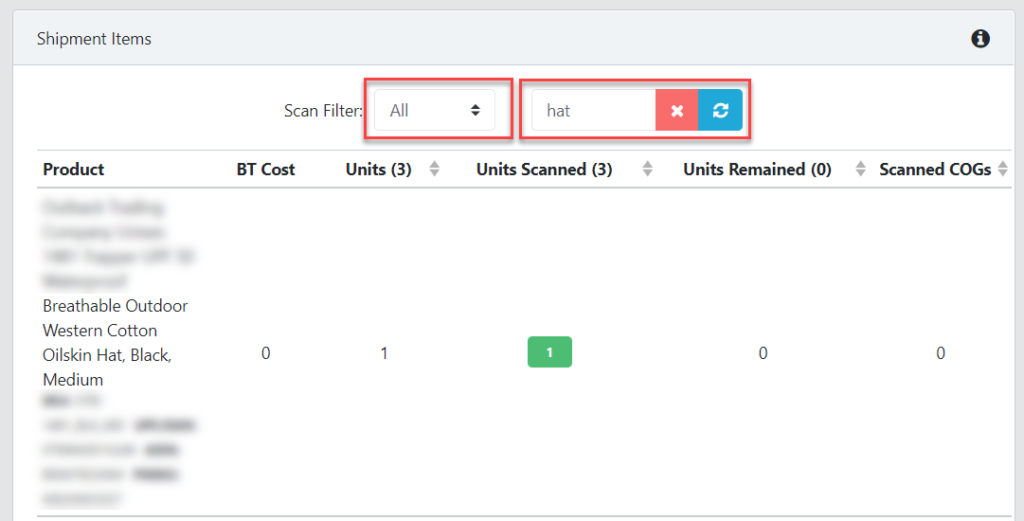
The Shipment Items section lists all items that appear in the shipment plan, whether already packed or not. Items are listed with their full product titles and all their different product ID numbers. The Units column shows how many units of each product are called for in the shipment plan, while the Units Scanned column shows how many units of each product have been packed already.
It’s possible to search each section of the report by simply typing in the Search field. It’s also possible to Scan Filter the Shipment Items section for products that have not yet been packed (Empty), products that are partially packed (Ongoing), or products that have already been packed (Complete). This section of the report can be useful for warehouse pickers when staging product.
In the upper-left portion of the page, you can click the dropdown button with table icon to choose between a List View or Tab View version of the page. While we recommend viewing and interacting with this report on the web, it’s also possible to download it in a Microsoft Excel file format by clicking Download Report.
Editing a shipment plan
To edit a shipment plan, find your shipment plan on the Shipment Plans page and click the corresponding View Report button in the Actions column.
In the Box Summary section, it’s possible to delete a carton using the trash can icon button or to add an item to the carton using the plus sign icon button.
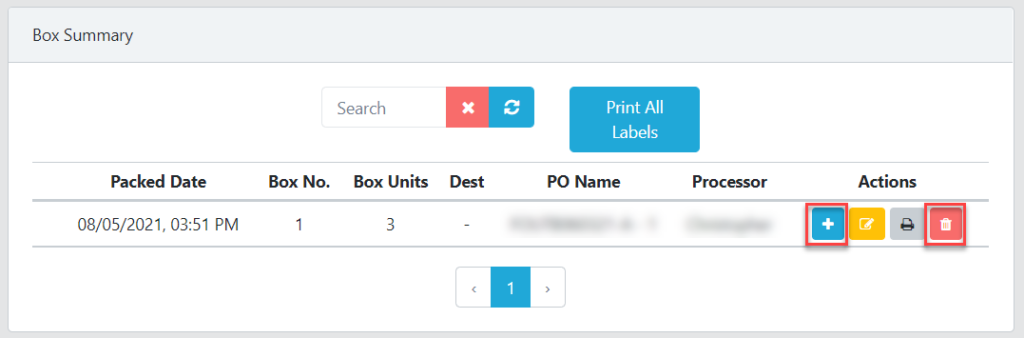
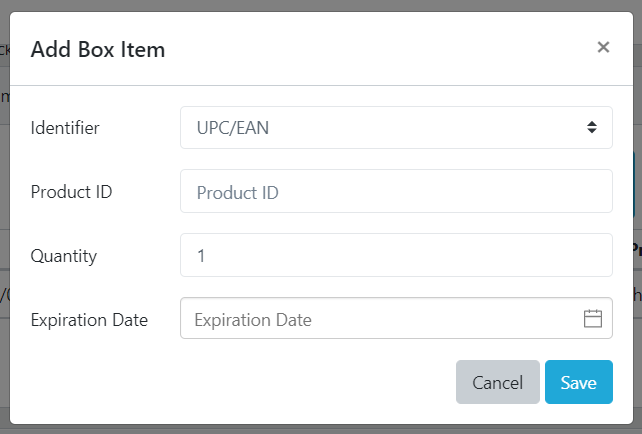
After clicking the plus sign icon button, you will see a pop-up box asking you to enter a Product ID, Quantity, and Expiration Date if applicable. Fill in the fields and then click Save.
Alternatively, you can edit box items from the Box Items section. Find the item you’re interested in, and increase the quantity by clicking the corresponding plus sign icon button, or delete the item by clicking the corresponding trash can icon button. A pop-up box will prompt you to confirm your choice.
Printing or reprinting shipment plan labels
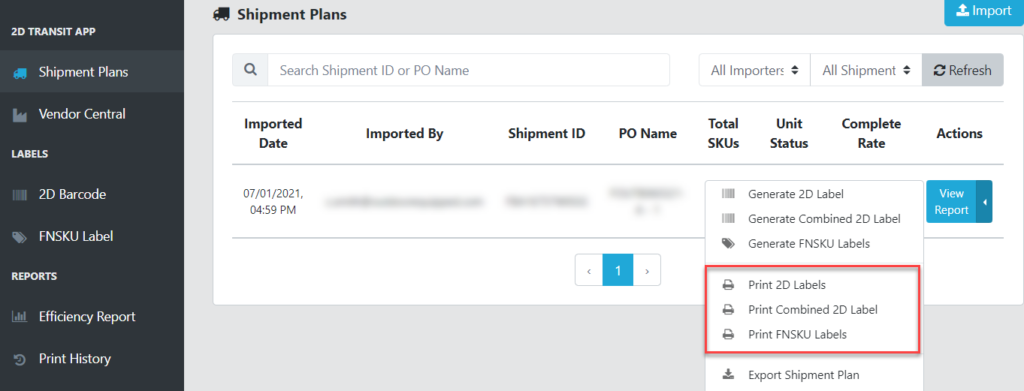
To print (or reprint) all labels for a shipment plan, navigate to the Shipment Plans page from the left menu and find the shipment plan of interest in the Shipment Plans list. Click the corresponding blue dropdown button in the Actions column and select from the list the type of labels you’d like to print. You can Print 2D Labels, Print Combined 2D Labels, or Print FNSKU Labels for the entire shipment.
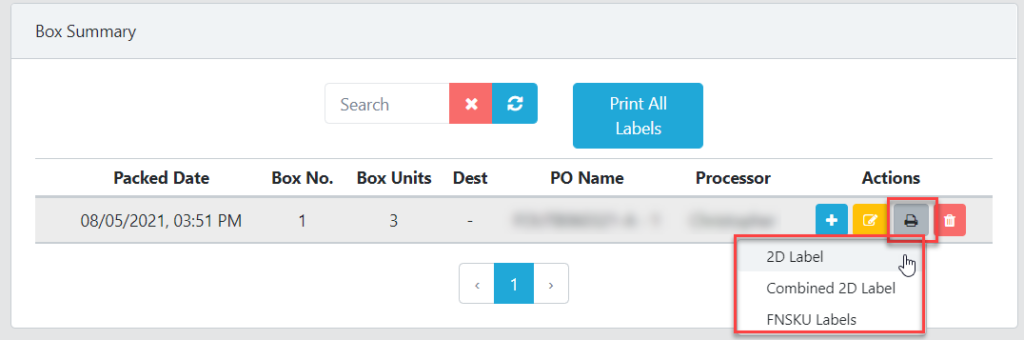
To print 2D, Combined 2D, or FNSKU labels for individual cartons, click View Report, find the carton of interest in the Box Summary section, and click the corresponding printer icon button. From the dropdown menu, select the type of label you want to print.
Deleting a shipment plan
To delete a shipment plan, navigate to the Shipment Plans page from the left menu and locate the shipment plan you want to delete in the Shipment Plans list. Once you’ve found it, click the blue dropdown button in the actions column and select the Delete Shipment Plan menu item.
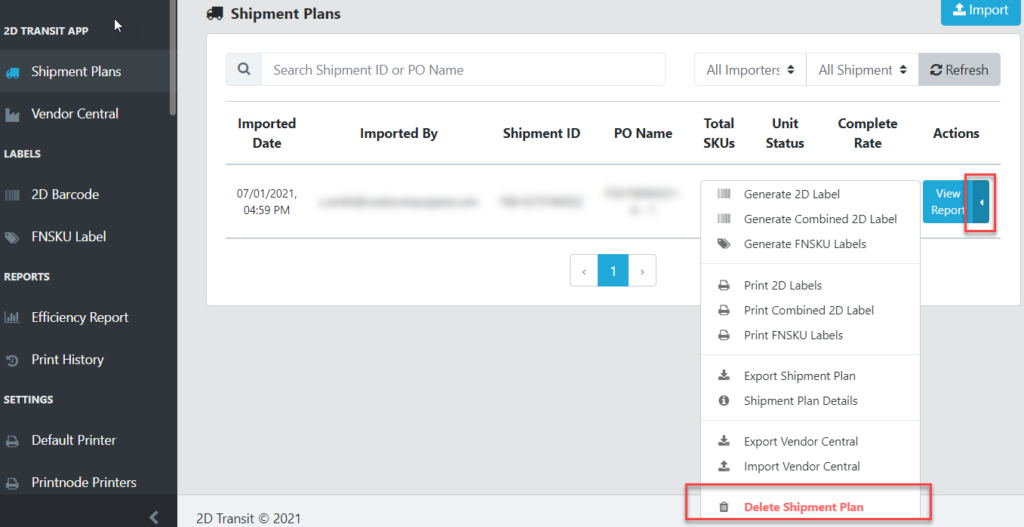
A pop-up will ask for confirmation that you want to delete the shipment plan. Click Delete to proceed. Warning: deleted shipment plans cannot be recovered. Deleting your shipment plan will also delete any associated data about printed labels and packed units and cartons.
Downloads
View our 2D Transit brochure and Frequently Asked Questions sheet to learn how 2D Transit can help your business grow.
Click here to download a printable version of the Scan and Print Labels tutorial.
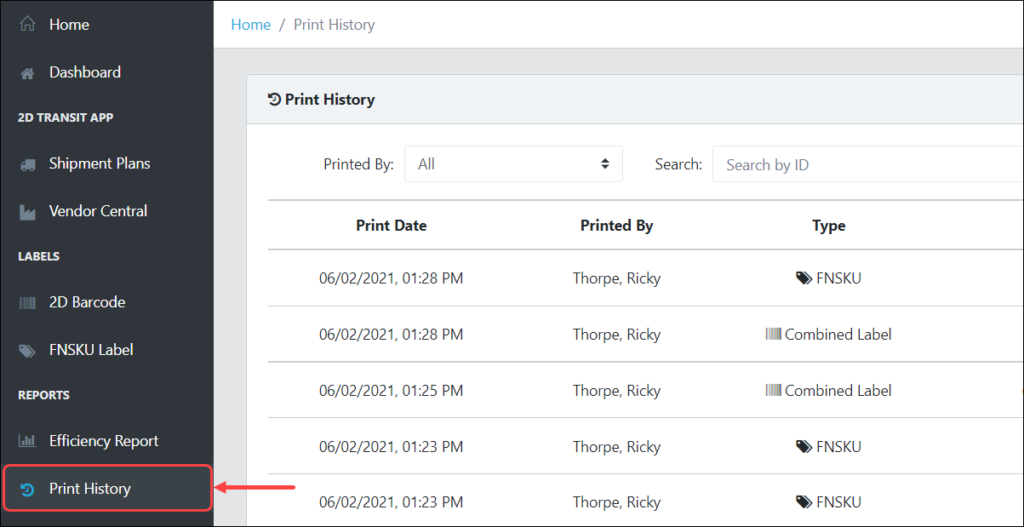
Viewing and reprinting previously printed labels
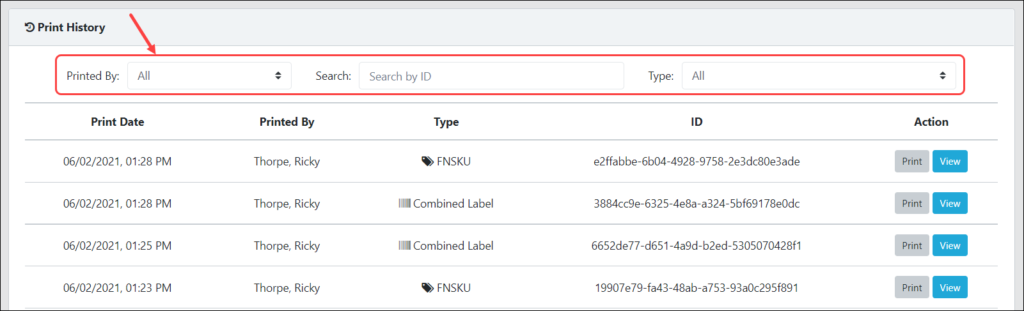
To view a complete history of your printed labels, including 2D, Combined, FNSKU, and Vendor Central labels, navigate to the Print History page from the left menu.
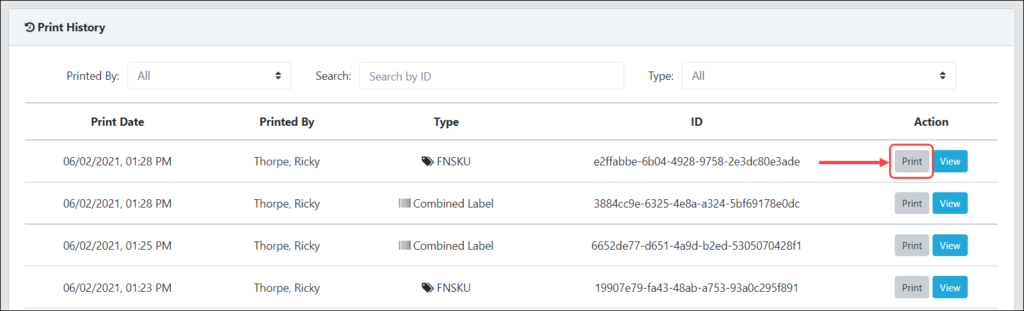
In the Actions Column, click the Print button to reprint a label. Please note that it will print based on your default printer settings.
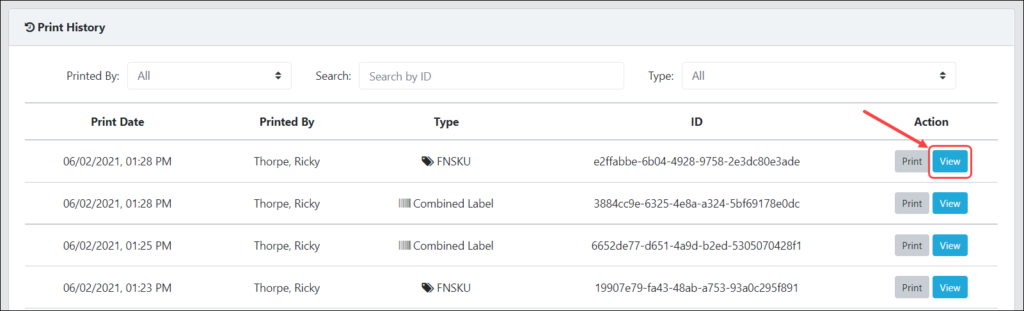
If you just want to view the label, click the View button and you will be redirected to a new tab with the label displayed.
You can also filter the labels if you are having a hard time finding your printed label. Select a user from the Printed By dropdown, paste your label ID into the Search by ID field, or filter by Label Type.
Downloads
View our 2D Transit brochure and Frequently Asked Questions sheet to learn 2D Transit can help your business grow.
Click here to download a printable version of the Print History tutorial.
Create Printnode Account
Before you can use Printnode, you must first create an account which you may do on your own or request from
the 2D Transit team for a child printnode account.
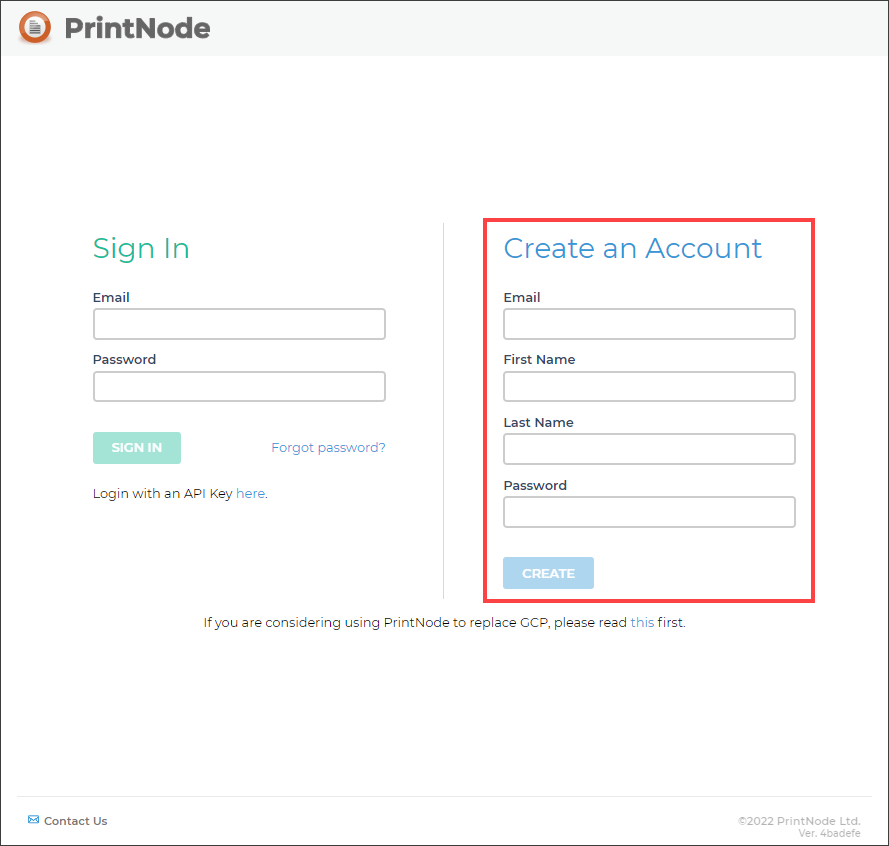
To create an account on your own, go to the printnode register page and fill-in the needed information then
click the Create button to proceed. Make sure you have a valid email address in creating your account for
verification purposes.
After creating an account, you will be redirected to the welcome page. The next step is to validate your email
address so that you won’t have any issues with your account in the future, particularly when contacting their
support service.
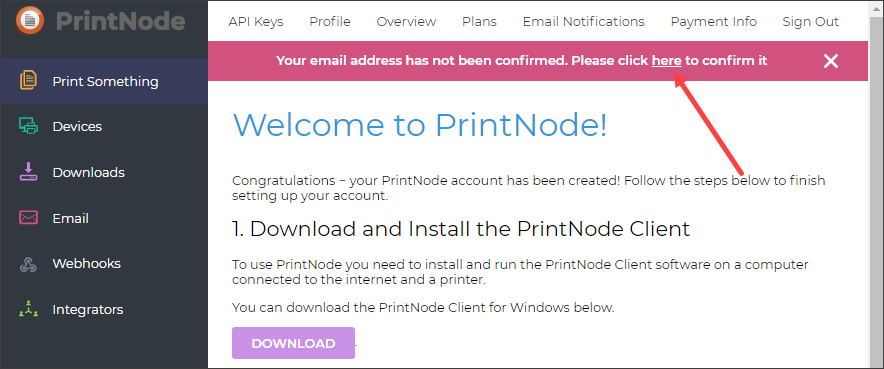
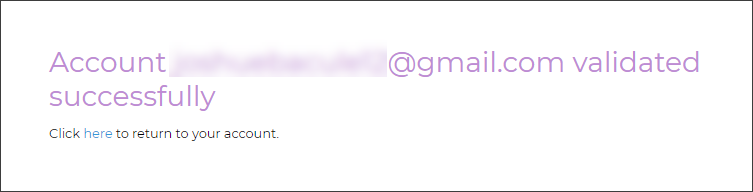
When confirming your account, you will receive a validation link to your email. Just simply click the validation
url and will receive a confirmation message that your email was validated successfully.

After your account has been verified, the next step is to select the plan you want. The current plan you had
after registering your account was a free trial with limited features that is not suitable if you have a business.
Here is their pricing plan page, and I recommend starting with the Essential or Standard plan. All plans include
a free month, so you can cancel at any time.
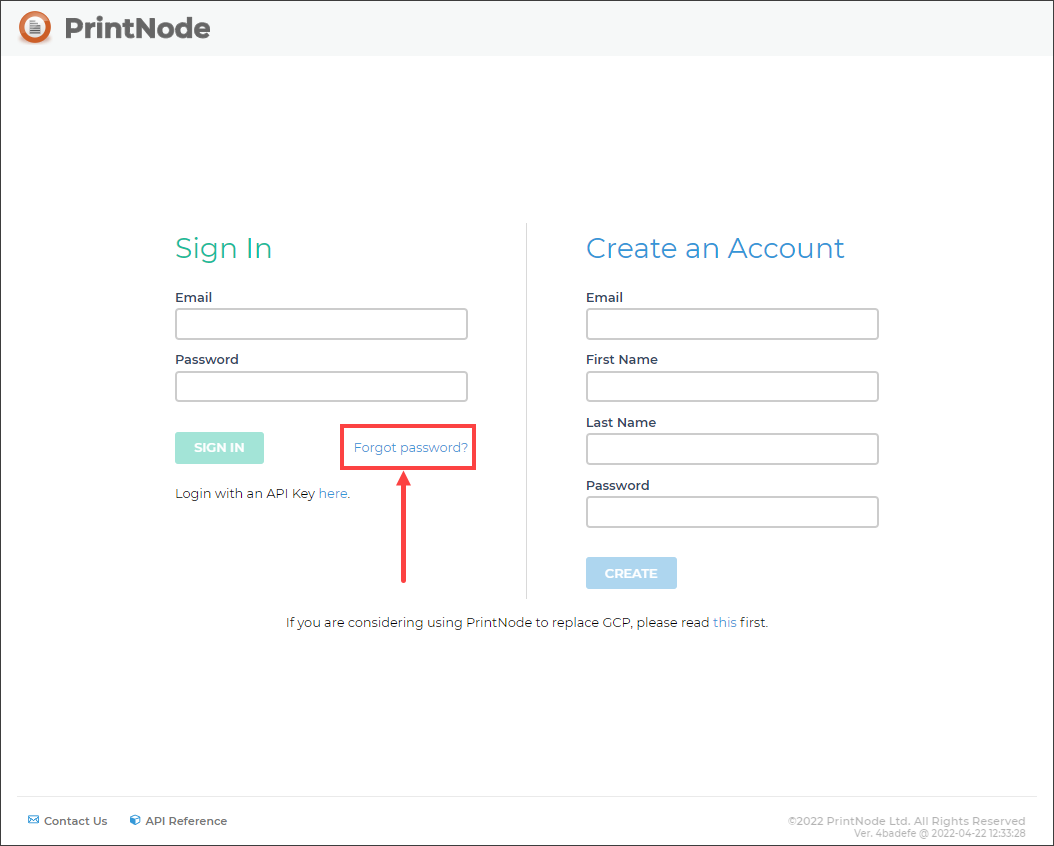
How to use Forgot Password in Printnode
To reset your account password, go to the printnode login page and click the Forgot Password link.
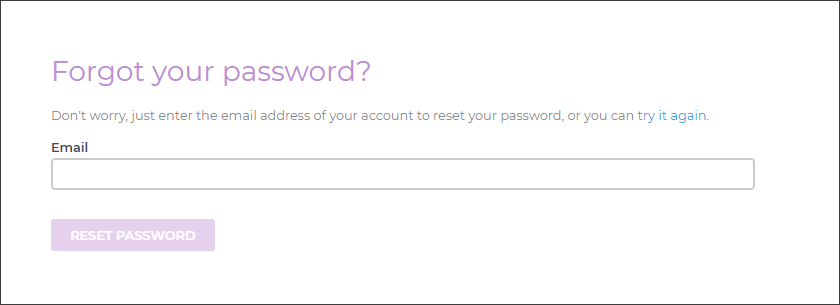
Enter your email address and click the RESET PASSWORD button. Make sure that the email address you
input was the one you used in creating your account.
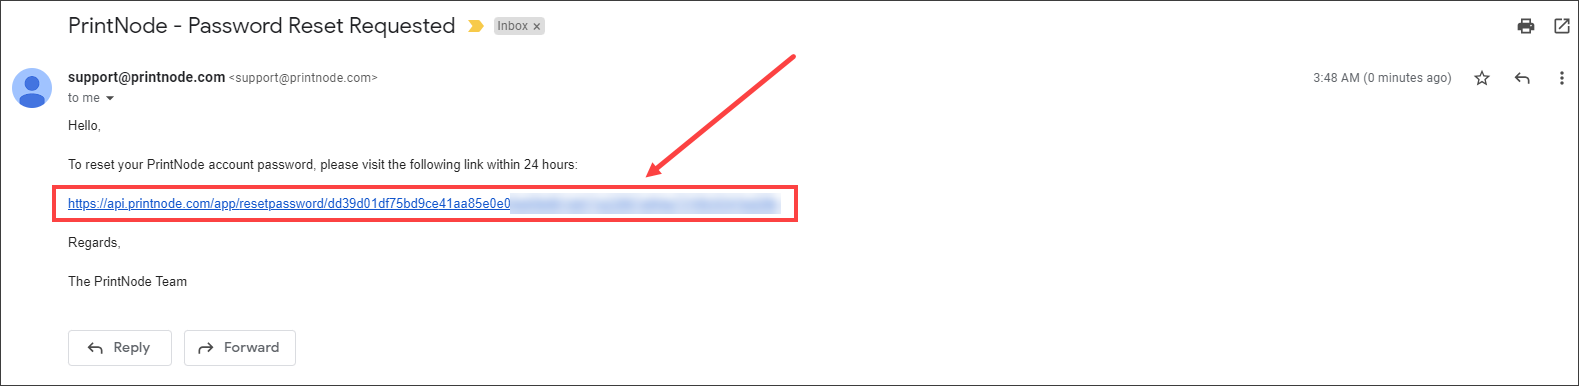
A link will be sent to your email and just click it to proceed on the Reset Password page.
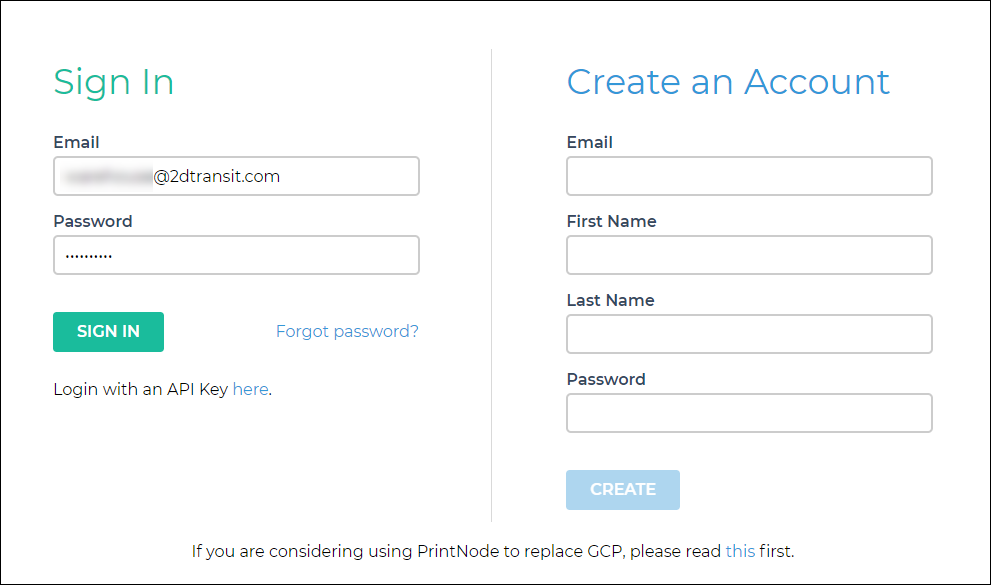
Enter your new password in the Reset Password page and click the SET PASSWORD button to proceed then
you’re good to go on the login page.

Generating a Printnode API Key
The Printnode API key is one of the requirements before you can use the printnode in 2D Transit. To generate
your API key, log-in first to the Sign-in page.
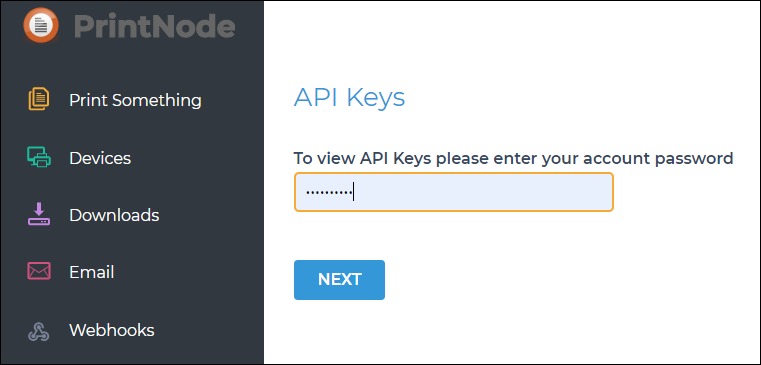
Go to the API Keys page. Re-enter your password and click the Next button.
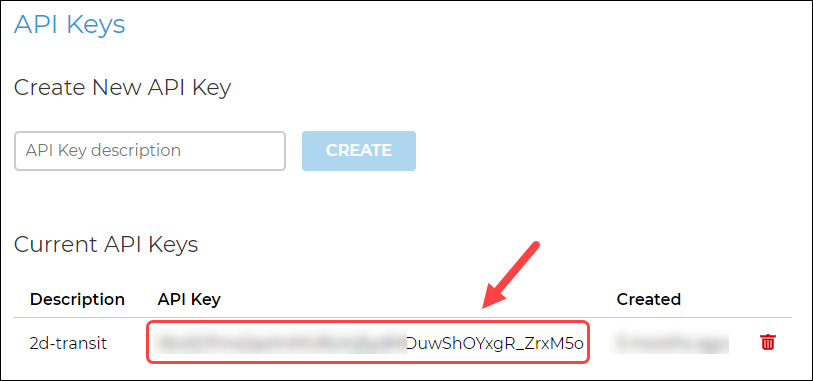
If you already have an existing API key, you can re-use it to avoid creating a duplicate. Otherwise, enter an API key description and click the Create button.

Once you’ve created an API key, you will see it in the list. Save or copy the API key, as you will need it during PrintNode Setup in the 2D Transit web app.
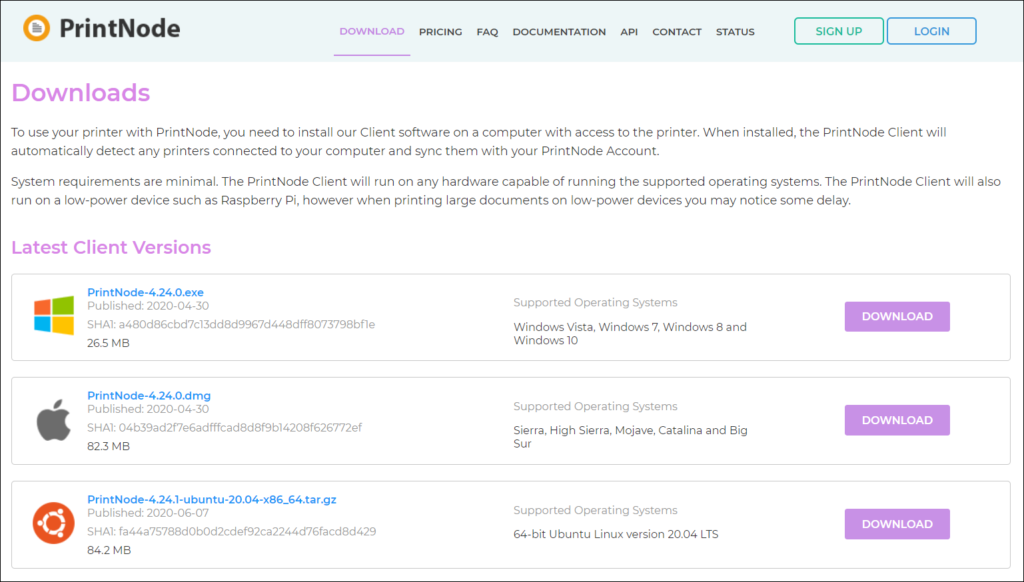
Downloading and setting up the PrintNode client application
The printnode client application will help you connect your label printers to the 2D Transit. To get started with
setting up your printnode client, browse to their download page and select the version that is appropriate for
your computer and operating system.
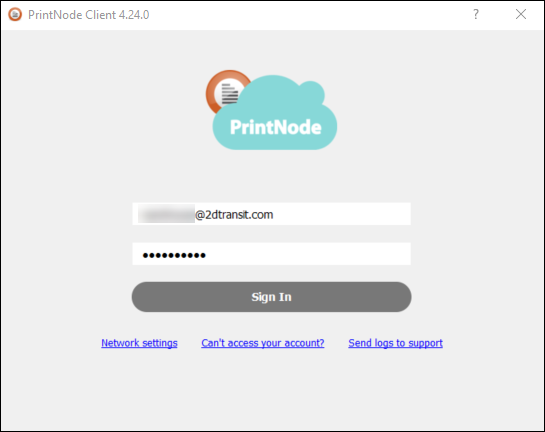
Install the software on your device and log in with your PrintNode account.
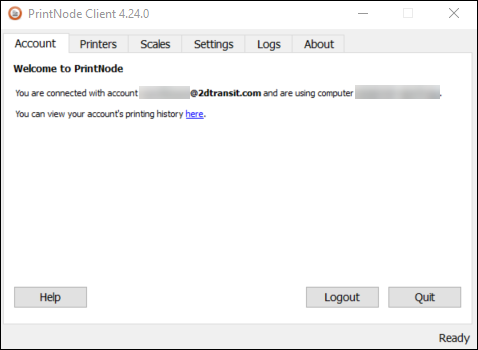
After you successfully log in, the PrintNode Client will automatically minimize to your computer’s system tray. Open the PrintNode Client by clicking the system tray icon. Under the Account tab, PrintNode should confirm that it is connected to your account.
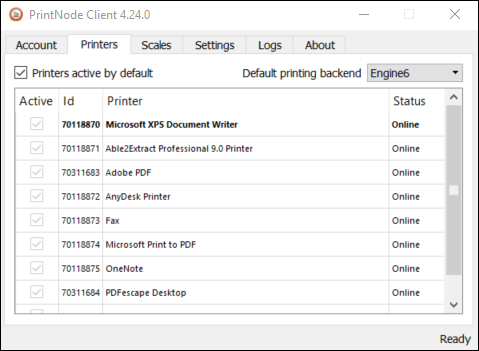
To check your PrintNode printers, click on the Printers tab. In the status column, PrintNode will tell you which of your printers are online.
Enabling PrintNode and setting up the PrintNode API key in 2D Transit
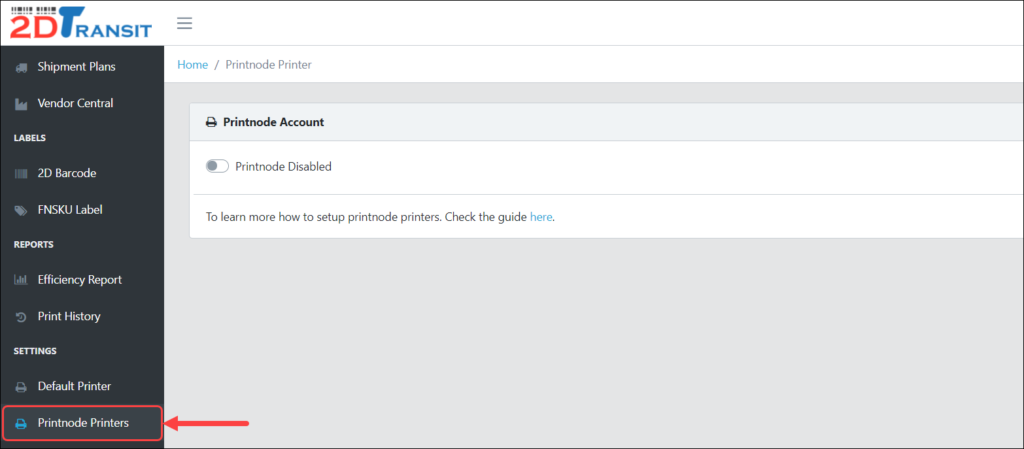
Navigate to the PrintNode Printers page from the left menu in 2D Transit.
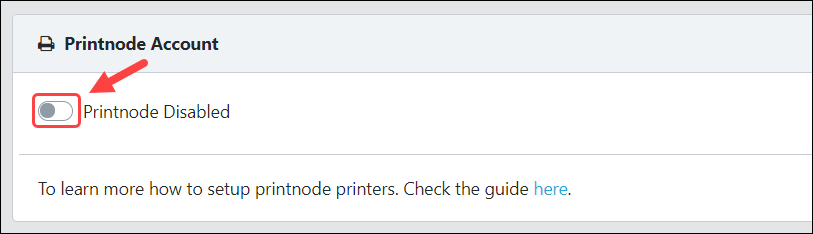
Switch the toggle to enable or disable PrintNode.
Copy (Ctrl-c) and paste (Ctrl-v) your API key into the API Key field and hit Save, or save it from the API Keys page.
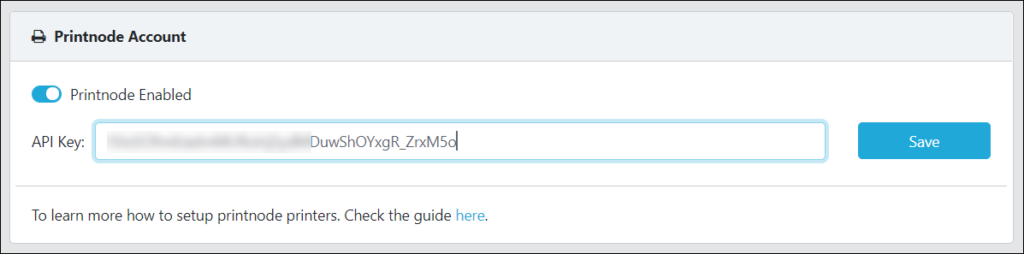
2D Transit will automatically validate your API key and then import a list of connected printers from your PrintNode account.
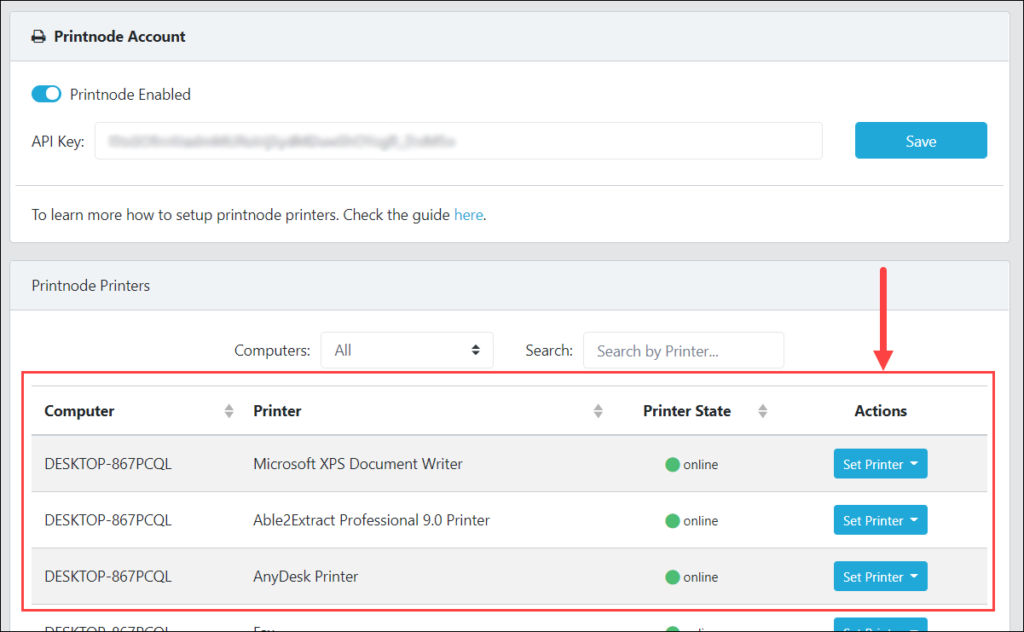
If you’re having trouble finding a printer, you can filter the printers list by selecting a device from the Computers dropdown or by typing a printer name in the Search field.
Selecting default printers for 2D Transit labels
To select default printers, go to the PrintNode Printers list and click the Set Printer button in the Actions column. Choose one of the three label types to set that printer as the default for that label type.
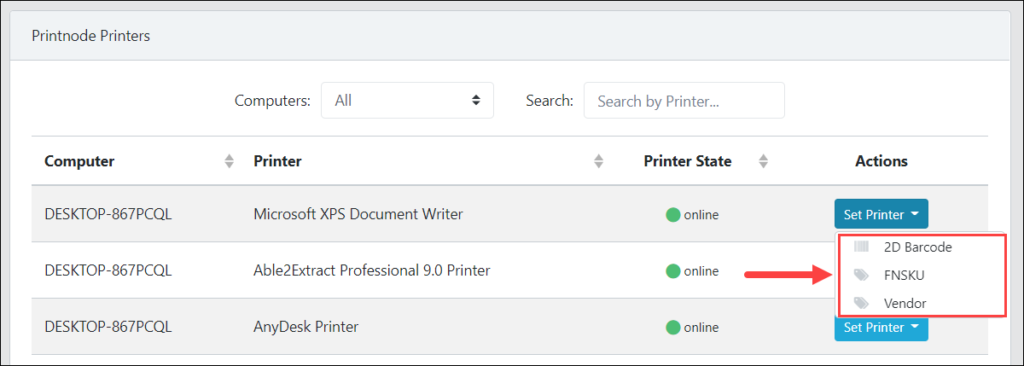
To learn more about selecting Default Printers, click here.
Downloads
View our 2D Transit brochure and Frequently Asked Questions sheet to learn 2D Transit can help your business grow.
Click here to download a printable version of the PrintNode Setup Guide tutorial.
Deciding between two options for printing labels
There are two options for printing labels through 2D Transit: printing through your browser or printing through PrintNode. We recommend using PrintNode, as it involves fewer pop-ups, requires fewer button clicks, and speeds up workflow. Rapid automatic printing of FNSKU labels requires PrintNode.
Printing through your browser is the default option if you change no settings. When browser printing is selected, clicking the Print Label button on the 2D Barcode page will trigger your browser’s built-in printing pop-up window. From this window, you can select a printer from the available local or network printers installed on your machine. (If you don’t see your printer listed in the pop-up window, follow the manufacturer’s setup or troubleshooting guide for your operating system.)

Printing through PrintNode allows you to print labels through the Internet rather than through your browser. It is also useful for printing labels remotely or from several different warehouses. To print through PrintNode, follow our guide to set up PrintNode printers.
Selecting a default printer for your labels
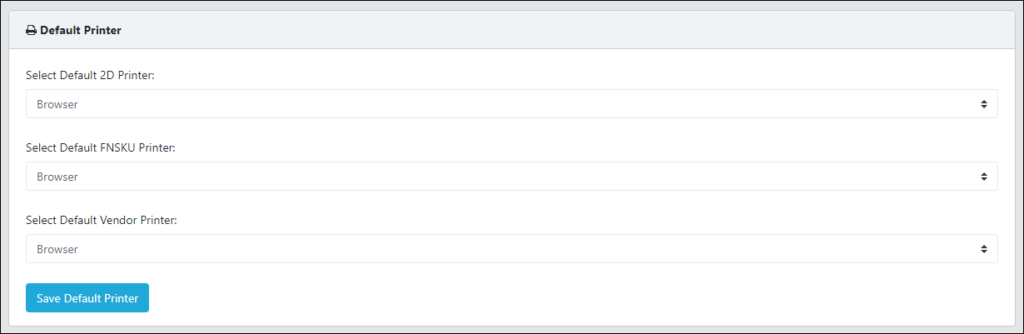
Navigate to the Default Printer page using the left navigation menu on the 2D Transit site.
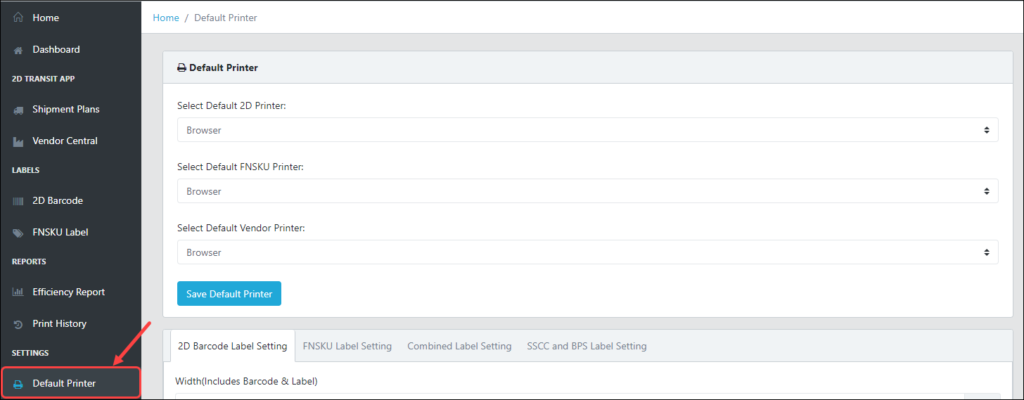
Click the drop-down menus to select a default printer for each type of label. The first drop-down menu controls the printer for 2D barcode or combined 2D labels, while the second controls the printer for FNSKU labels. (The third menu controls the default print for Vendor Central SSCC or BPS labels. Most users won’t need to print the Vendor label type.)
If you choose PrintNode from one of the drop-down menus, a secondary drop-down menu will appear. From this menu, select the PrintNode printer you want to use as your default.
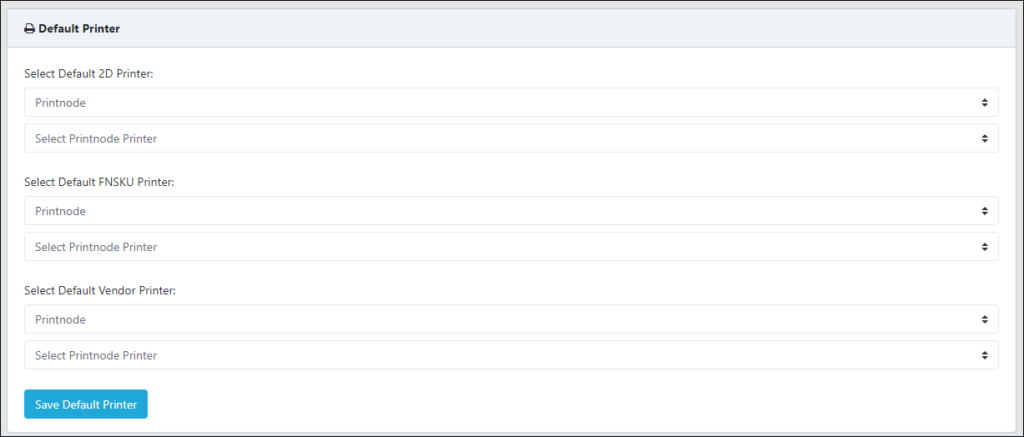
Hit the Save Default Printer button. A message will appear to confirm that your settings have been successfully saved.
Downloads
View our 2D Transit brochure and Frequently Asked Questions sheet to learn 2D Transit can help your business grow.
Click here to download a printable version of the Select Default Printer tutorial.
Adding a shipping address
When printing a Combined label, you will be prompted to provide a “Ship From” and “Ship To” address. You enter the addresses manually or select saved addresses from the dropdown menus. We will pre-populate your account with all Amazon Fulfillment Center addresses for easy access from the “Ship To” dropdown menu, but you will need to add your own warehouse address(es) for easy access from the “Ship From” dropdown menu.
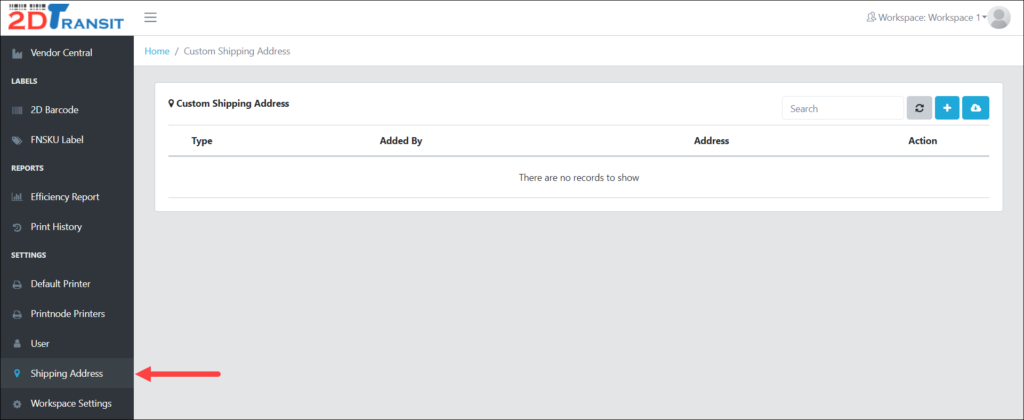
To start adding a shipping address, navigate to the Shipping Address page from the left menu.
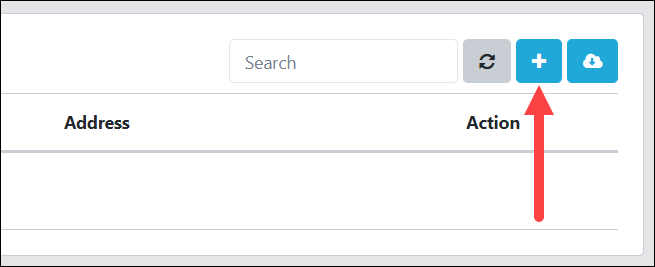
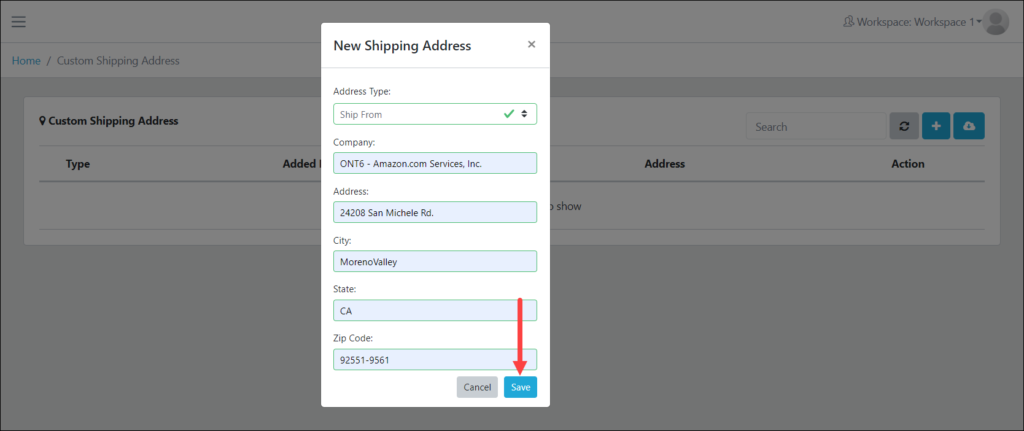
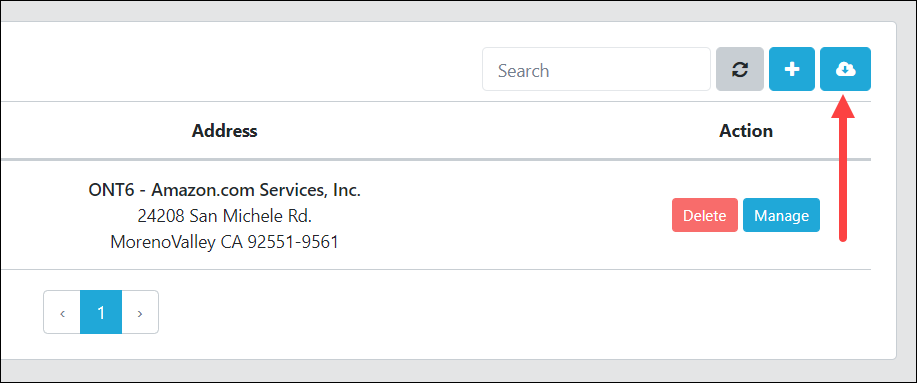
Click the + button found in the upper-right portion of the page.
In the pop-up window, all fields are required. Fill in the fields and click the Save button when done.
Updating a shipping address
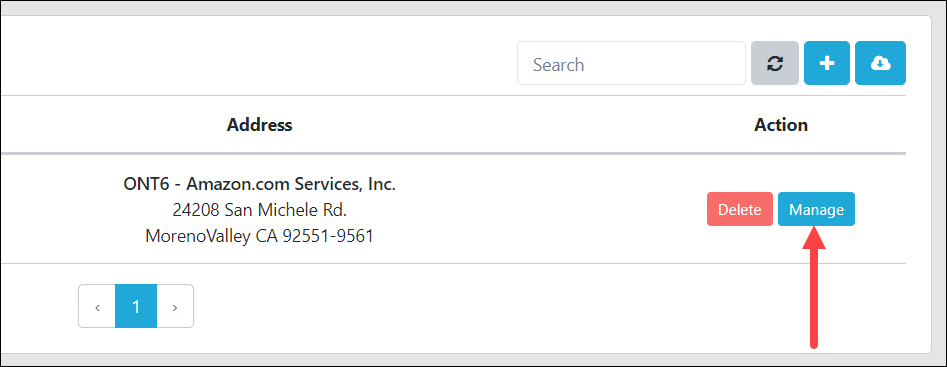
To update a shipping address, navigate to the Shipping Address page and find a shipping address you want to update and click the Manage button in the Action column for that row.
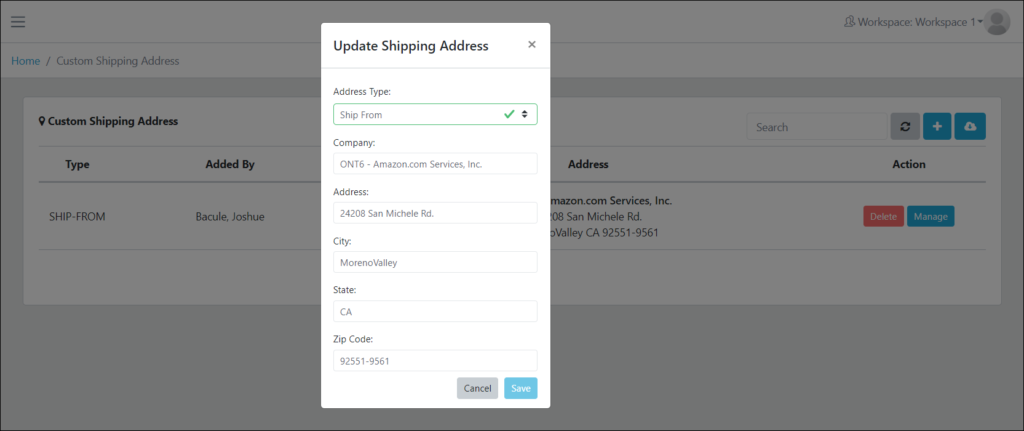
You will see a pop-up box pre-populated with the shipping address from that row. Update the fields as needed and click the Save button when done.
Deleting a shipping address
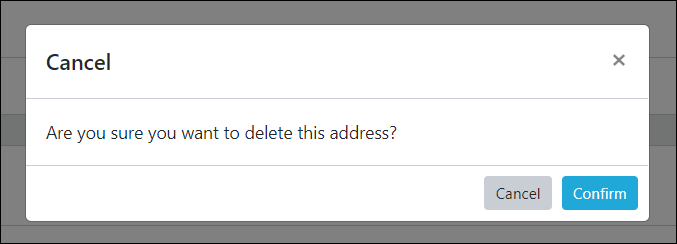
To delete a shipping address, navigate to the Shipping Address page and find a custom shipping address you want to delete and click the Delete button in the Action column for that row.

A pop-up window will ask if you’re sure that you want to delete the address. Click the Confirm button to proceed.
Syncing Amazon Fulfillment Centers
To sync the latest Amazon Fulfillment Center addresses to your account, navigate to the Shipping Address page and click the Sync button.
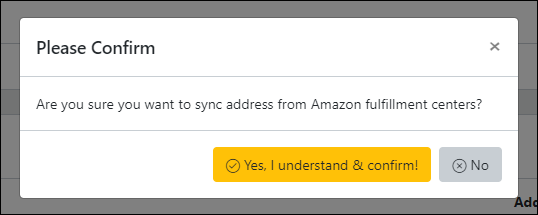
A confirmation window will pop up. Just click the “Yes, I understand & confirm!” button to proceed.
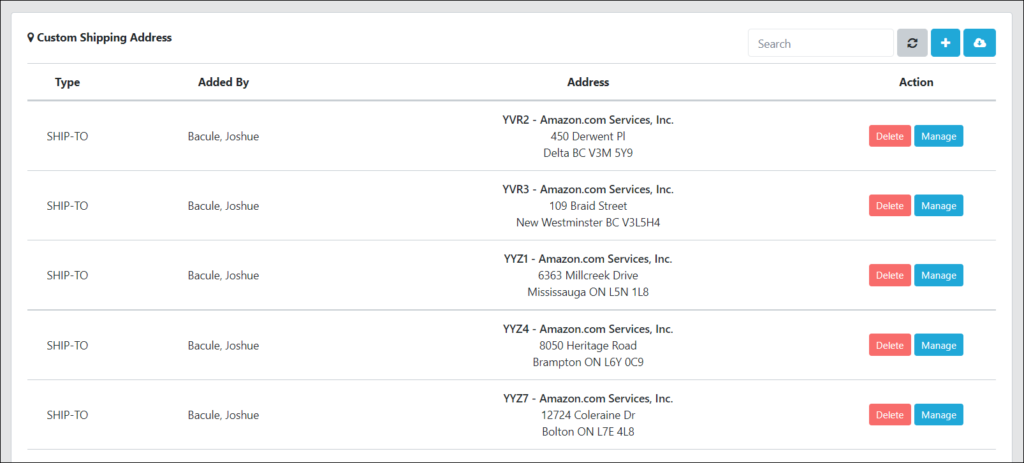
Within a few seconds, you will see the updated list of Amazon Fulfillment Center addresses appear on the page.
Downloads
View our 2D Transit brochure and Frequently Asked Questions sheet to learn 2D Transit can help your business grow.
Click here to download a printable version of the Manage Custom Shipping Addresses tutorial.
Setting your timezone
To update the timezone used for time-stamping entries in the print history, shipment plans, and shipment plan reports, navigate to the User page in the Settings section of the left menu.
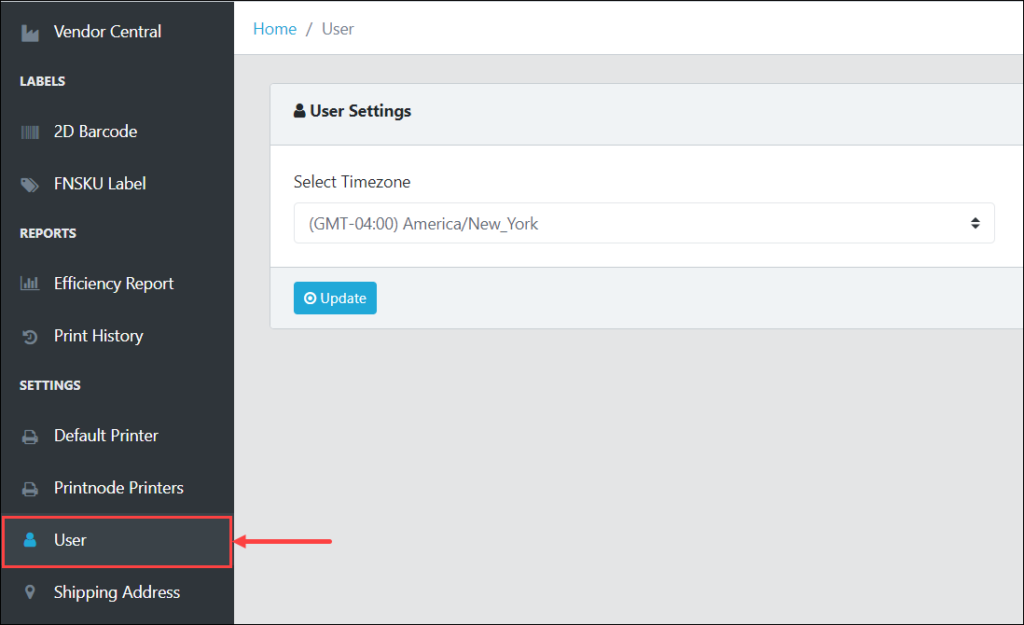
From the Select Time Zone drop-down menu, select your preferred time zone for reporting purposes. The default time zone is (GMT -7:00) America/Los_Angeles.
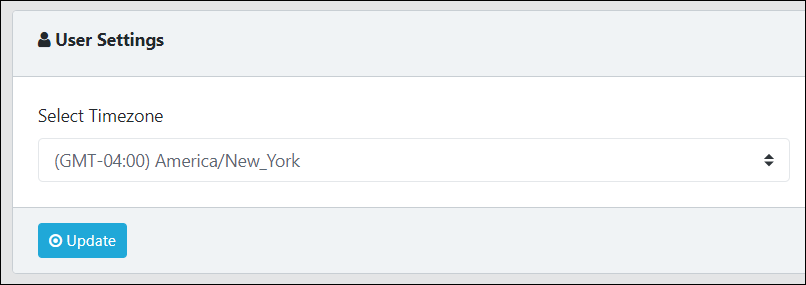
Click the Update button when done.
Setting your default ship-from address
Your default ship-from address will be automatically applied every time you generate or print a Combined 2D Label. Setting a default ship-from address will save you some time by preventing you from having to manually select a ship-from address every time you prepare a shipment.
To set a default ship-from address, navigate to the User page in the Settings section of the left menu. Locate the Default Ship From setting on the page and select an available address from the drop-down menu. If no addresses are available, you will need to add a custom shipping address. Follow the steps in this guide learn how to manage custom shipping addresses.
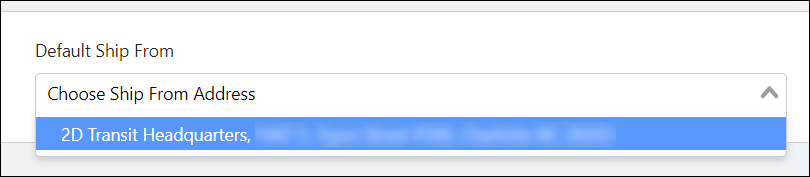
Once you’ve selected the address you want, click the Update button to continue.
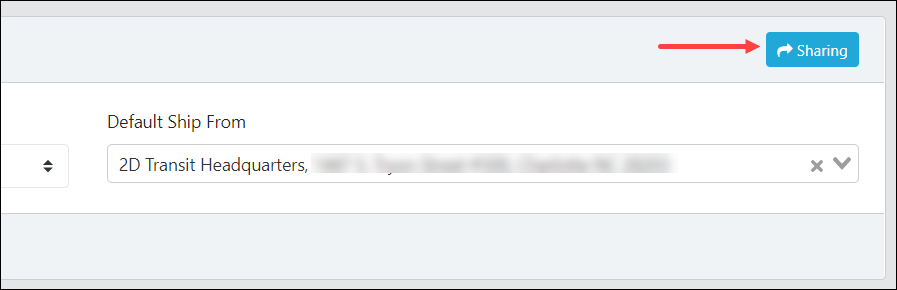
Share user settings to another workspace
To share default settings from one workspace to another, navigate to the User page from the Settings section of the left menu and click the Sharing button to open a small window where you can select a workspace and settings to share. Please keep in mind that this only applies if you have more than one workspace in your account.
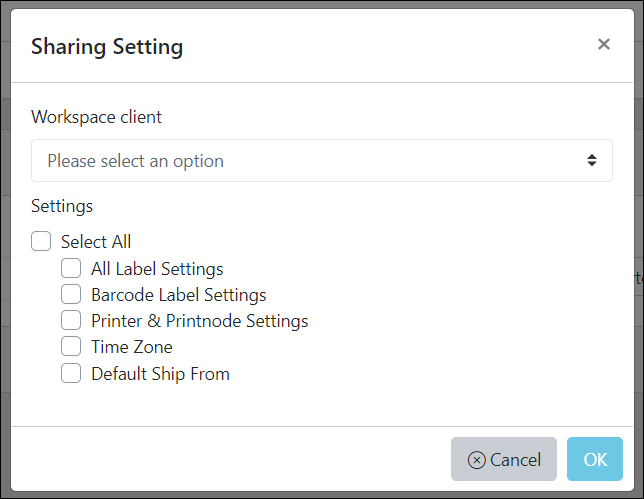
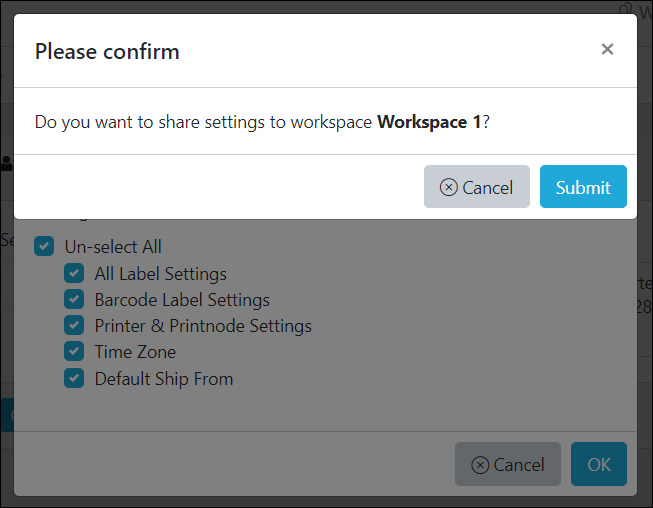
Click the checkboxes to select the settings you want to share, and select the workspace you want to share to from the Workspace client dropdown. Then click the OK button and click the Submit button on the confirmation pop-up box to continue.
Downloads
View our 2D Transit brochure and Frequently Asked Questions sheet to learn 2D Transit can help your business grow.
Click here to download a printable version of the Manage User Settings tutorial.
Setting out-of-stock (OOS) margin for importing templates and printing labels
The out-of-stock (OOS) margin setting controls the minimum required completion rate before 2D Transit will allow printing of labels from the Shipment Plans page or import of a Vendor Default or Vendor Central Template filled out by a Direct-to-FBA partner (i.e., a supplier who ships product directly to FBA on your behalf). For instance, if OOS margin is set to 90%, then 2D Transit will not allow import of any Vendor Default template with a shortage greater than 10%.
(Sending a shipment to FBA with a small shortage is usually okay, but if the shortage is large, you will want to contact your partner and have them repack the shipment and resubmit the template. The OOS margin controls what the threshold for an unacceptable shortage is.)
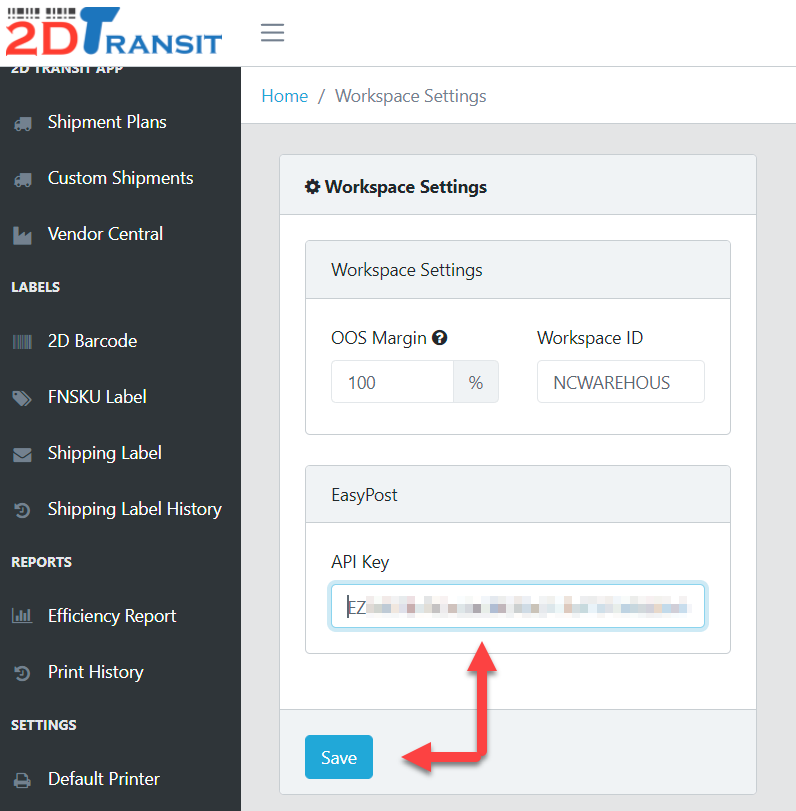
To change the OOS margin setting, navigate to the Workspace Settings page from the left menu.
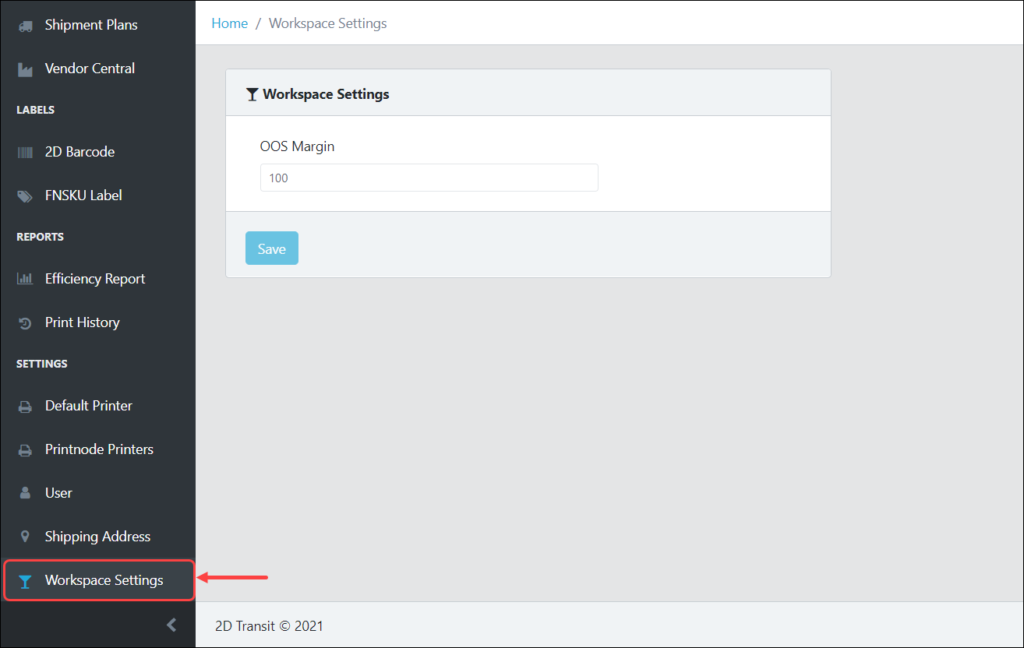
Enter your preferred OOS Margin. The default is 75.

Click the Save button when done.
Downloads
View our 2D Transit brochure and Frequently Asked Questions sheet to learn 2D Transit can help your business grow.
Click here to download a printable version of the Manage Workspace Settings tutorial.
Setting a default printer for Vendor Central labels
Vendor Central merchants are required to label their cartons with one of three label types: a Serial Shipping Containerized Code (SSCC) label, a 2D Barcode Packing Slip (BPS) label, or a Vendor Central Labeling Solution (VCLS) label. 2DTransit supports creation and printing of the SSCC and BPS label types from an uploaded template file.
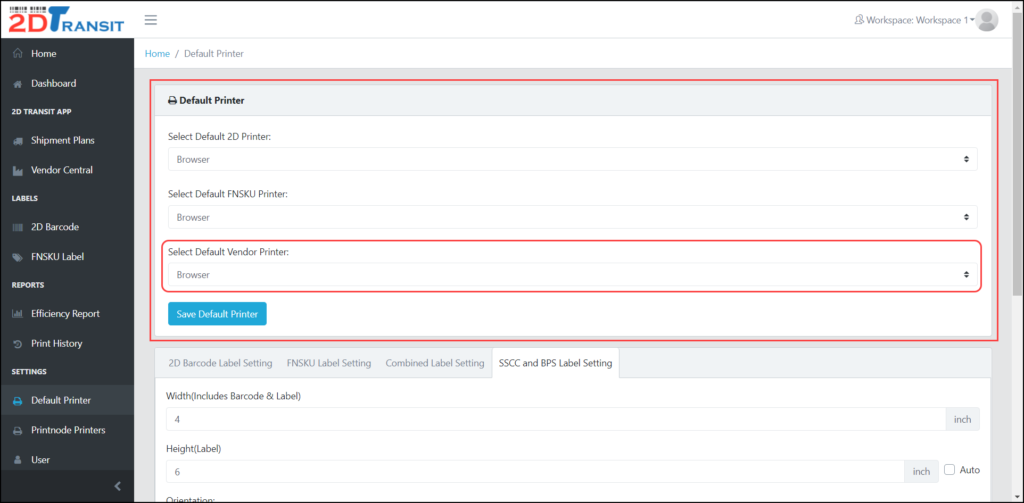
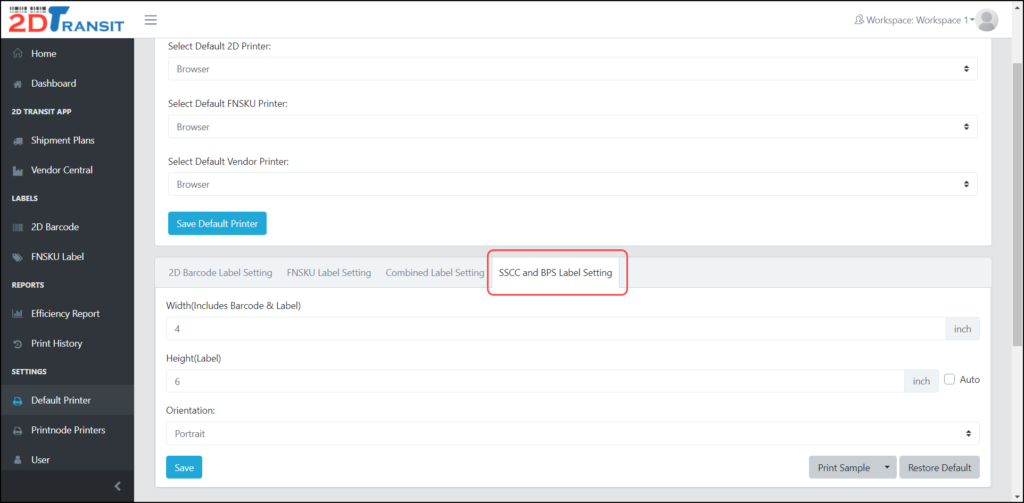
To set up default printing for Vendor Central labels, navigate to the Default Printer page from the Settings section of the left menu.
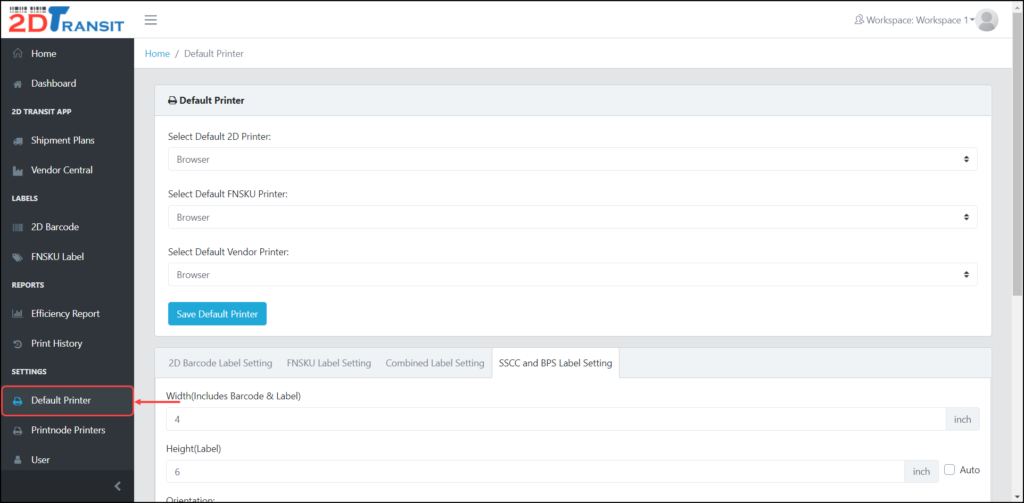
In the Default Printer section, select a default Vendor Central label printer from the Select Default Vendor Printer dropdown.
Selecting Browser will cause 2D Transit to use your browser default printer settings. To print through the Internet, enable and select Printnode. To learn more about Printnode, see our PrintNode setup guide.
To change SSCC and BPS label settings, click the SSCC & BPS Label Setting tab in the second section of the page. We recommend that you keep the default values.
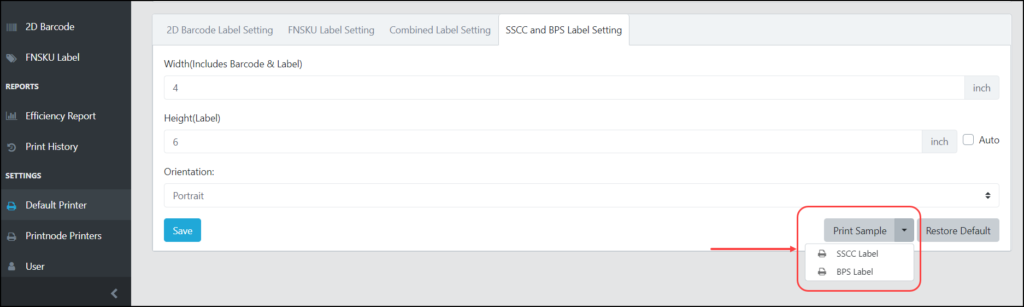
To print a sample SSCC or BPS label, click the Print Sample button and select either SSCC Label or BPS Label from the dropdown.
Exporting a Vendor Central template from the Shipment Plans page
To export a 2D Transit shipping plan to a Vendor Central template file, navigate to the Shipment Plans page from the left menu.
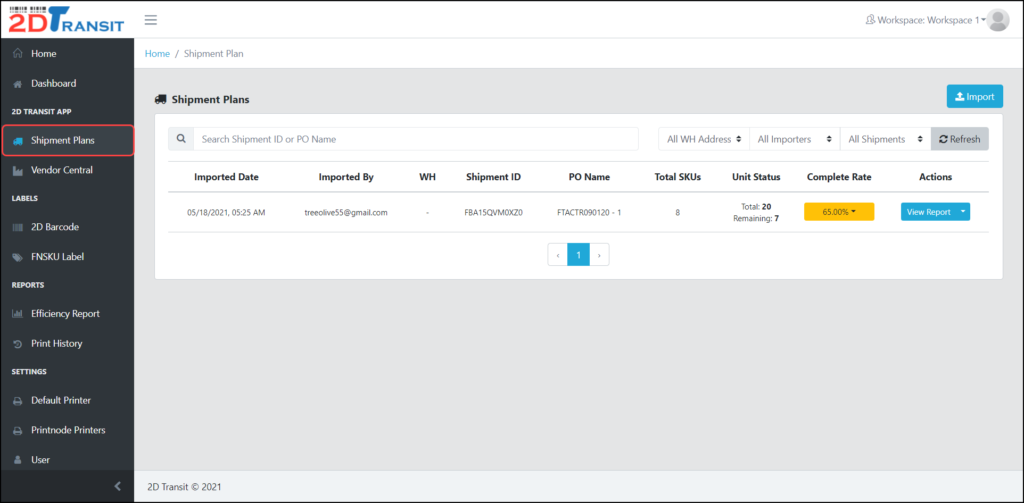
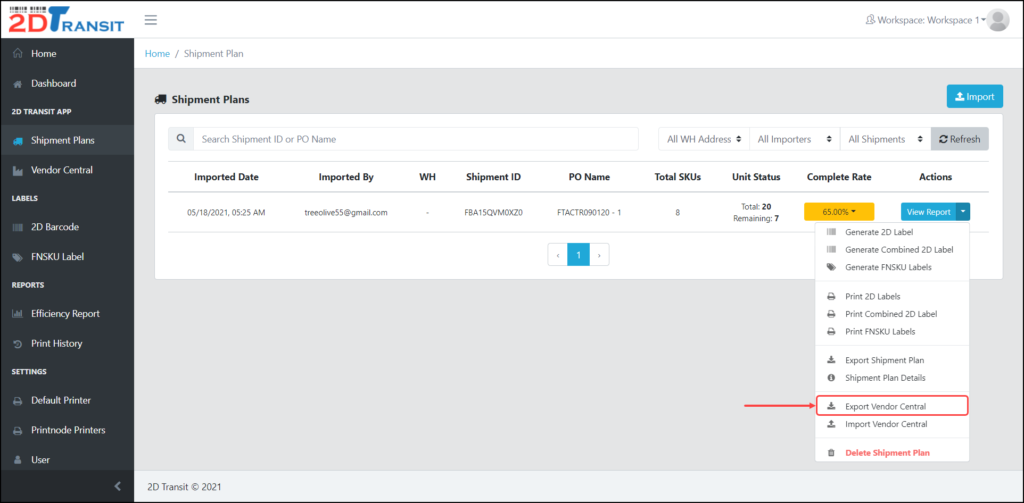
Select any shipment plan and click the corresponding dropdown button in the Actions column, and then select Export Vendor Central from the dropdown.
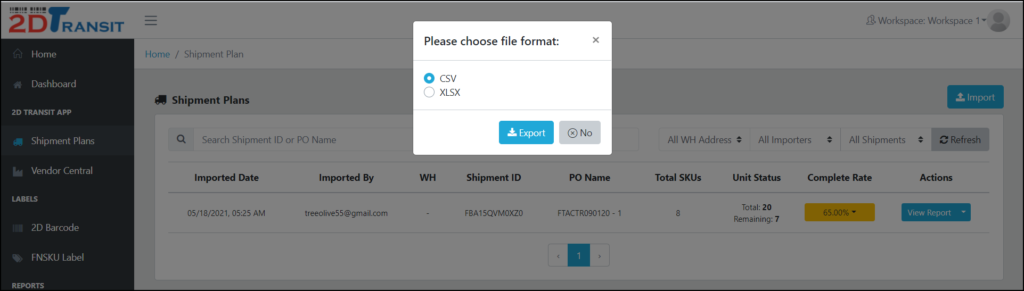
Select a file format for your exported file and click the Export button to proceed.
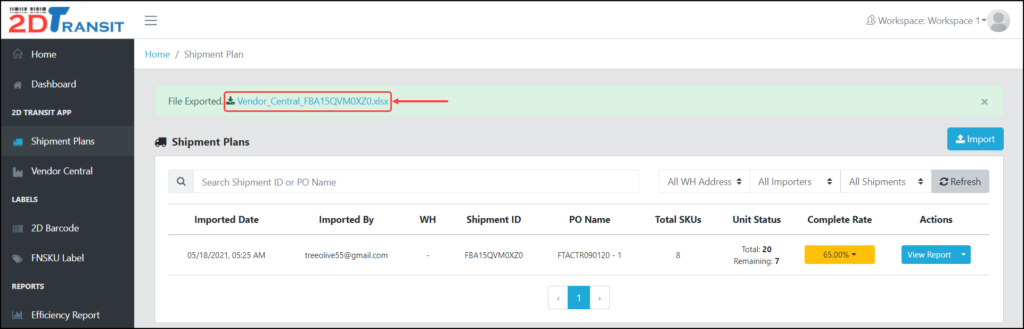
Wait until the export process is completed and the file is downloaded to your computer. You can also re-download the exported file by clicking the link on the export status banner.
To edit the Vendor Central template, fill in the remaining columns. You will then import the completed template to generate and print your labels.

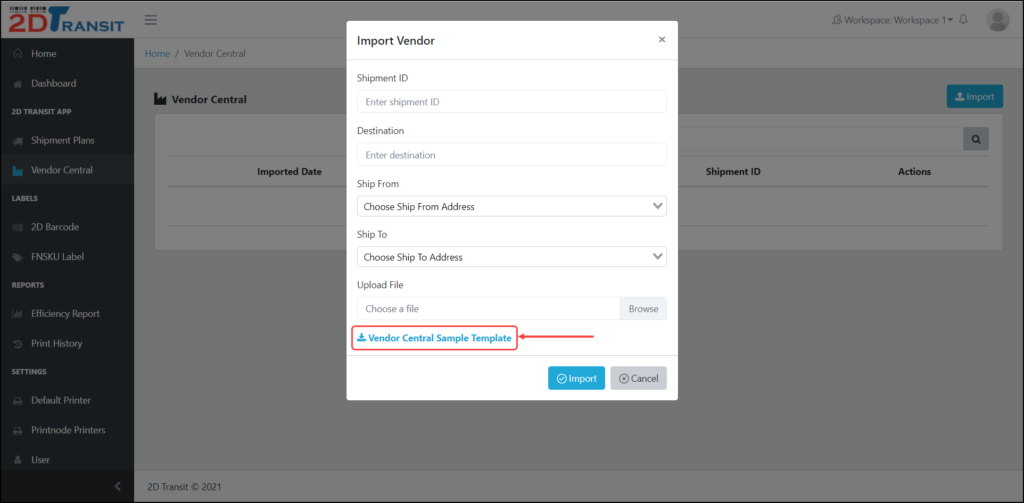
As an alternative to exporting a shipment plan as a Vendor Central template file, it’s also possible to start from scratch with a blank template file. Just navigate to the Vendor Central page from the left menu, click the Import button, and then click the Vendor Central Sample Template link to download the blank file.
Importing a file created from a Vendor Central template
Before you import a Vendor Central template, make sure you have completed the template by filling in the required information.
To start importing, navigate to the Vendor Central page from the left menu.

Click the Import button.

In the pop-up box, fill in all fields and upload your template. (You may wish to review our tutorial on how to manage custom shipping addresses).

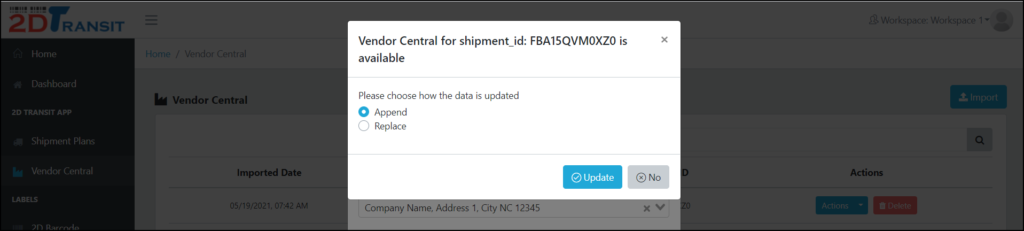
When you’re done, click the Import button to proceed. In the event that your shipment ID already exists in the Vendor Central shipment plans list, you are given an option to replace all items in the existing plan or to append items to the existing plan. Click Update to finish.
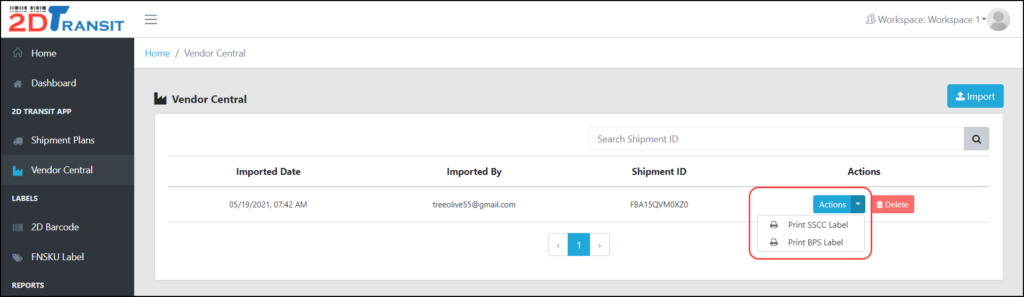
Printing SSCC and BPS labels
To start printing SSCC or BPS labels, select any shipment from the Vendor Central shipment plans list, and then click the dropdown button in the Actions column and select either Print SSCC Label or Print BPS Label from the dropdown.
You will be redirected to a new tab to print your selected label.
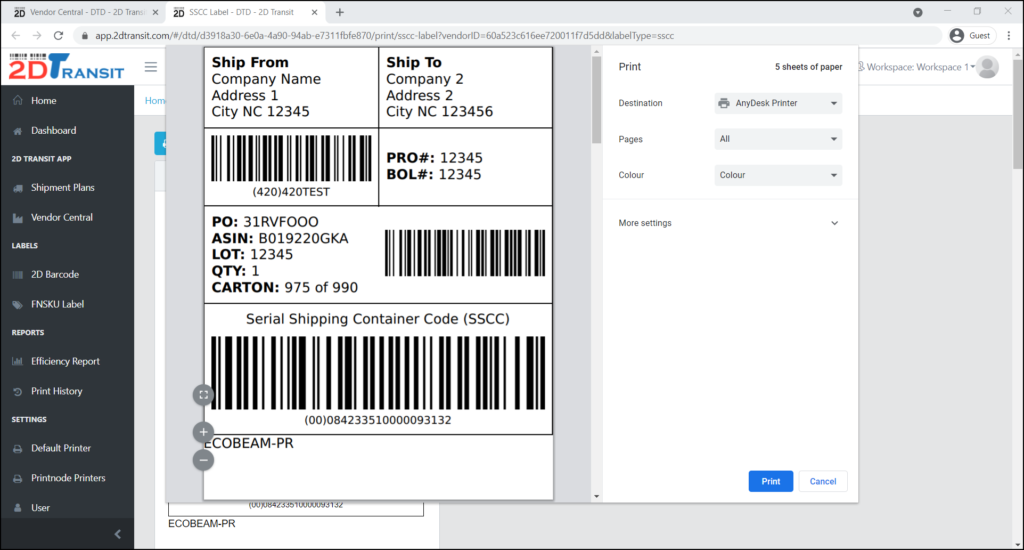
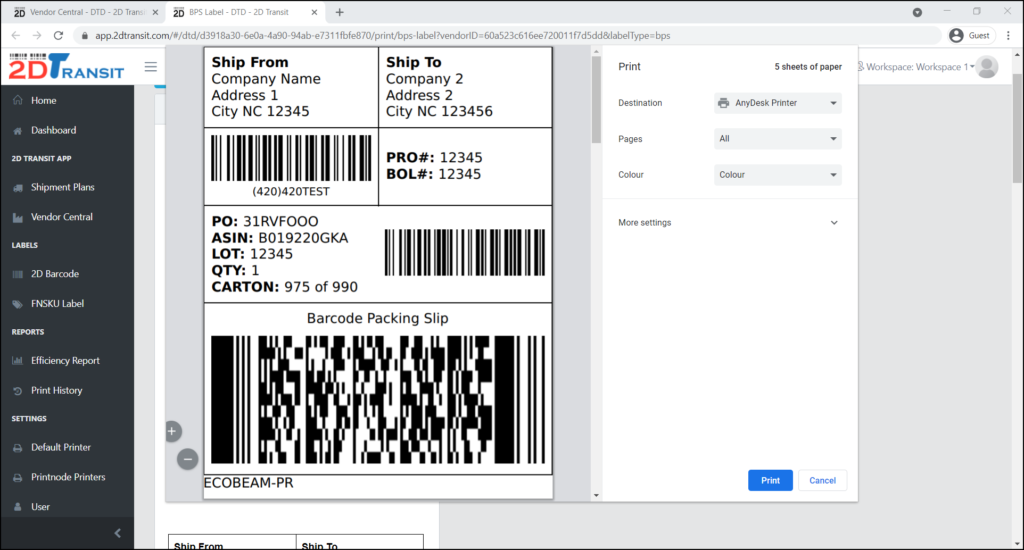
Should you wish to reprint a label, click the Print button to print again.

Downloads
View our 2D Transit brochure and Frequently Asked Questions sheet to learn 2D Transit can help your business grow.
Click here to download a printable version of the Vendor Central tutorial.
Creating a custom shipment
Navigate to the Custom Shipments page from the left menu.
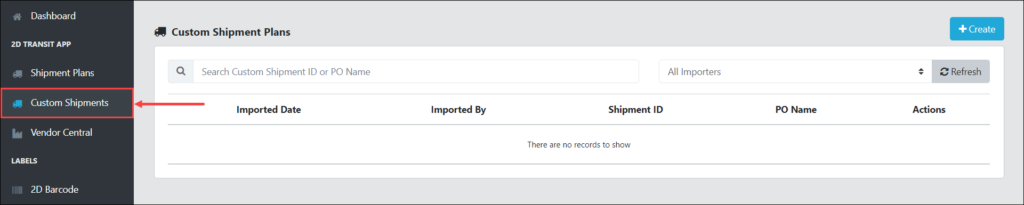
Click the Create button to create a new custom shipment.

In the pop-up window, fill in the Shipment ID and PO Name fields and select a shipping address from the Ship To dropdown. You can leave the Ship To field blank if you don’t want to provide an address.

When you’re ready, click the Create button to proceed.
Scanning and printing labels
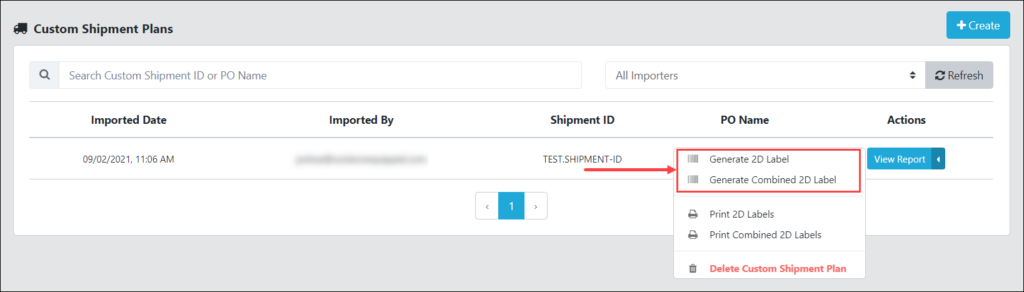
To begin scanning labels, navigate to the Custom Shipments page from the left menu, find the desired custom shipment plan in the Custom Shipment Plans list, click the corresponding dropdown button in the Actions column, and then select Generate 2D Label or Generate Combined 2D Label from the dropdown menu.
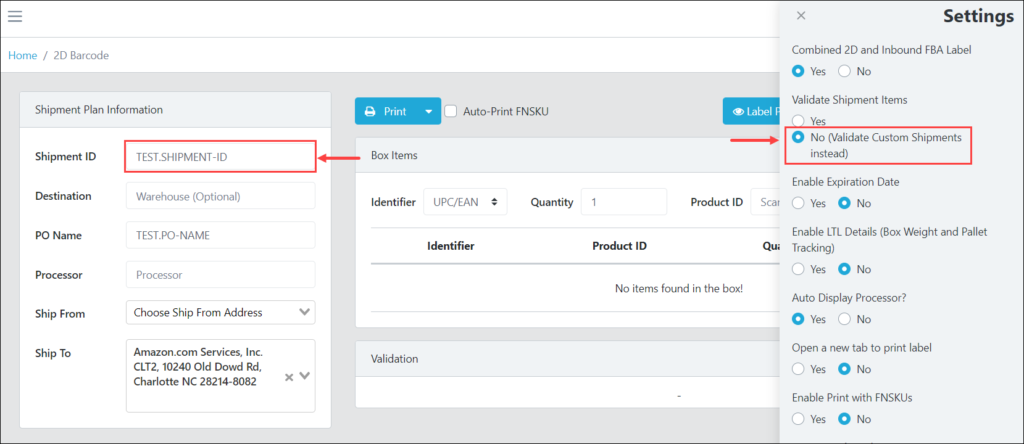
The Custom Shipment ID can also be entered directly on the 2D Barcode page. In the Settings, ensure that the Validate Shipment Items option is set to No (Validate Custom Shipments instead).
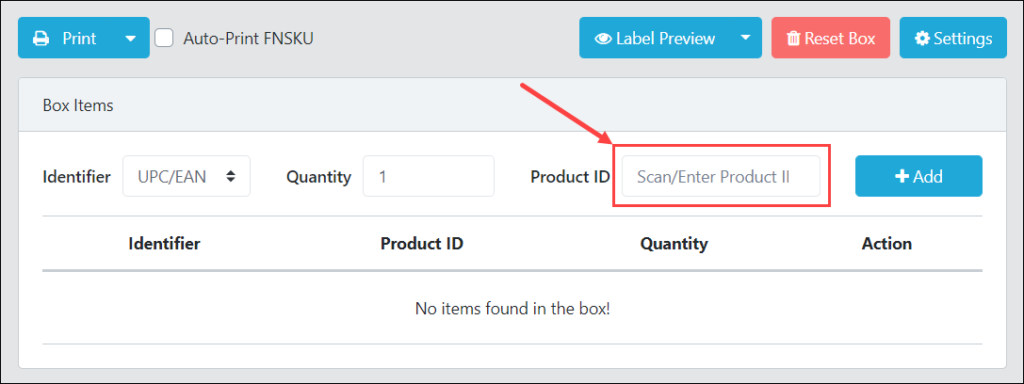
To begin scanning, click in the Product ID field and scan a product ID with your barcode scanner, and it will be immediately added to the table. Alternatively, manually input the product ID and click the Add button to add it to the table.
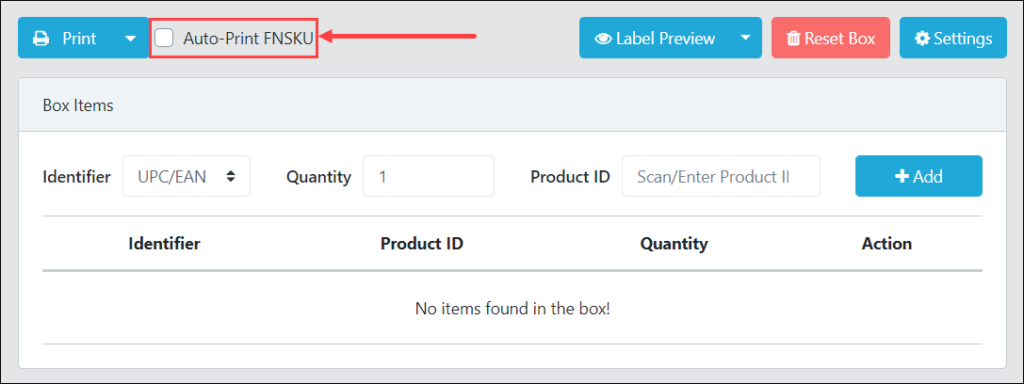
If you want to automatically print FNSKU labels as you add product IDs to the table, check the Auto-Print FNSKU checkbox.
To reprint or manually print an FNSKU label for an individual product ID, find the desired product ID in the table and click the corresponding Print FNSKU button in the Action column.
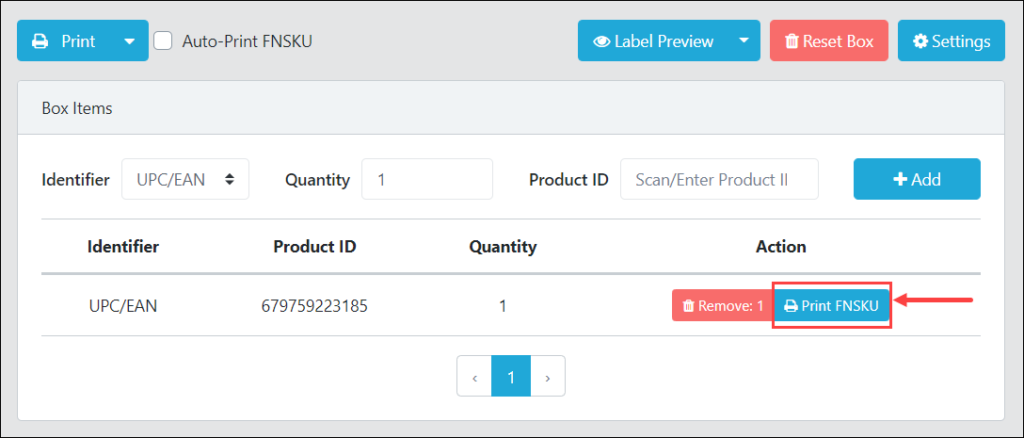
To print a 2D or combined 2D label, click the Print button. If you also want to all FNSKU labels for the carton, click the dropdown button next to the Print button and select Print with FNSKUs from the dropdown menu. (If you don’t see this option, turn on the Enable Print with FNSKUs toggle under Settings.)


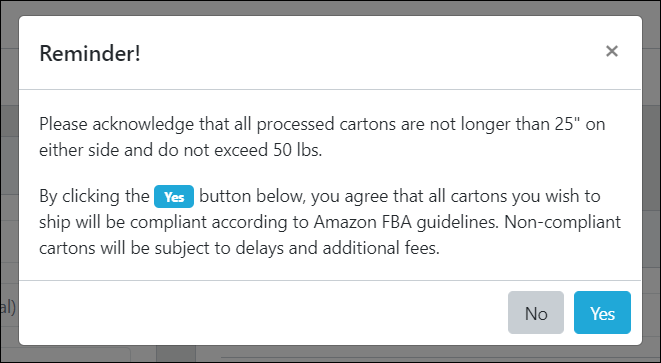
When printing labels, you will see a label guide reminder. Click the Yes button to confirm, and you will be able to print using the printer you have specified. Or select No if you still want to change the box.
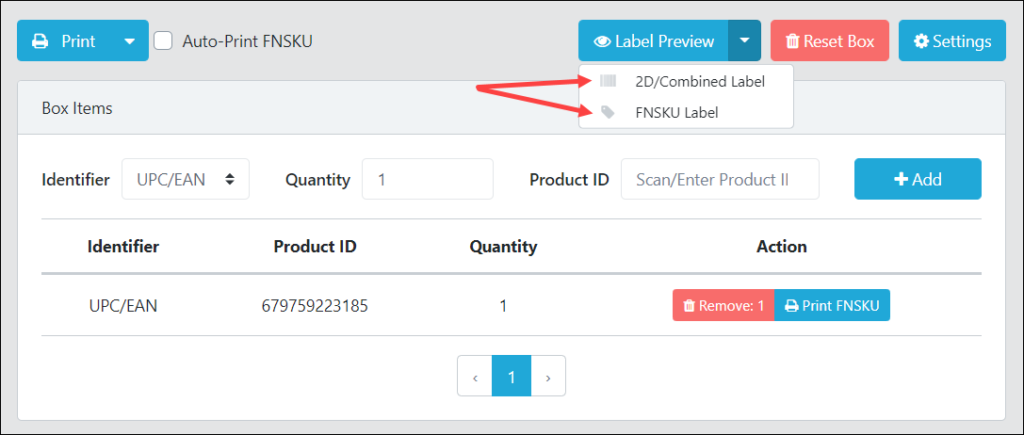
You can also preview labels before printing. Just click the Label Preview button and select either 2D/Combined 2D Label or FNSKU Label from the dropdown menu.
Viewing and downloading a custom shipment report
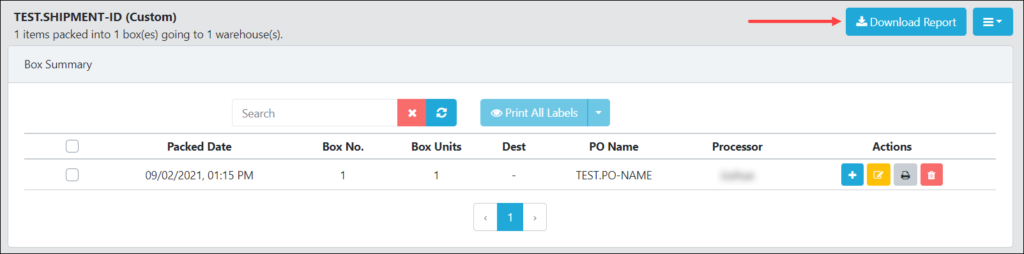
The Custom Shipment Report breaks down which items you have added to each carton in the shipment. On the Custom Shipment Plans page, find a shipment of interest and click the corresponding View Report button in the Actions column. To export the file in Excel format, click the Download Report button.
Editing a custom shipment
Open the custom shipment report for a shipment you want to edit. From the Box Summary section of the report, you can reprint carton labels, add new products to a carton, update carton information, or even delete the whole carton from the shipment.
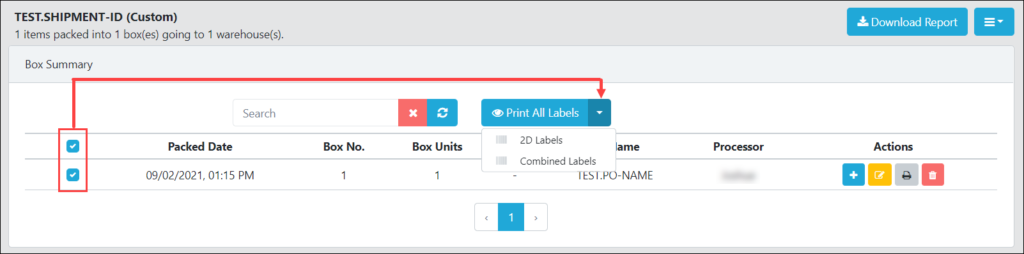
To reprint carton labels, check the checkboxes for the cartons of interest, and then click the dropdown button beside the Print All Labels button and choose either 2D Labels or Combined 2D Labels from the dropdown menu.
You can also reprint 2D or FNSKU labels for an individual carton by clicking the corresponding Print icon button in the Actions column, and then selecting one of the three label types from the dropdown menu.

To add additional items to a box, click the corresponding Plus icon button in the Actions column and fill in the fields in the pop-up box. Click the Save button when you’re finished.

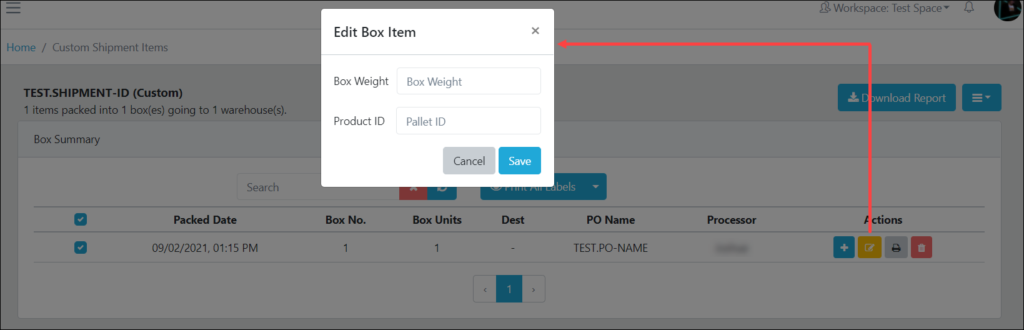
To edit weight and pallet ID for a carton, click the corresponding Edit icon button in the Actions column and fill in the fields in the pop-up box. Then click Save.
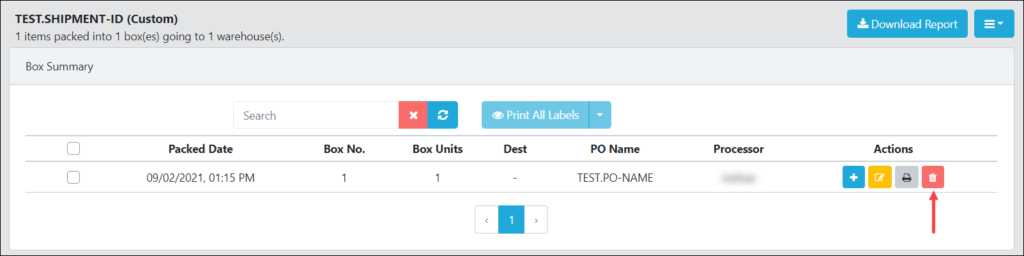
To delete a carton from the shipment, click the Delete icon button. You will be prompted for confirmation to delete. Click the Yes button to continue.
Downloads
View our 2D Transit brochure and Frequently Asked Questions sheet to learn how 2D Transit can help your business grow.
Click here to download a printable version of the Getting Started tutorial.
Generating an efficiency report
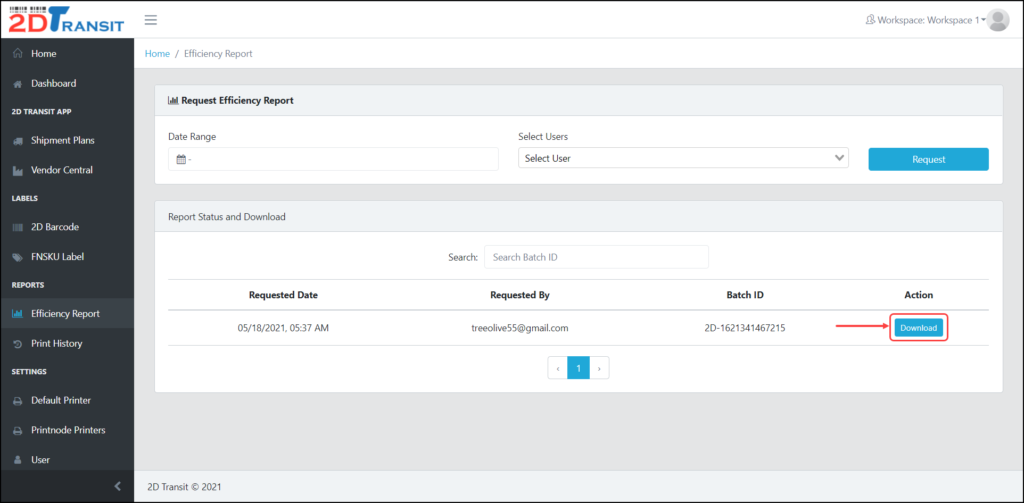
To generate a productivity report showing the number of cartons or items processed by hour by one or more workers over a selected date range, navigate to the Efficiency Report page from the left menu.
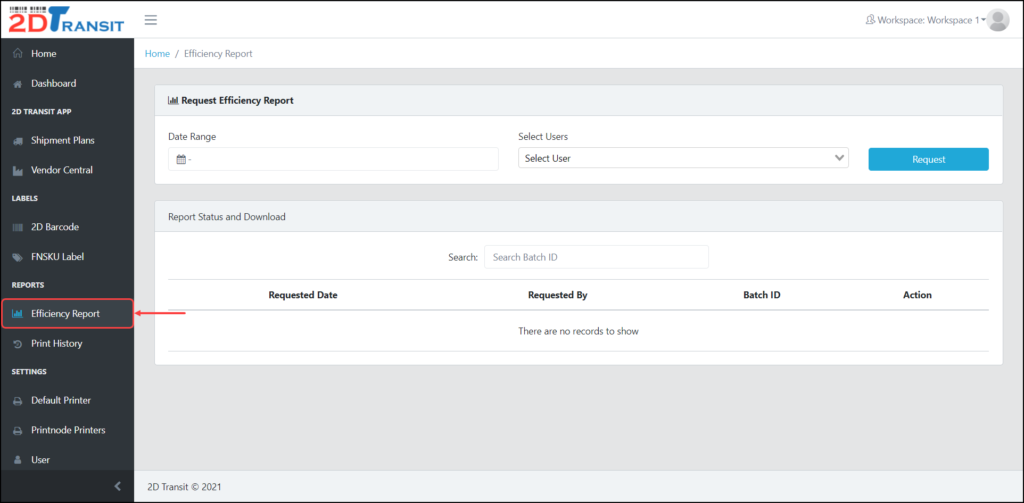
To request a report, you are required to select a date range and at least one user whose productivity you want to analyze. Please note that access will depend upon your user role and permissions. Admin-level users can view the productivity of all users, whereas User-level users can view only their own productivity statistics.
After filling in the required fields, click the Request button to proceed.

The report you requested will appear in the list. Click the Download button to access the report.
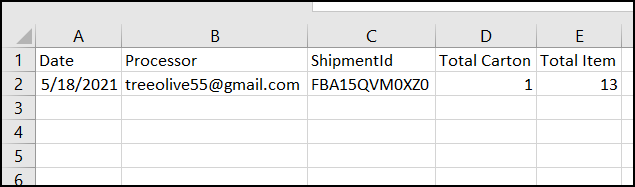
The downloaded file will be in .csv format with 5 columns (Date, Processor, Shipment ID, Total Carton, Total Item).
Downloads
View our 2D Transit brochure and Frequently Asked Questions sheet to learn 2D Transit can help your business grow.
Click here to download a printable version of the Efficient Report Tool tutorial.
Integration Guide with Easypost
In order to be able to purchase shipping labels through 2DTransit, you must first apply for an account with our shipping integration partner of choice, Easypost. https://www.easypost.com/ . Please follow the instructions below.
Easypost is free and allows for up to ten thousand (10,000) shipping labels purchased per month. If you go over the limit you’ll have to ask them for a fairly-priced subscription. You still pay for the labels you purchase, naturally.
1. Register a new account here: https://www.easypost.com/signup
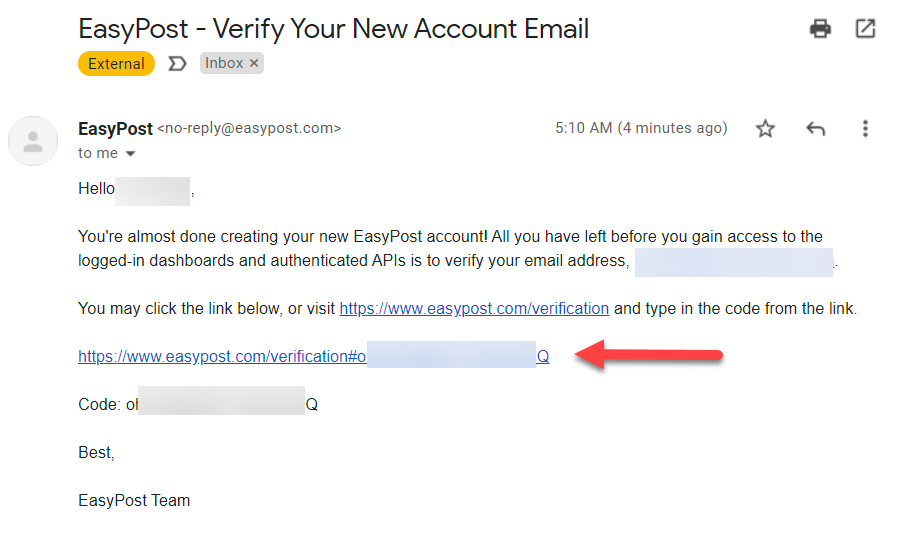
2. Verify your email through the confirmation email link.
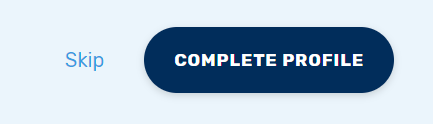
3. Optionally complete the profile (description of your company). You can skip it.
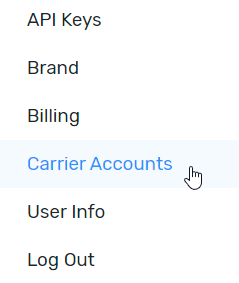
4. Click on your account name at the top left.
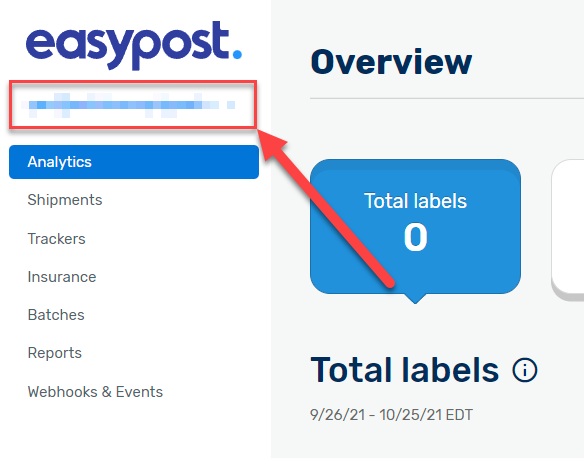
5. Select “Carrier accounts”
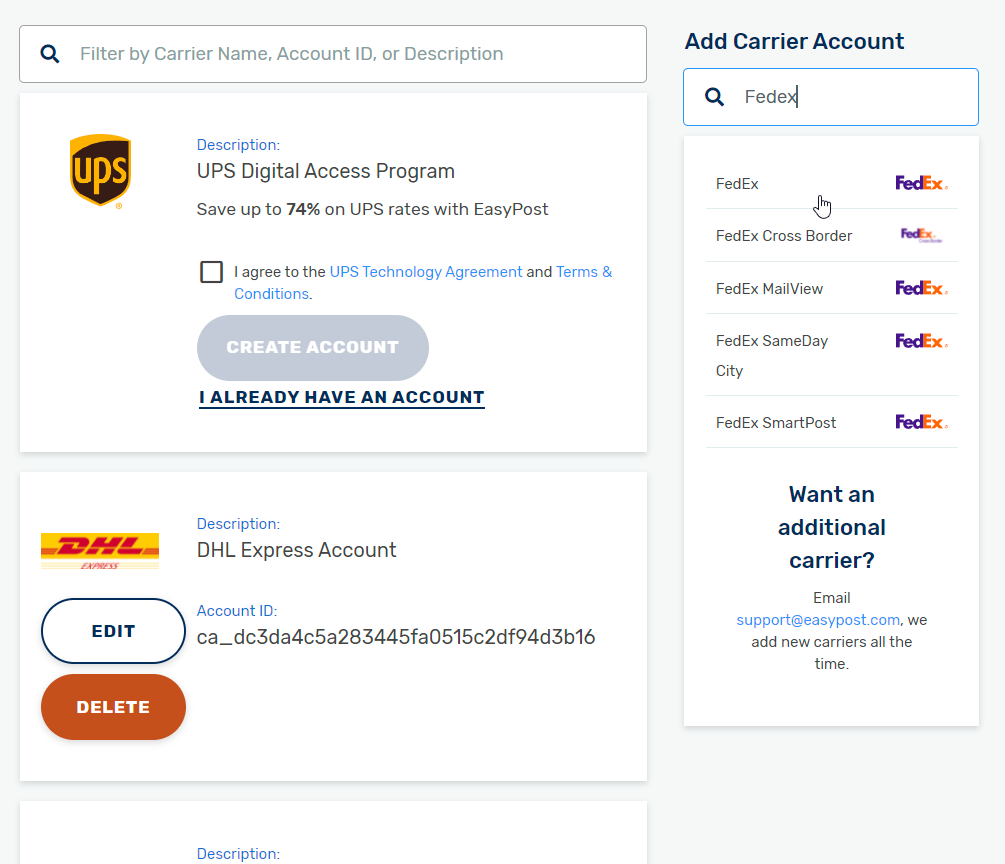
6. Select FedEx from the right panel.
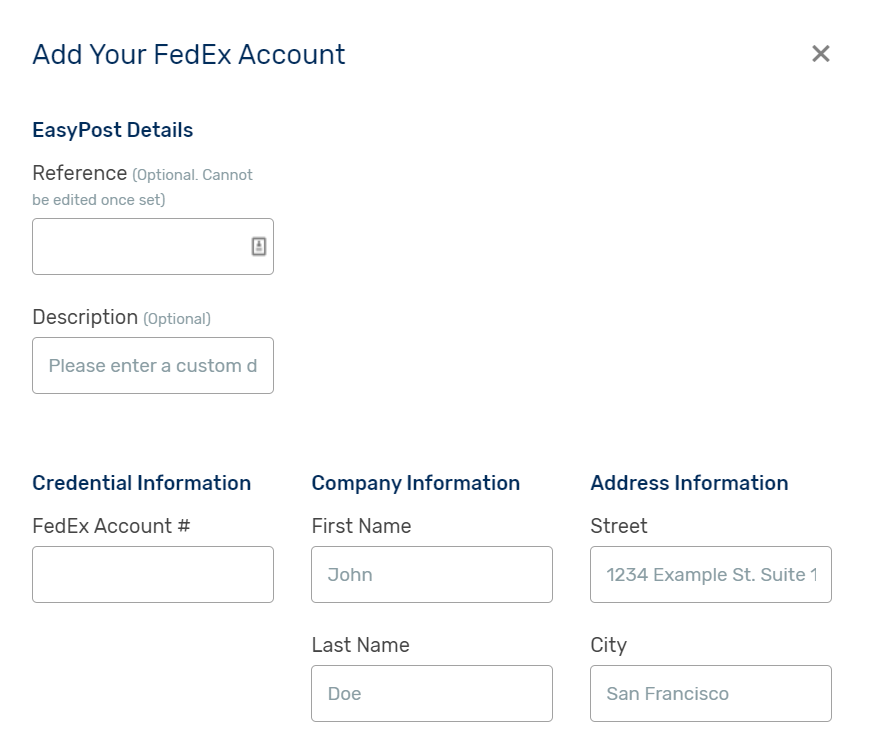
7. Fill in your FedEx account information.
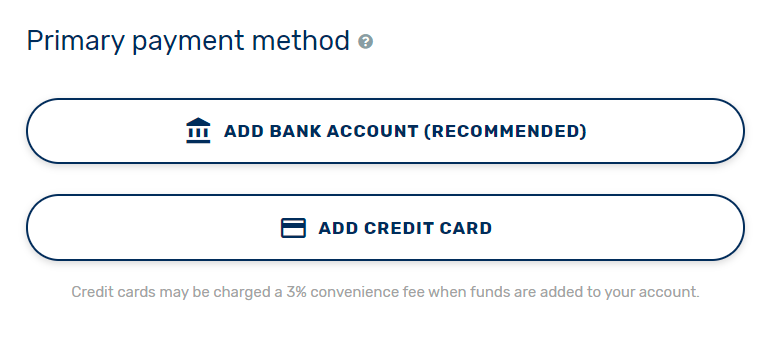
8. Click on your account name on the top left, then on “Billing”, and set up your primary label payment method (Powered by Plaid https://plaid.com/ ). Secondary method is optional but recommended. The ideal is a bank account as primary, CC secondary.
9. Click on your account name on the top left again, then on “API Keys”. Alternatively, go on this URL: https://www.easypost.com/account/api-keys
10. Copy your Production API Key.

11. Paste your Easypost Production API Key onto the 2DTransit “Workspace Settings” page, and hit Save.
12. You can now access and print your labels on the Shipping Label page using shipping plan information.
For any questions, please see our help page for contact information.
Setup Default Printer for Shipping Label
Before you begin printing shipping labels, you should probably configure your printer. Navigate to the right-hand side options and choose Default Printer.
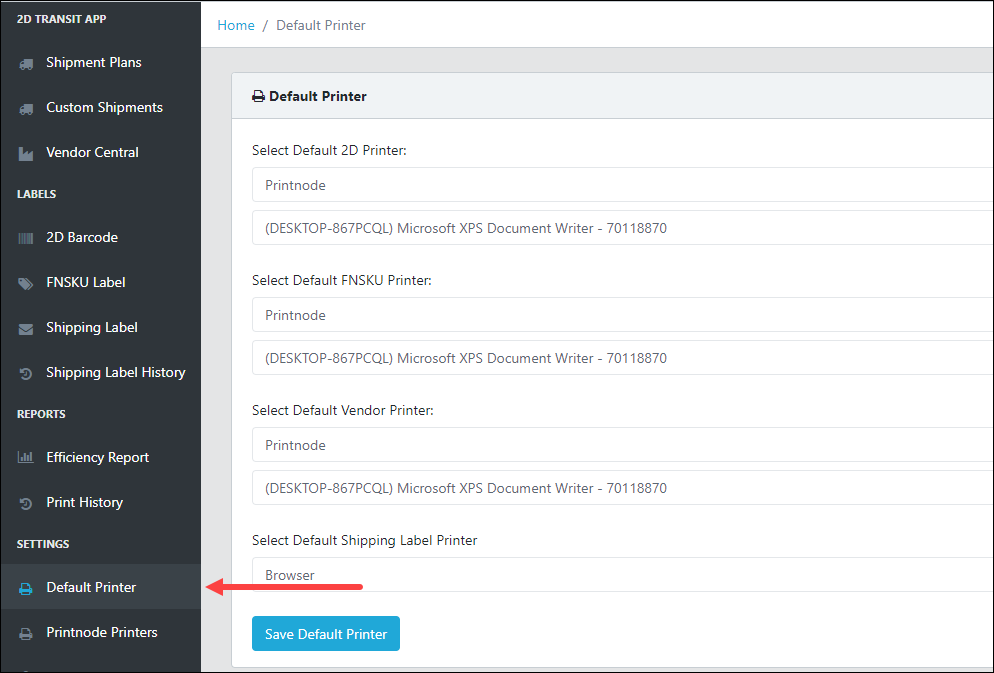
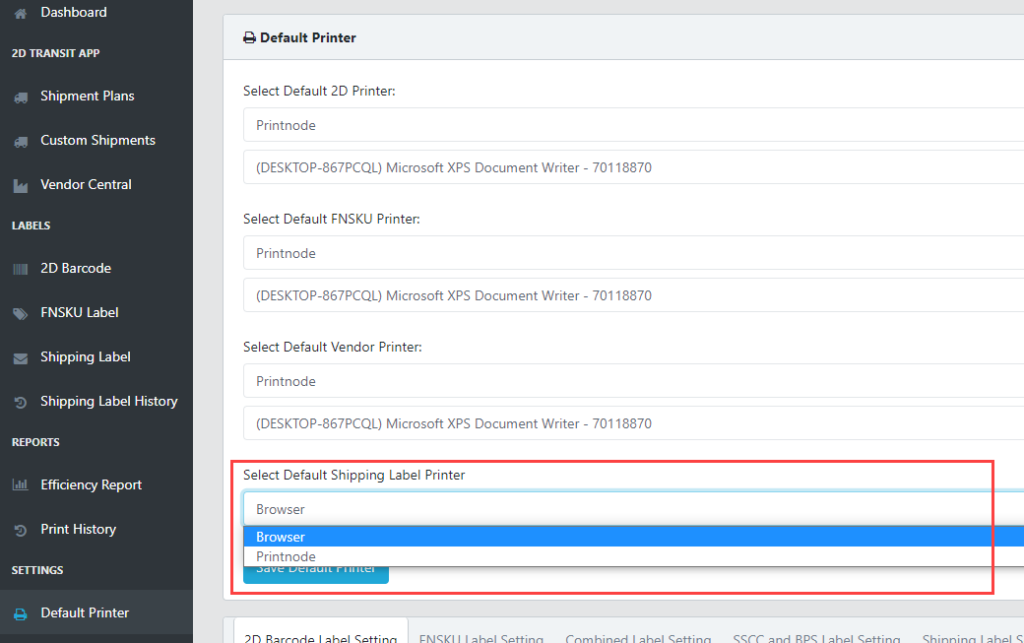
Find “Select Default Shipping Label Printer” under the Default Printer Section, then select either Browser or Printnode. When you click Printnode, you must specify the printer you wish to use to print the label. Check out this guide for instructions on how to set up and utilize printnode.
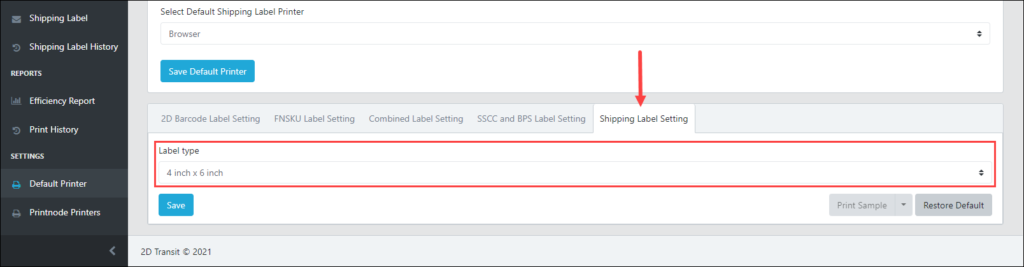
To change the size of the shipping label, navigate to the Shipping Label Settings tab and pick the desired size. The default size will be 4×6 inches.
After you’ve finished configuring the default printer, you’re ready to start printing shipping labels.
Generate and Print Shipping Label
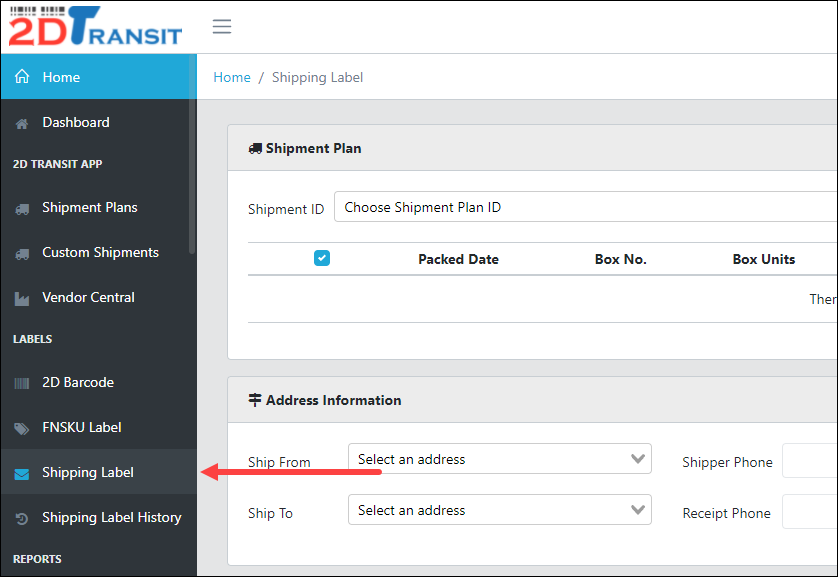
To start printing labels, go first to the Shipping Label page.
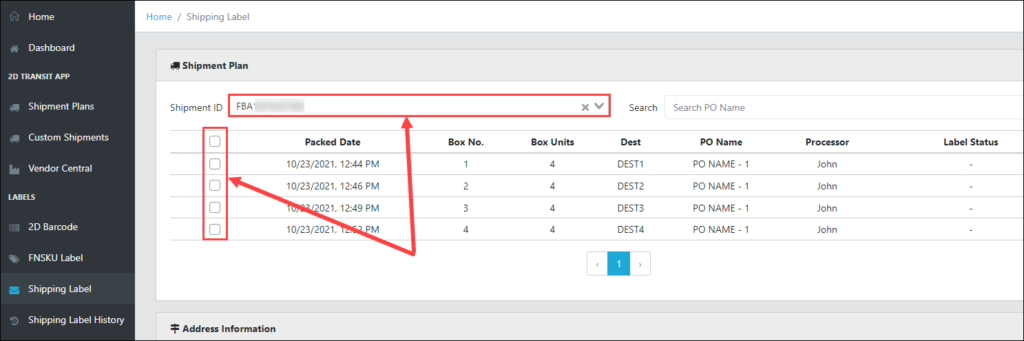
Search for the Shipment ID and pick the shipment box to be printed. Shipments should have existed in Shipment Plans and cartons should have been created.
Provide the address information. Please check this tutorial if you haven’t set up the shipping address yet. The Shipper and Receipt Phone are required as well.
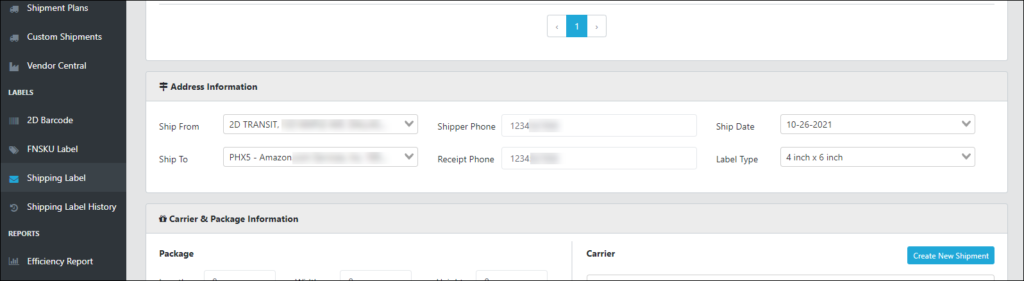
Provide the required info in the Carrier and Package Information section, then choose a Carrier and click the Create New Shipment button.

After the shipment was successfully created, choose the service available.
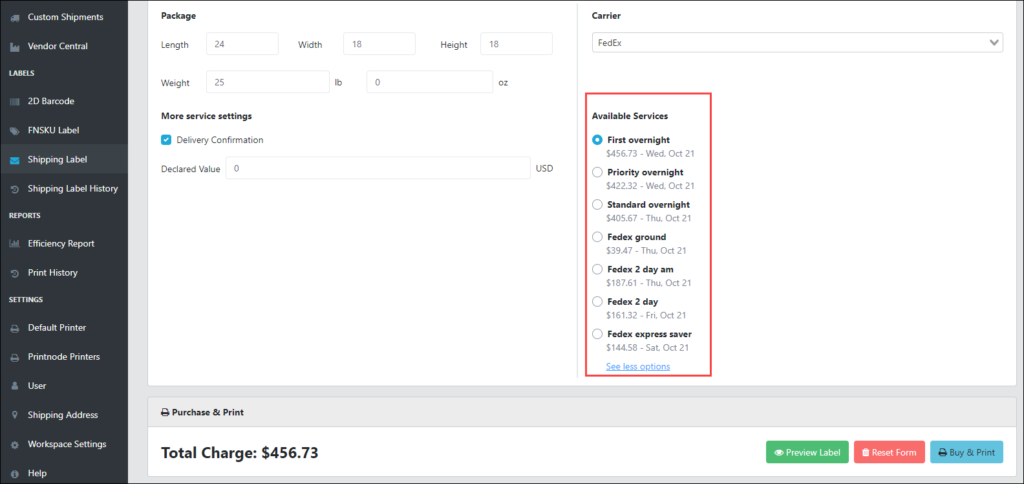
Once you’re done, simply click the Buy & Print button to proceed. You can also preview the label by clicking the Preview Label button.

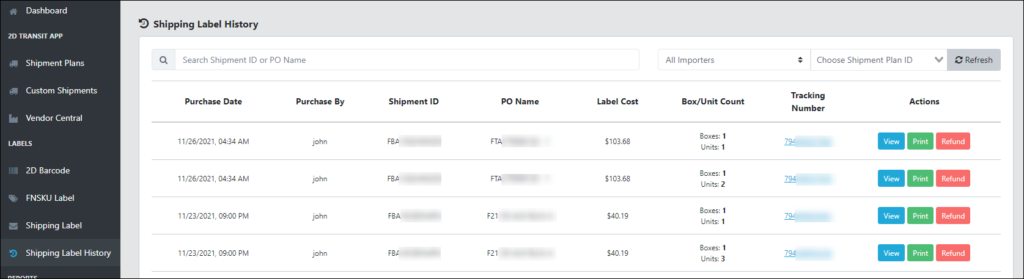
View Printed Shipping Label History
Printed shipping labels will be available in the Shipping Label History page. If you want to view the label, just click the View button or click the Print button to reprint the shipping label. You can also do the Refund of the purchased labels by clicking the Refund button but note that if the purchased labels status was delivered, you can longer do the refund.
Downloads
View our 2D Transit brochure and Frequently Asked Questions sheet to learn 2D Transit can help your business grow.
Click here to download a printable version of the Efficient Report Tool tutorial.
Importing of FNSKU Items
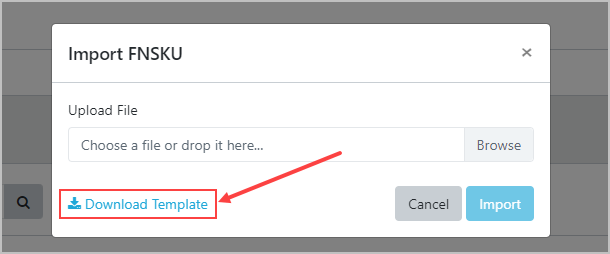
To start importing, navigate to the FNSKU Items page and click the Import button.

In the pop-up window, download the default template file for importing FNSKU Items.
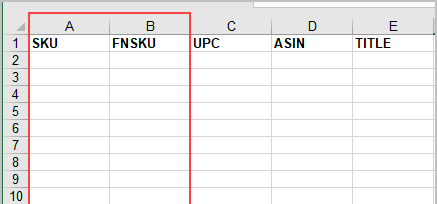
These are the following columns that you’re gonna fill-in. Only SKU and FNSKU columns are required and the
other columns are optional.
Once you’re done on the template, you may upload the file in the Import pop-up window then click the Import
button to proceed.

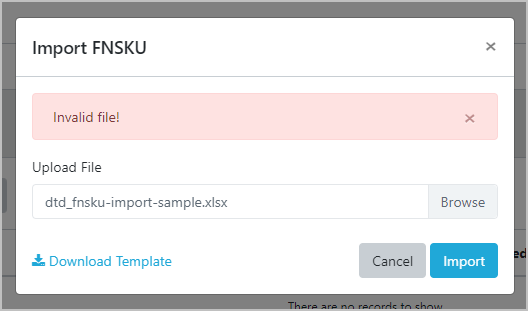
If the import has an error, an error message will appear in the pop-up window. For example, you’ve uploaded a
template with no rows.
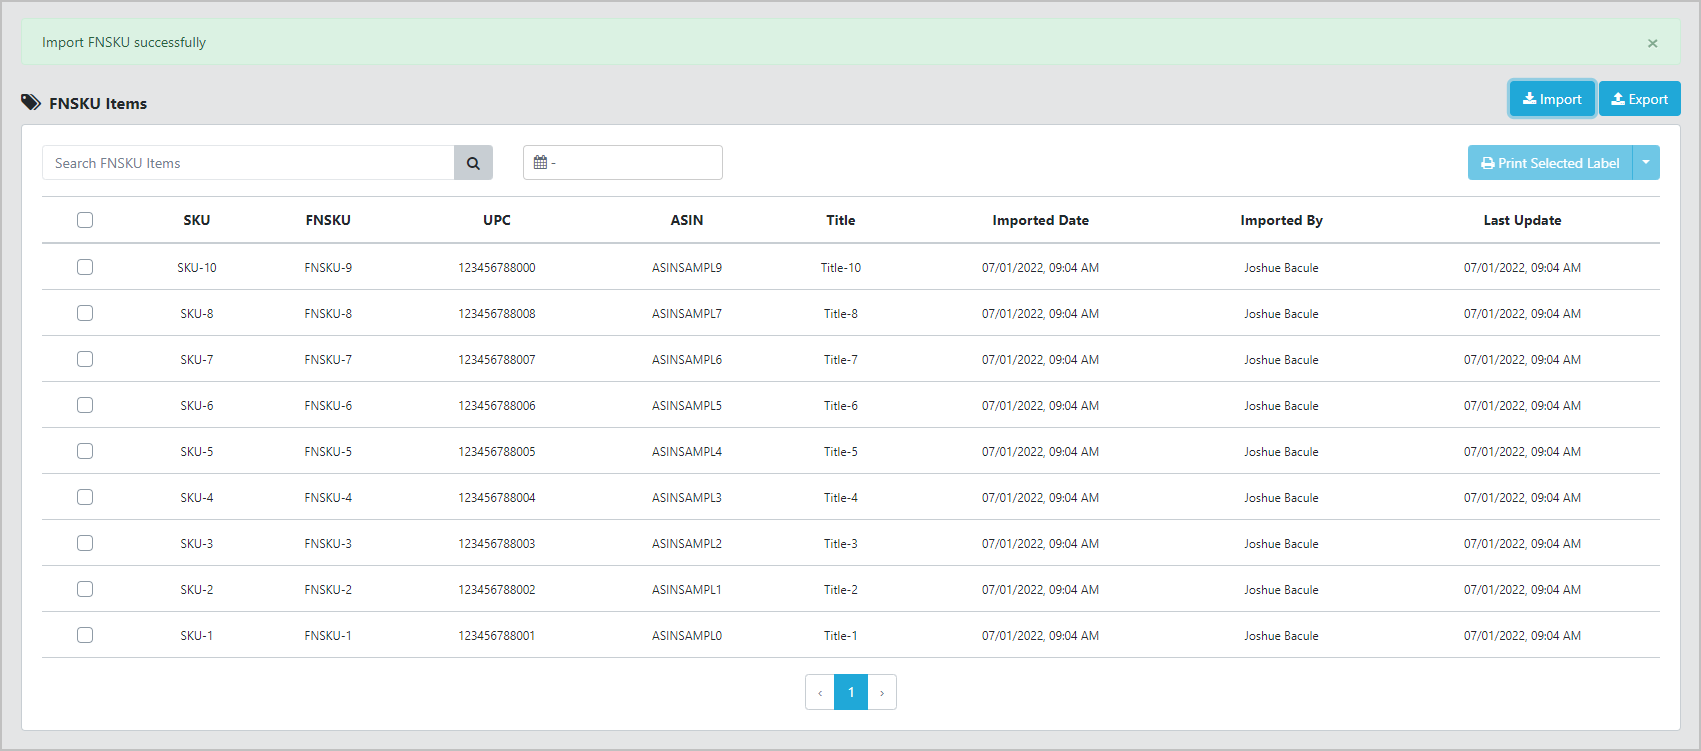
Otherwise, if the import is successful, you will see the items in the table with a success message.
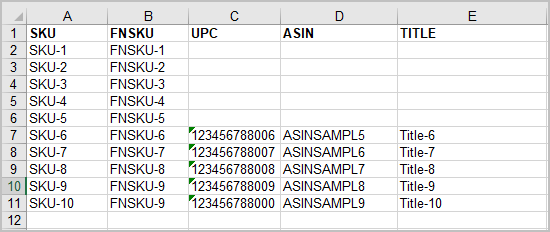
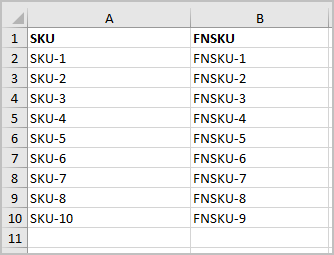
Updating of FNSKU Items
You can update FNSKU Items in bulk. All you have to do is download the template again from the import
window then make sure that the SKU and FNSKU already exist in the table. If it is not the same, it will save as
a new row in the table.
For example:
Previous Items:
Updated Items:

Once you’re done, just simply do the same process when importing the FNSKU Items.
Filtering FNSKU Items in the Table
There are two ways to filter the FNSKU Items. First is by using the search input filter. You can only search SKU
and FNSKU keywords.

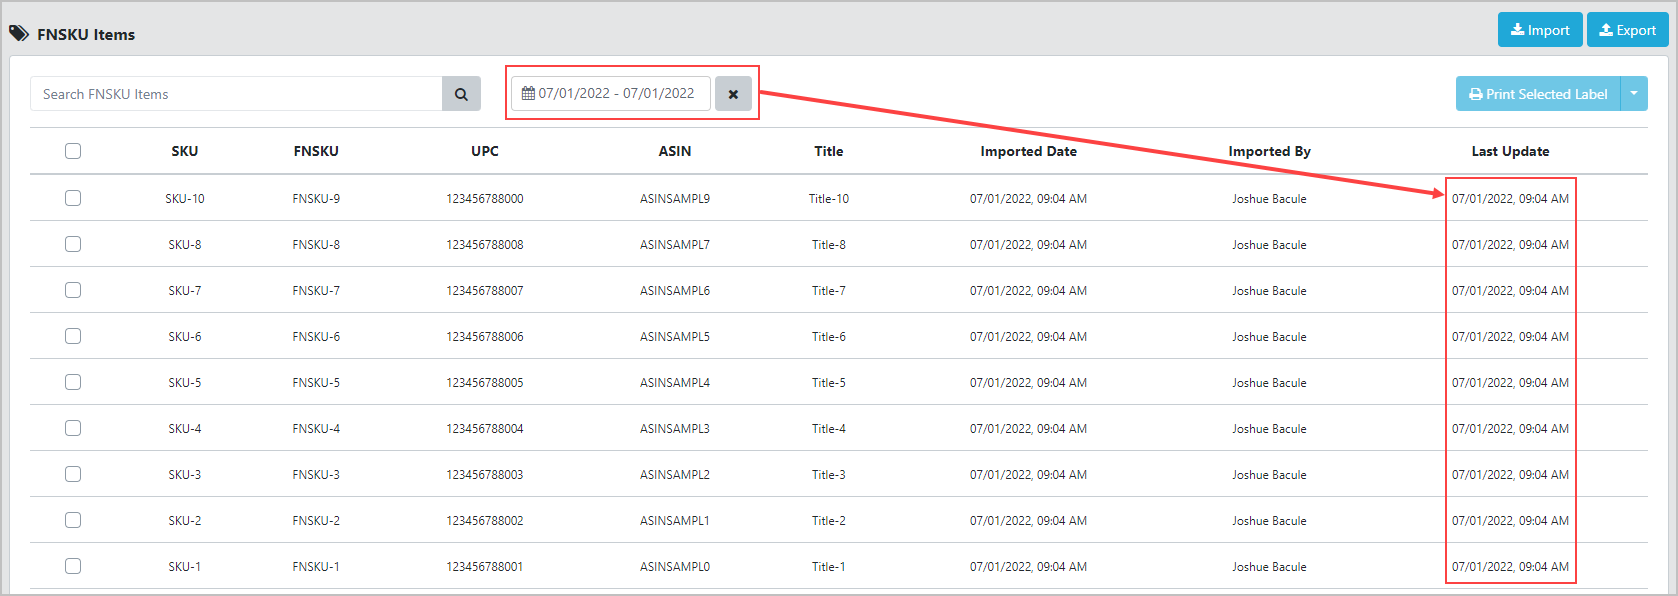
The other one is by Date Range filter. This will filter the FNSKU Items based on the date they were imported.
To clear the filter, simply click the X button.
Printing and Preview of FNSKU Labels
Before you start printing FNSKU labels, make sure you’ve already set up your FNSKU Printer. If you haven’t
done it yet, you can check the link below for the guide on how to select the default printer for FNSKU Labels
After you’ve done setting up your printer, you can proceed now on printing. Select first the rows that you want
to print by checking the checkboxes in the first column of the table. You can also directly select all rows by
checking the header checkbox of the table.
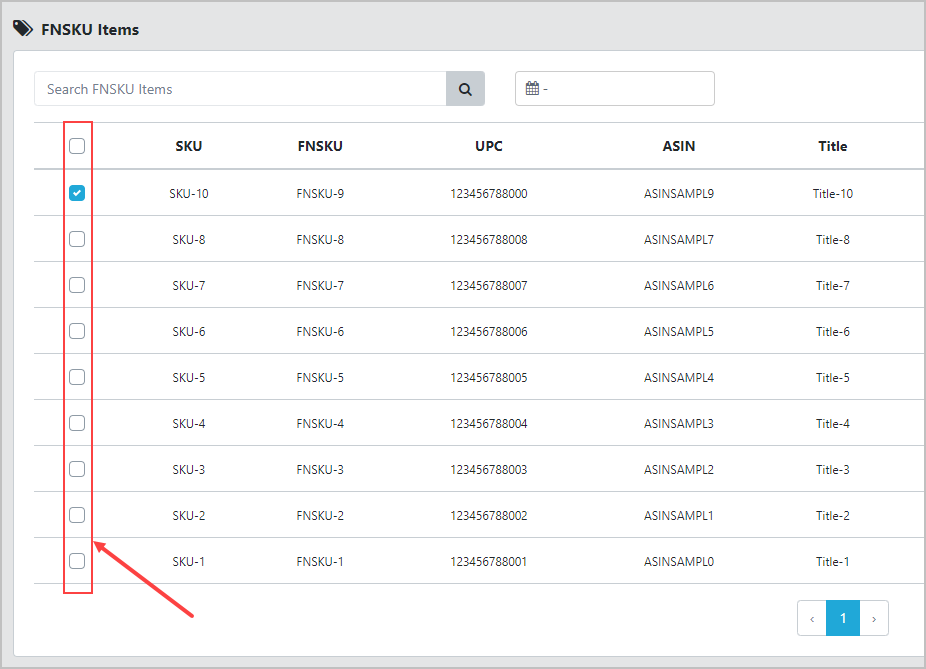
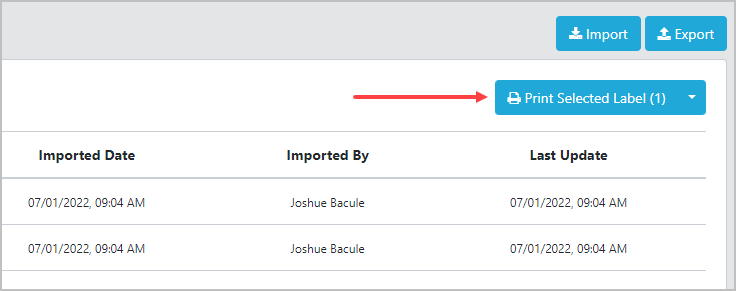
After deciding and checking the rows that you want to print. Click the Print Selected Labels button.
After clicking the button, a small window will pop-up for an option before proceeding in printing FNSKU labels.
You can input the number that you want to print per selected item with a maximum of 10. You can also see
below the total of FNSKU Labels to be printed.
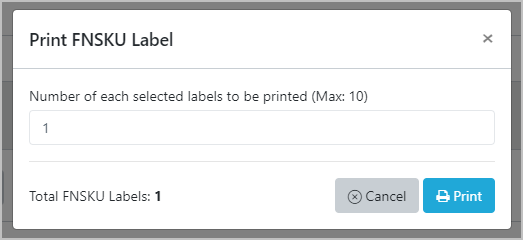
Once you’re set, then simply click the Print button to start printing.
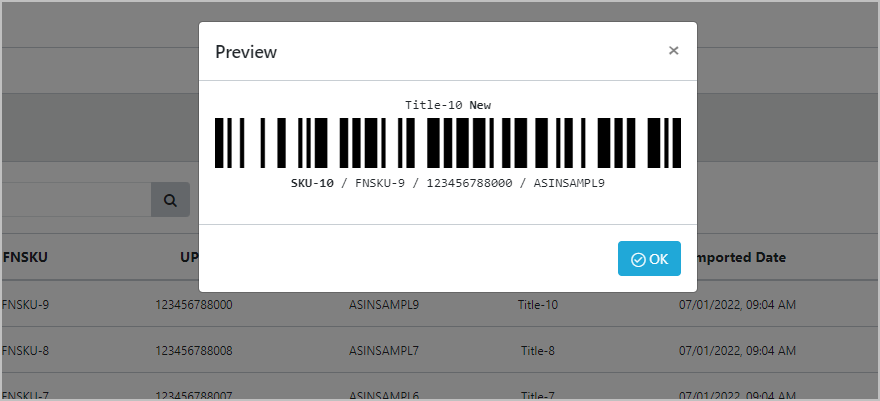
To see the preview of the FNSKU Labels, you can simply click the arrow icon from the Print Selected Label
button then click the Preview menu to proceed.
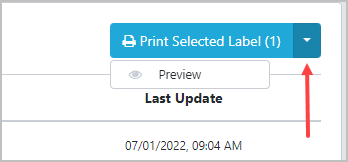
This should look like when previewed.
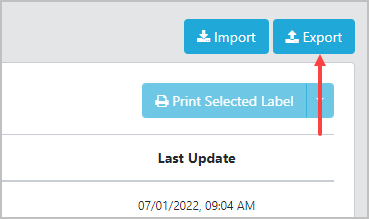
Exporting of FNSKU Items
Beside the import button, you can see the Export button. Just click this button to open the export window
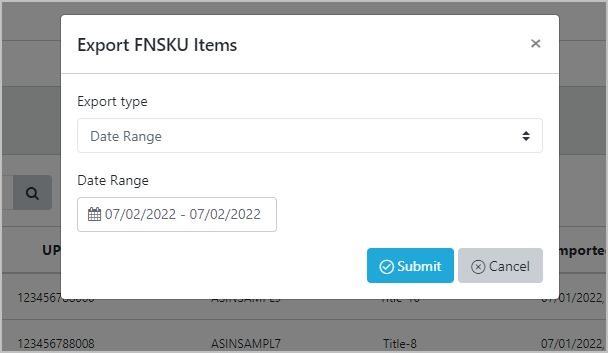
There are two ways to export FNSKU Items. First is by using Date Range type. This is already the default type
when opened. Just proceed on selecting the dates in the Date Range input then click the Submit button to
export.
It will be saved in an excel file with the same columns you can see from the import template before.
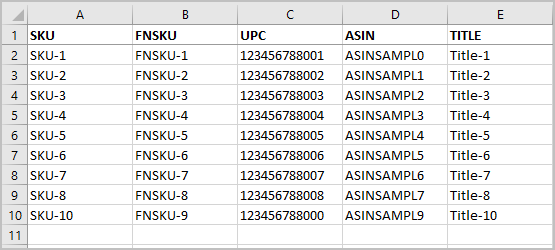
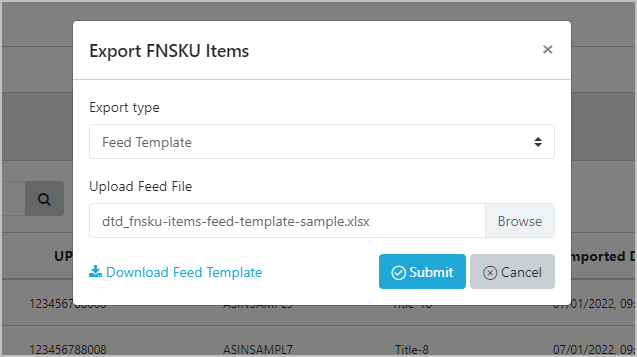
The second export type is by feed template. This is pretty useful especially when you export items that were
imported on different dates. Select the Feed Template in the export type and download the feed template.

In the feed template, you only need to fill-in the SKU and FNSKU column.
Then upload it back in the export window and click the Submit button to proceed on export.
It will also be saved in an excel file with the same columns when you export the items by Date Range.
Downloads
View our 2D Transit brochure and Frequently Asked Questions sheet to learn 2D Transit can help your business grow.
Click here to download a printable version of the Efficient Report Tool tutorial.