Tutorials
User education and troubleshooting guides
Information to help guide you.
With our step-by-step guides, learning 2D Transit is as easy as pie. Also check out our downloadable brochure and detailed Frequently Asked Questions sheet. If you don’t find the answers to your questions there, be sure to visit our Contact page and ask our customer assistance team for help.
Download a shipment plan template file
Learn how to import shipment plans using Seller Central and Vendor Default templates.
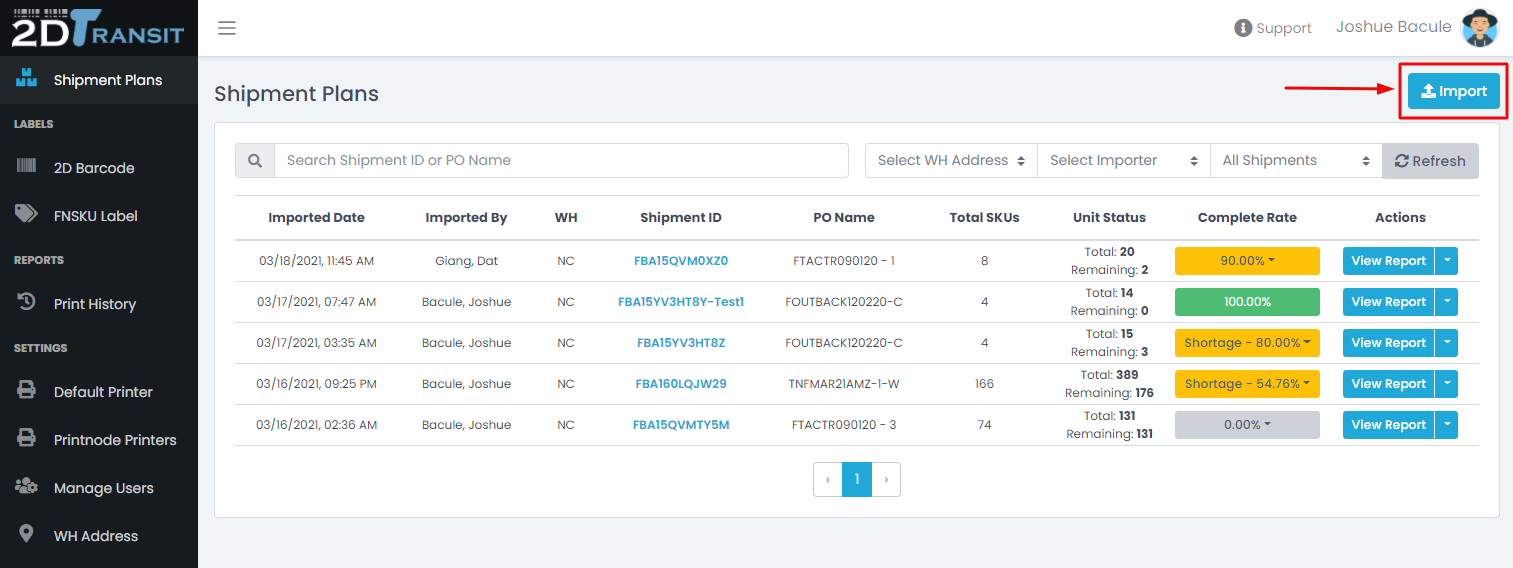
Navigate to the Shipment Plans page using the left navigation menu on the 2D Transit site.
Click the Import button found in the upper-right portion of the page.
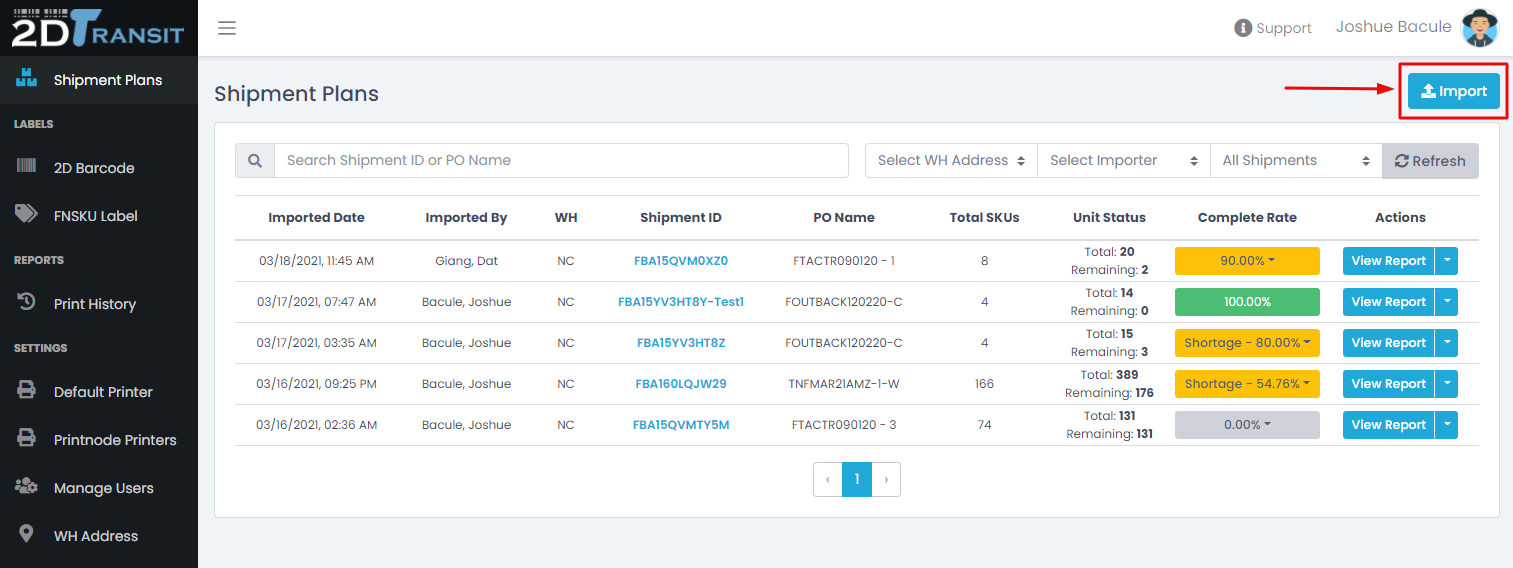
Choose a file template from the Template drop-down menu. The Seller Central FBA template supports two file types: .tsv or .csv. The Vendor Default template supports one file type: .xlsx. We recommend the Vendor Default template if you plan to create your files in Microsoft Excel or Google Sheets. For other spreadsheet software, you may need to use Seller Central FBA.
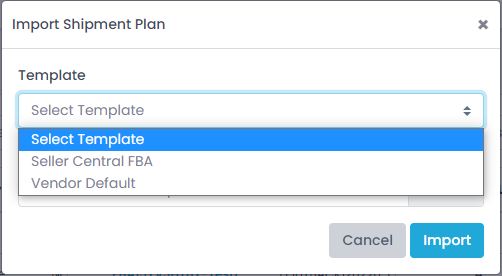
Click the link under Export Template to download a template file. Input your shipment plan data into the template file.
Import a shipment plan file
Click the Browse button in 2D Transit, select a file created from one of our templates, and click the Import button to import it as a shipment plan.
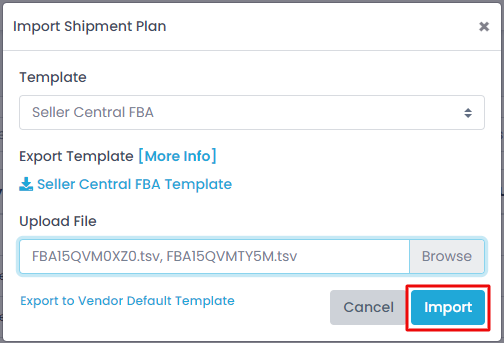
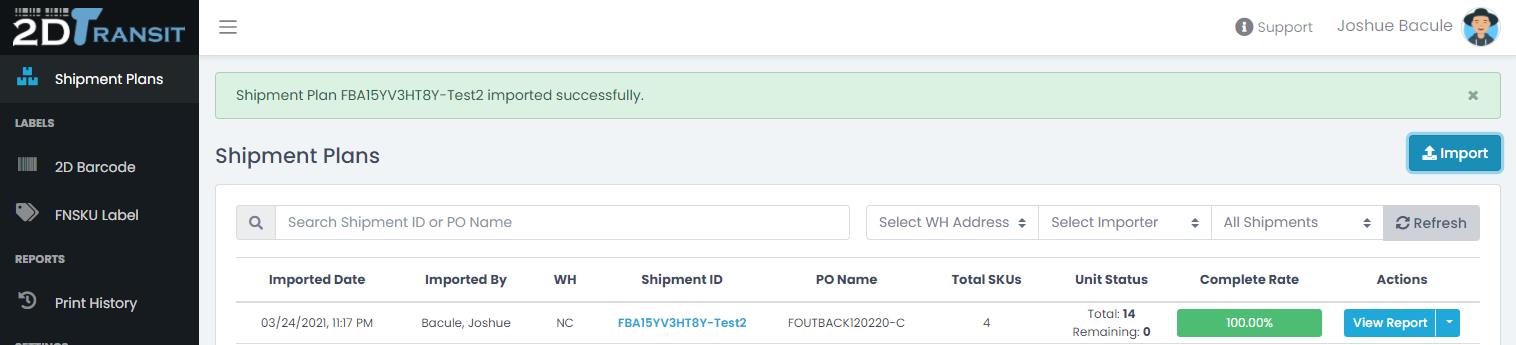
You should see your shipment plan appear in the Shipment Plans list. A green message bar above the list will inform you that your shipment plan was imported successfully. If the shipment plan already exists, you will see a red error message.
Convert Seller Central template to Vendor Default template
Click the Import button found in the upper-right portion of the page.
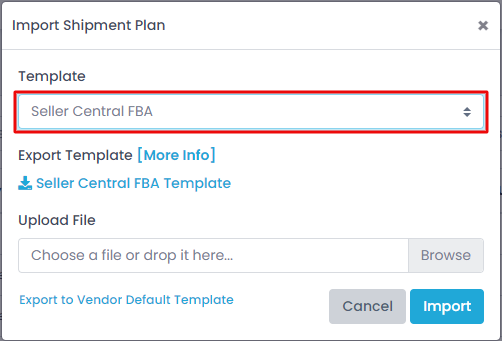
Select Seller Central FBA template and import a file created from the Seller Central template.
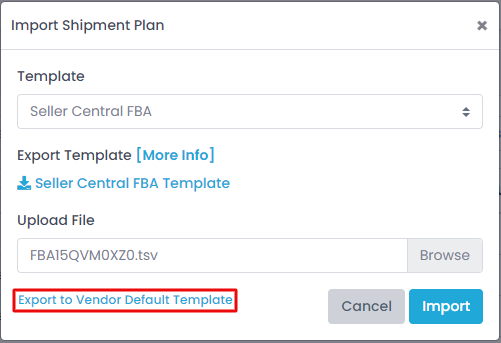
Click Export to Vendor Default Template.
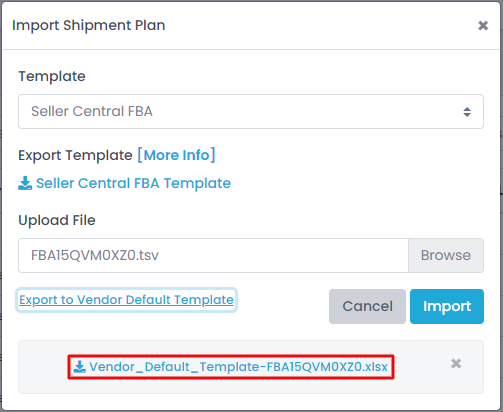
Click the link to download the converted file.
Downloads
View our 2D Transit brochure and Frequently Asked Questions sheet to learn how 2D Transit can help your business grow.
Click here to download a printable version of the Import Shipment Plans tutorial.
Find, view, and reprint a previously printed label
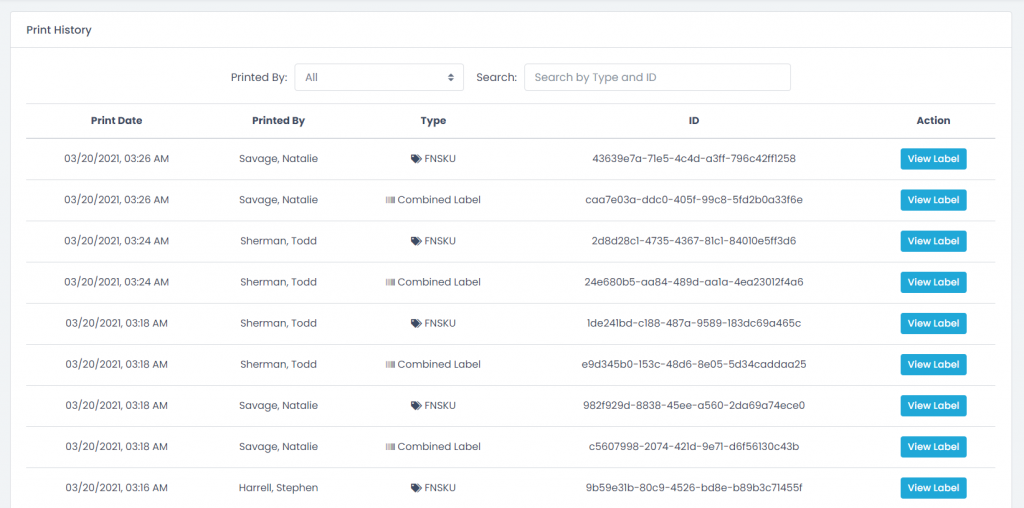
Learn how to view a complete history of your printed 2D and FNSKU labels.
Navigate to the Print History page using the left navigation menu on the 2D Transit site.
Use the search boxes to filter labels by the user who printed them, by label type, or by label ID. Or click a column header to sort the list by that column.
To view a label, click the View button in the Action column.
To reprint a label, click the Print button in the Action column.
Downloads
View our 2D Transit brochure and Frequently Asked Questions sheet to learn 2D Transit can help your business grow.
Click here to download a printable version of the Print History tutorial.
Download and set up the PrintNode client application
Go to the PrintNode download page and download the client app for your operating system.
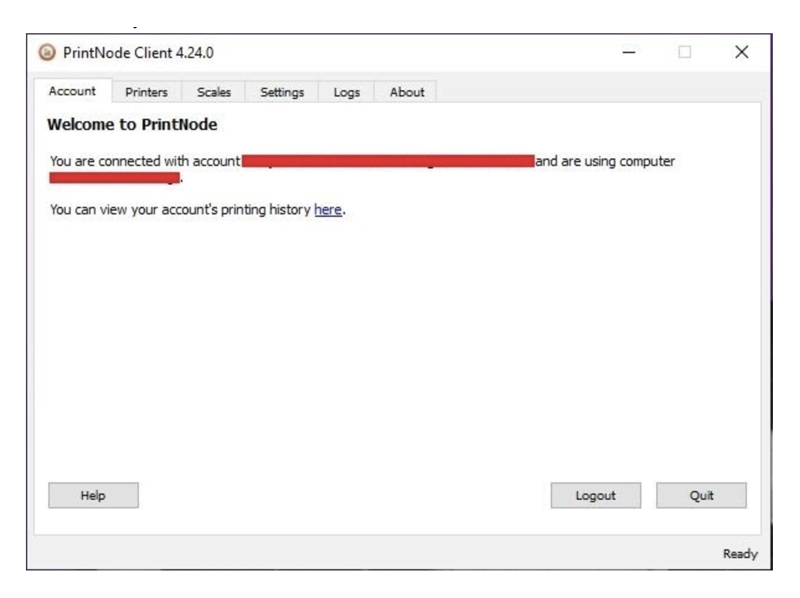
Open the install file and install the PrintNode client by following the onscreen instructions.
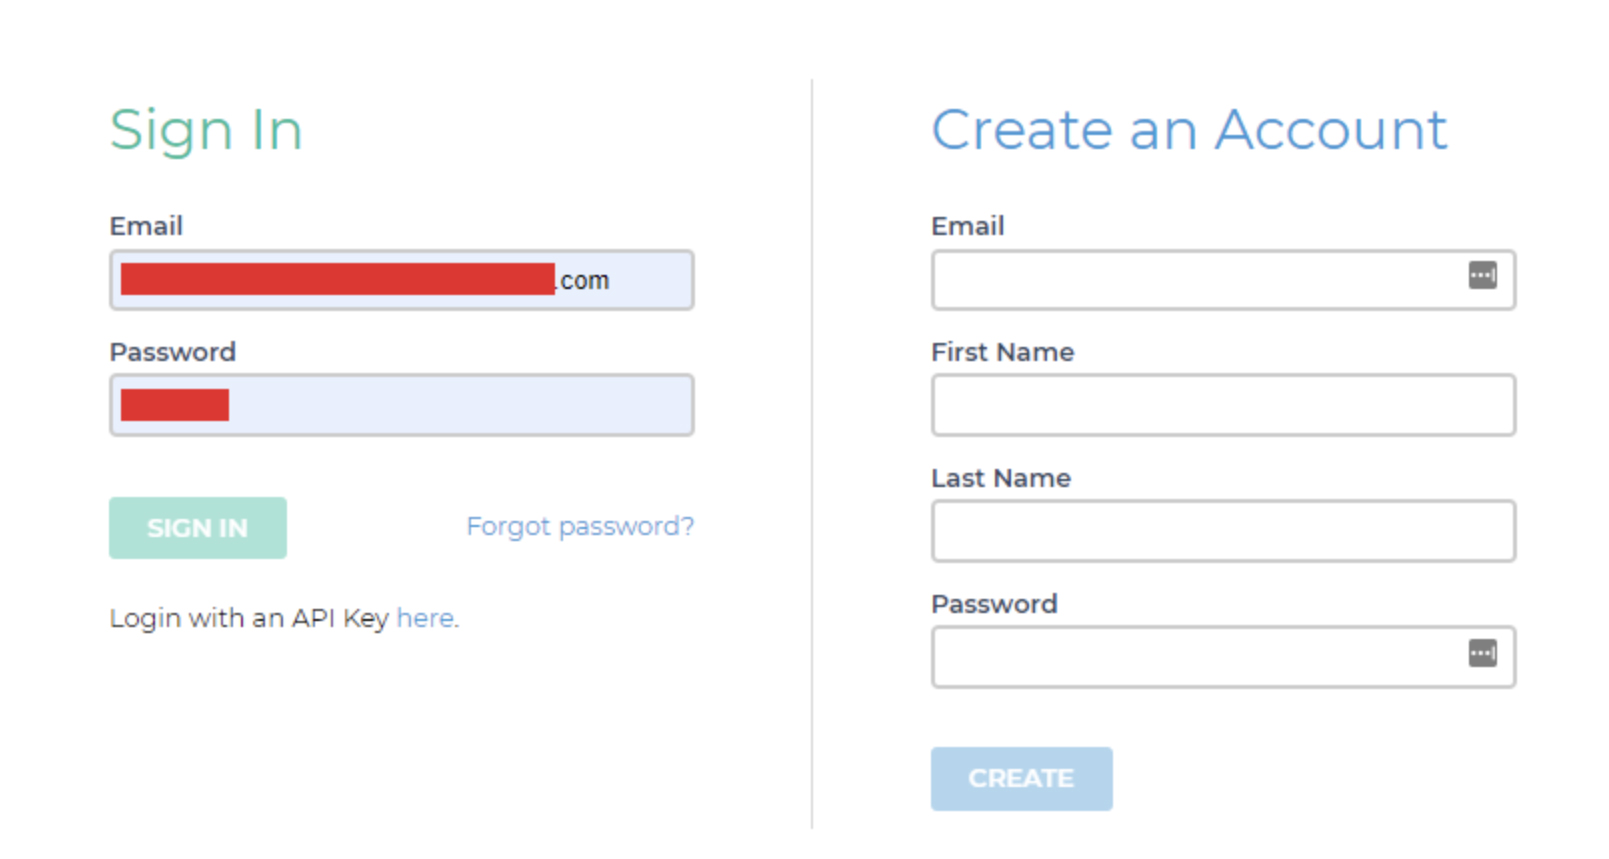
Log in with your PrintNode account. After successfully logging in, PrintNode will automatically minimize to your computer’s system tray.
Verify that PrintNode is connected to your account and your printer
Under the “Account” tab in the PrintNode Client, PrintNode should confirm that it is connected to your account.
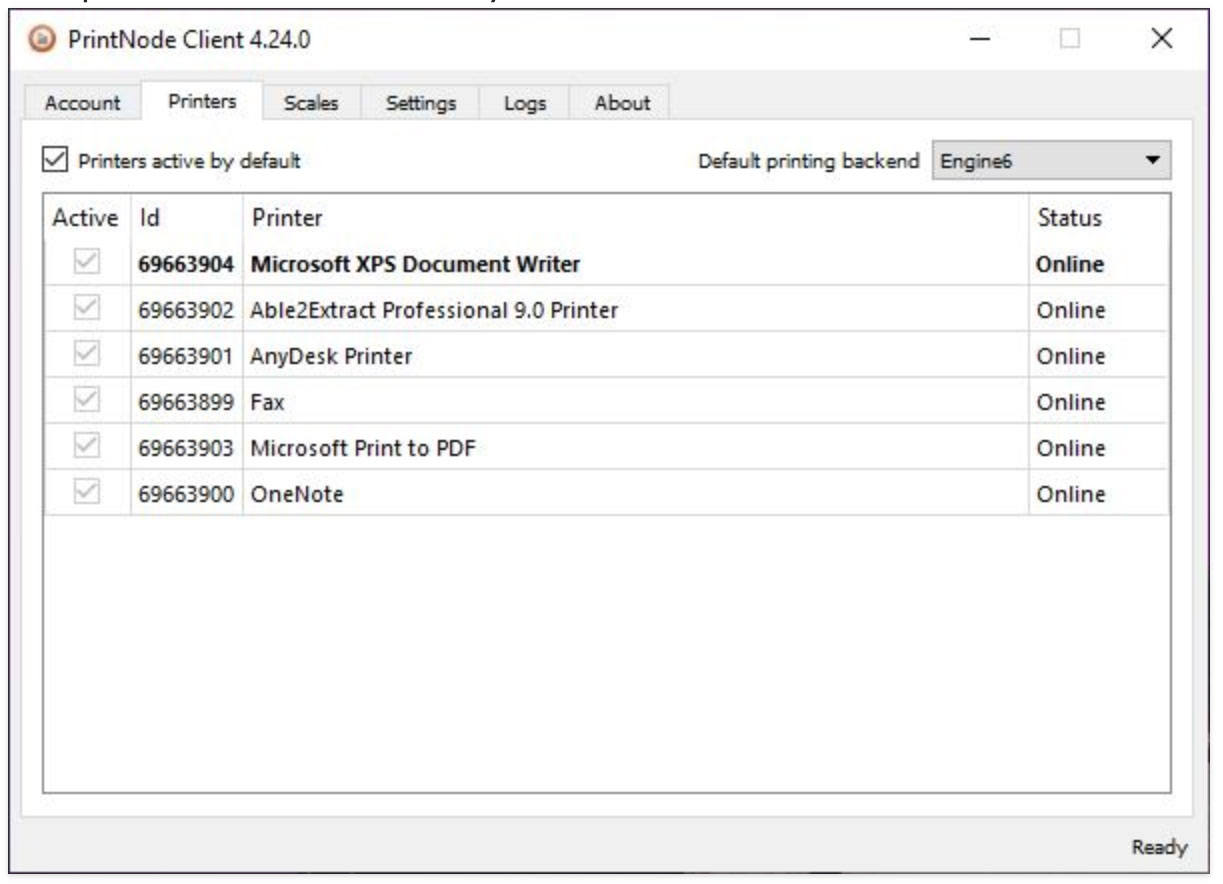
Under the “Account” tab in the PrintNode Client, you should see a list of printers connected to your device. If you do not see your printer listed here, please ensure that your printer is correctly installed and recognized by your operating system.
Get a PrintNode API key
Go to the PrintNode Login page, enter your email address and password, and click the “Sign in” button.
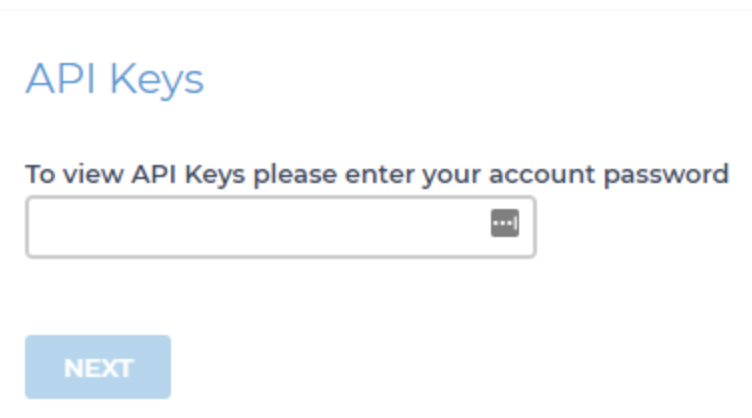
Go to the API Keys page. Re-enter your password and click the “Next” button.
If you already have an existing API key, you can re-use it to avoid creating a duplicate. Otherwise, enter an API key description and click the “Create” button.
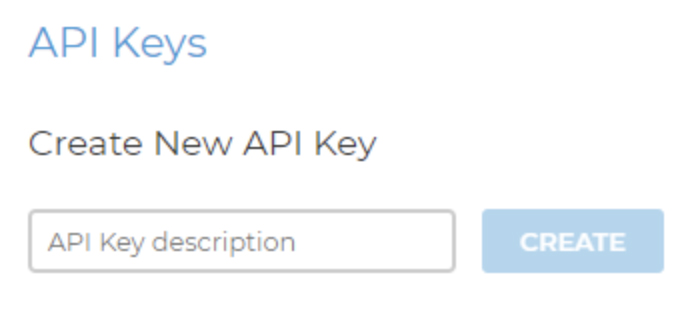
Once you’ve created an API key, you will see it in the list. Save or copy the API key, and then go to the PrintNode page to set up PrintNode printers in 2D Transit.
How to enable PrintNode and set up PrintNode API key in 2D Transit
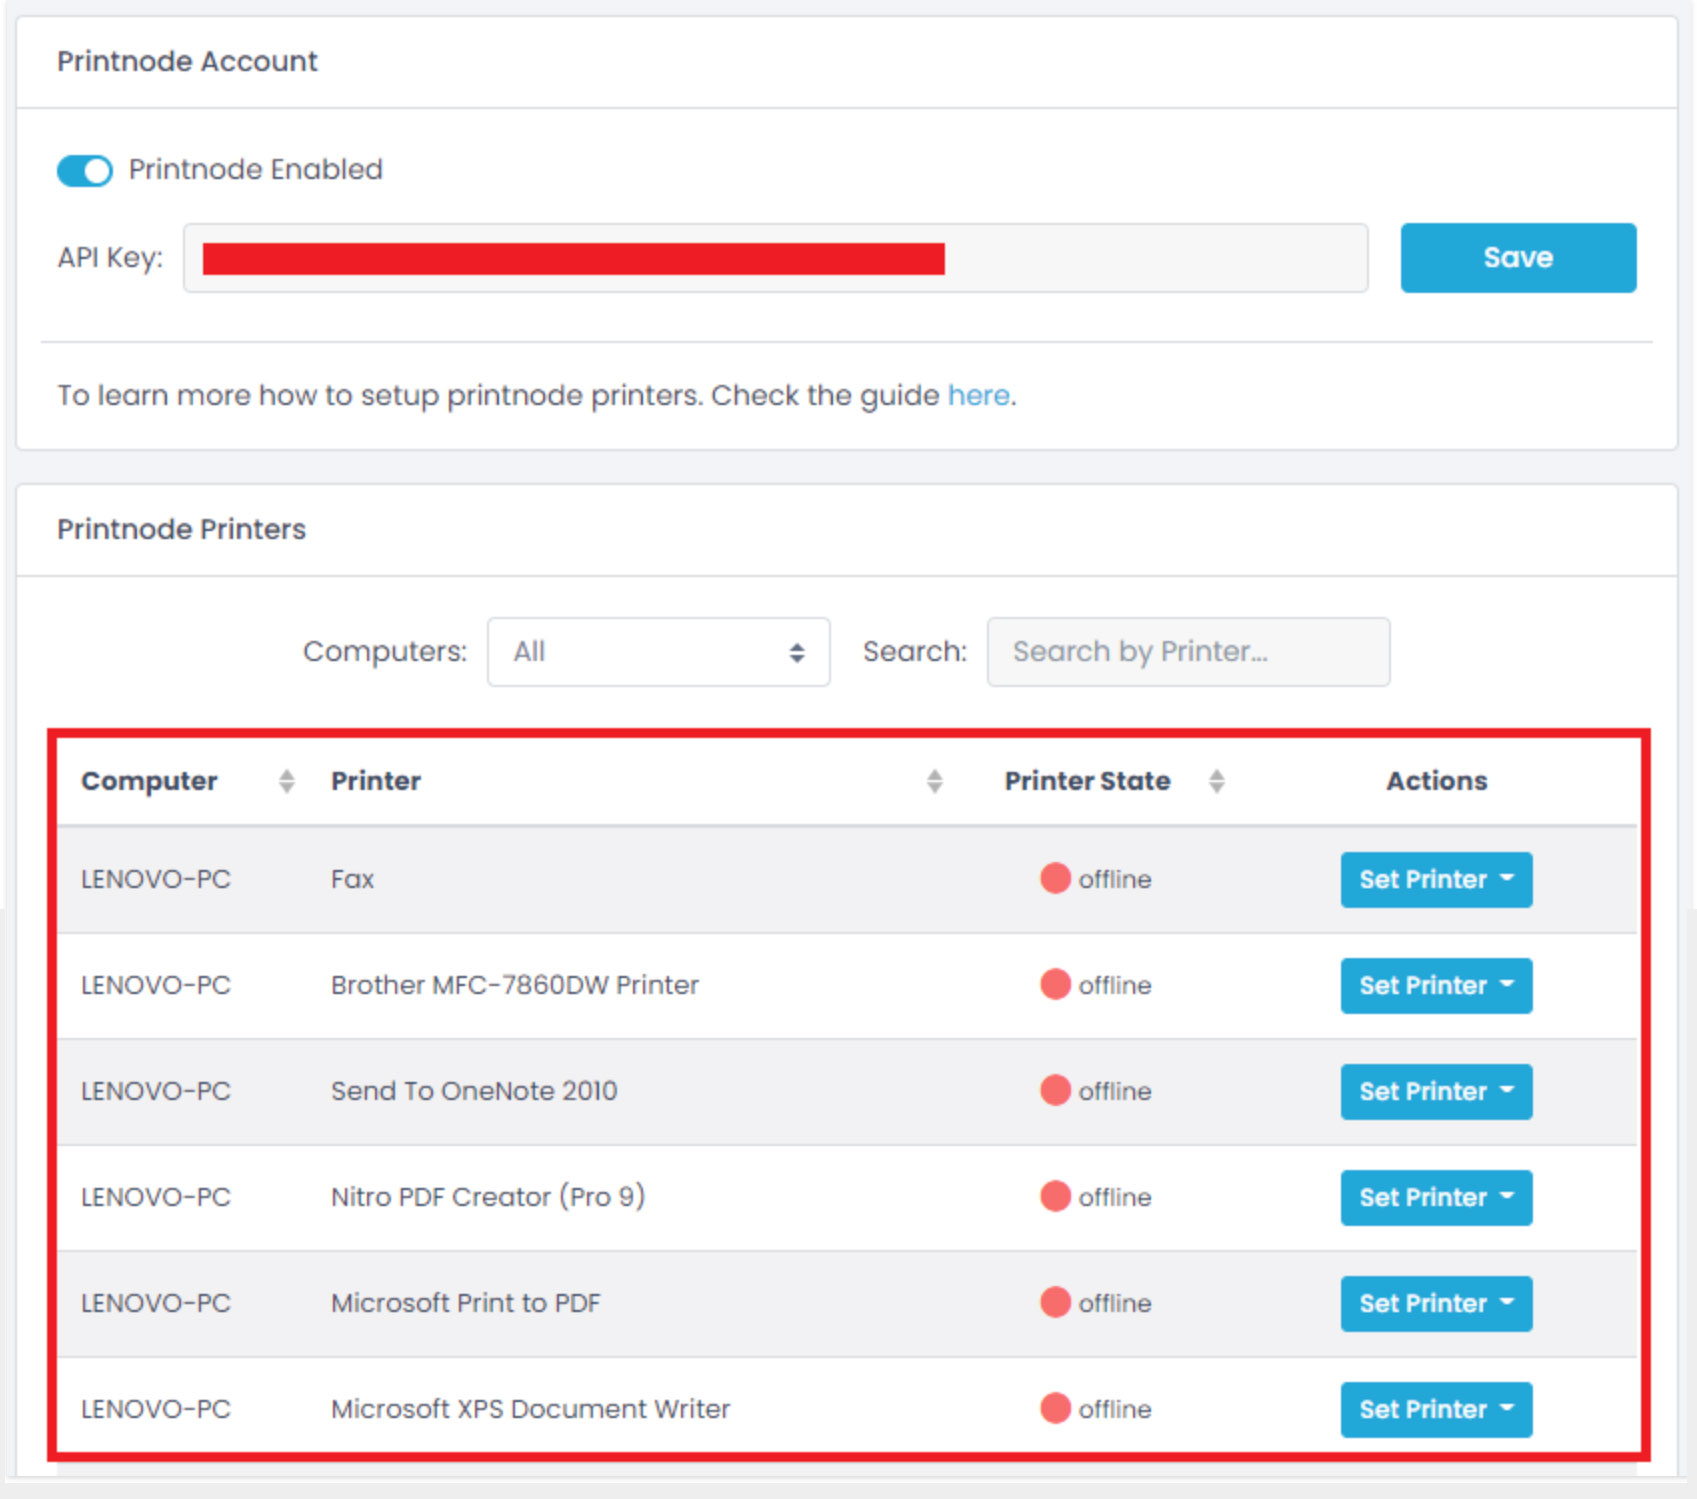
Log in to the web app and visit the PrintNode page.
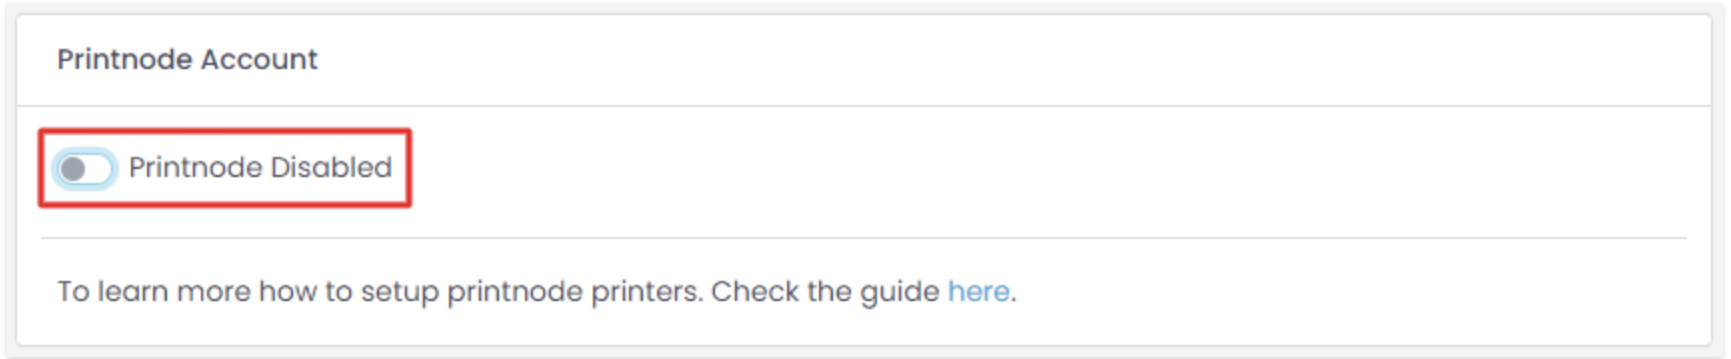
Switch the toggle to enable/disable PrintNode.
Copy and paste your API key into the “API Key” field and hit “Save,” or save it from the API Keys page.
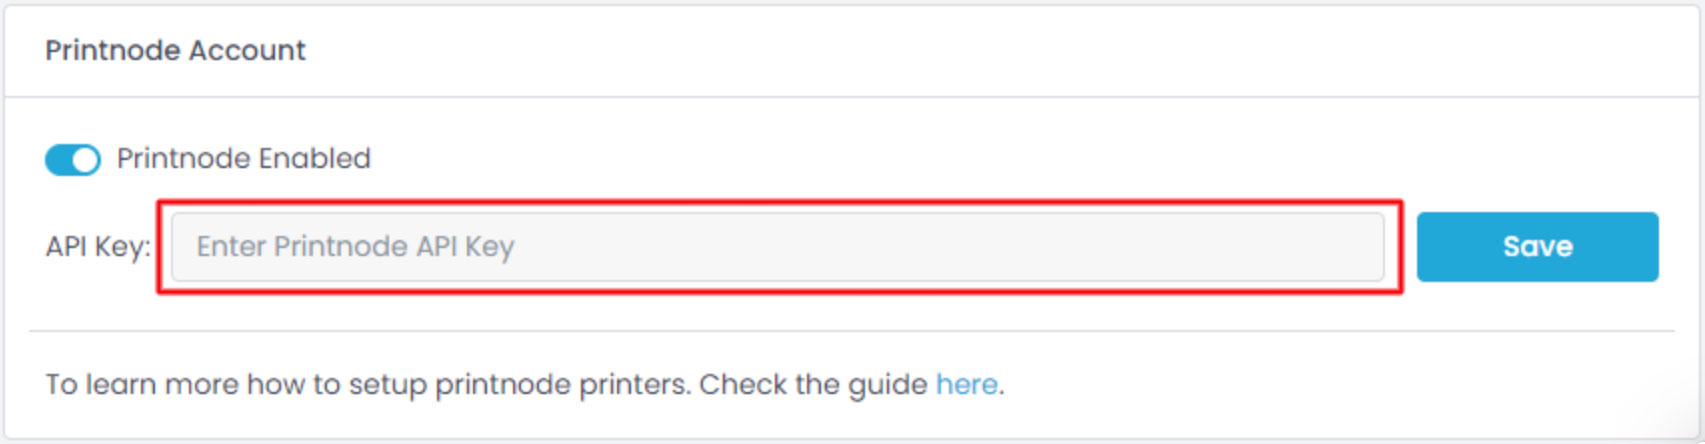
2D Transit will automatically validate your API key and then import a list of connected printers from your PrintNode account.
How to select default printer for 2D barcodes and FNSKU labels
It’s best to set different printers for 2D barcodes and FNKSU labels.
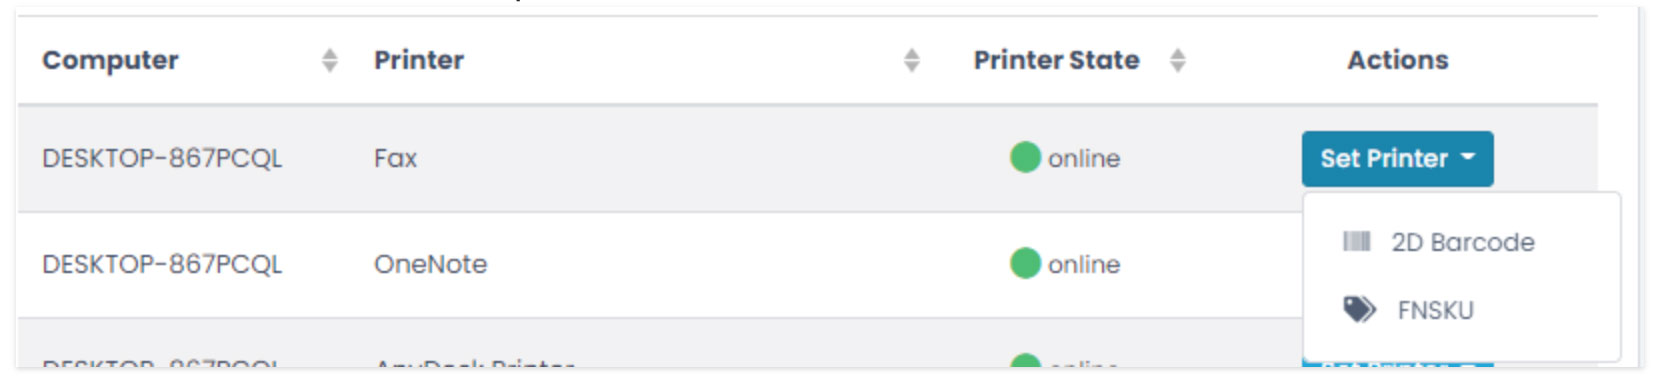
Go to the PrintNode page and find the printer you want in the table. In the “Actions” column, click “Set Printer” and choose either “2D Barcode” or “FNSKU” to set the printer.
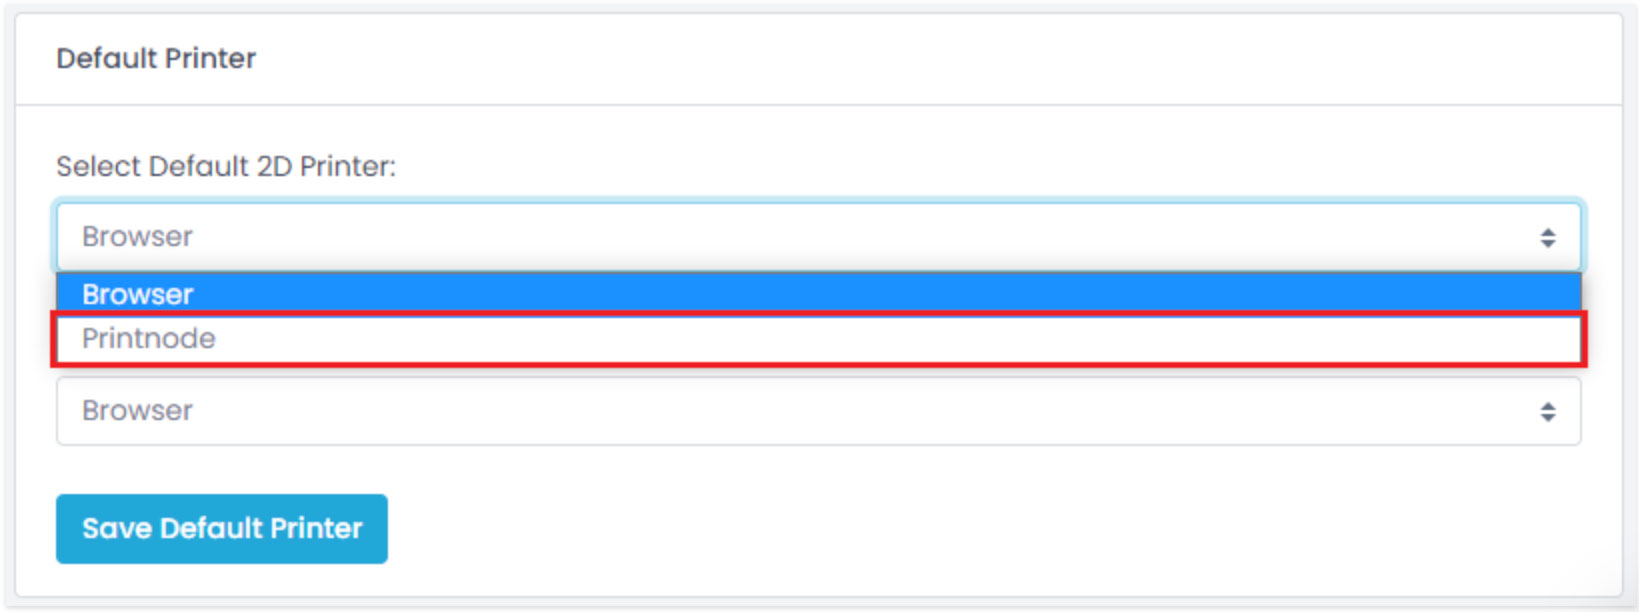
Go to the Default Printer page, select “PrintNode,” select the printer you want to use, and then click “Save Default Printer.” (Note: you can’t select PrintNode printers unless you have already enabled PrintNode.)
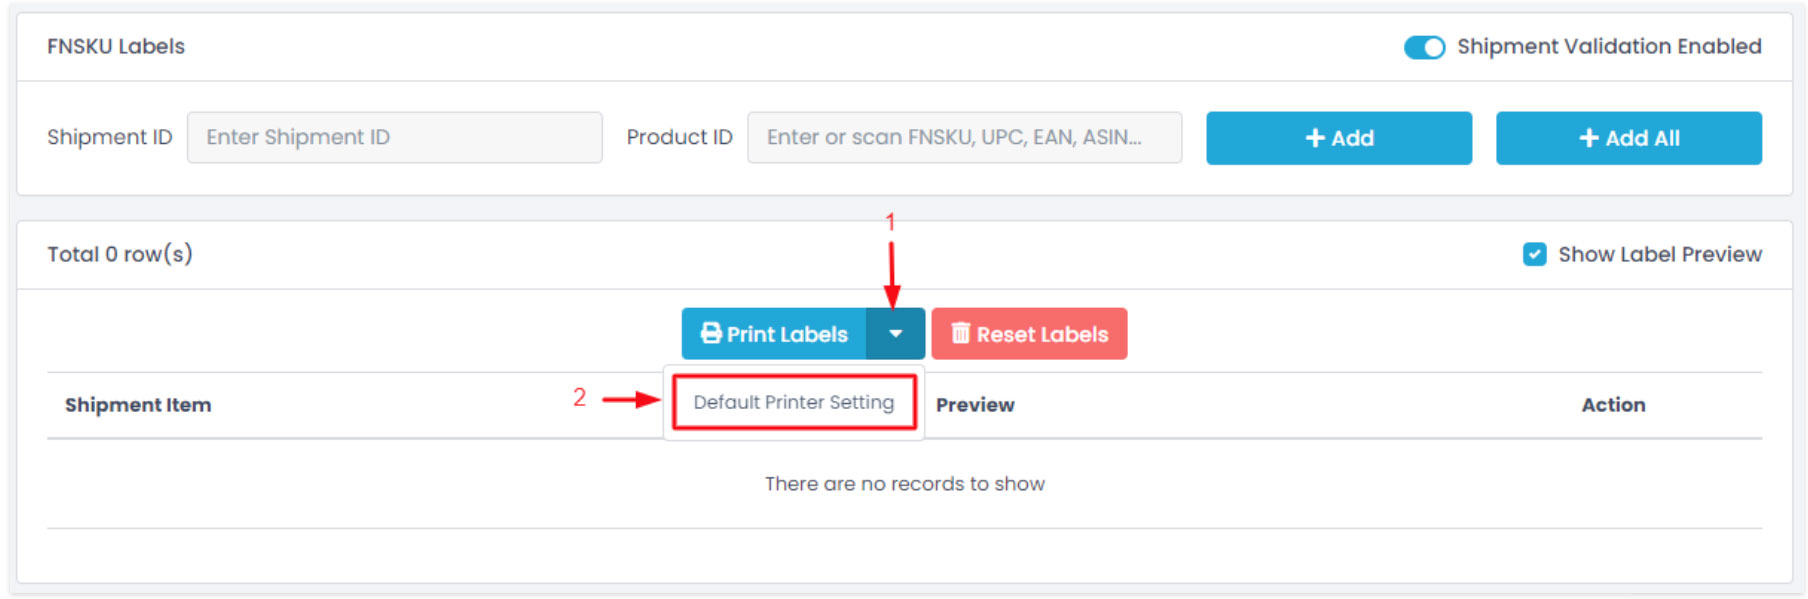
Should you wish to use a different printer than the default when printing labels from the 2D Barcode page or FNSKU Label page, select a printer from the dropdown on the “Print Labels” button.
Downloads
View our 2D Transit brochure and Frequently Asked Questions sheet to learn 2D Transit can help your business grow.
Click here to download a printable version of the PrintNode Setup Guide tutorial.
Decide between two options for printing labels
There are two options for printing labels through 2D Transit: printing through your browser or printing through PrintNode.
Printing through your browser is the default option if you change no settings. Clicking the Print Label button will trigger your browser’s built-in printing pop-up window. From this window, you can select a printer from the available local or network printers installed on your machine. If you don’t see your printer listed in the pop-up window, follow the manufacturer’s setup or troubleshooting guide for your operating system.
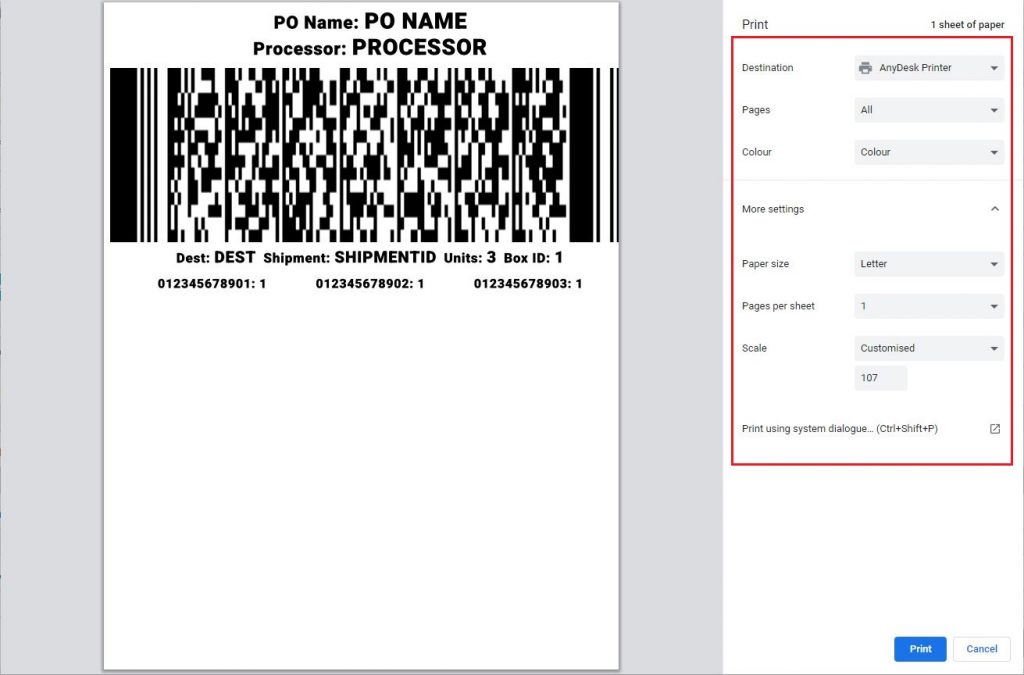
Printing through PrintNode allows you to print labels through the Internet rather than through a local network. It is useful for printing labels remotely or from several different warehouses. To print through PrintNode, follow our guide to set up PrintNode printers.
Select a default printer for your labels
Navigate to the Default Printer page using the left navigation menu on the 2D Transit site.
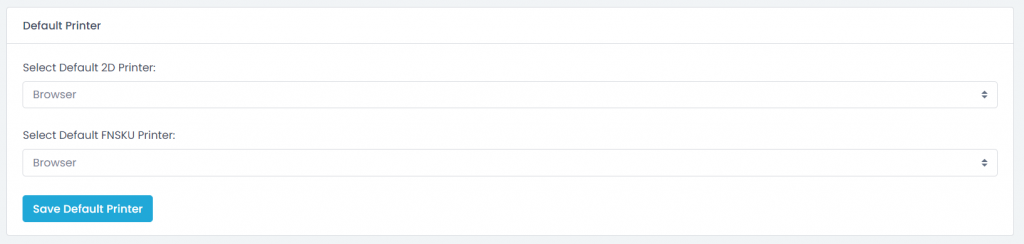
Click the drop-down menus to select a default printer for each type of label. The first drop-down menu controls the printer for 2D barcode or combined 2D labels, while the second controls the printer for FNSKU labels.
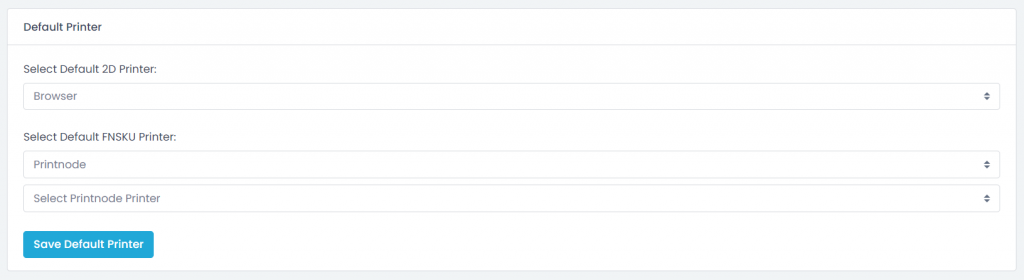
If you choose PrintNode from one of the drop-down menus, a secondary drop-down menu will appear. From this menu, select the PrintNode printer you want to use as your default.
Hit the Save Default Printer button. A message will appear to confirm that your settings have been successfully saved.
Downloads
View our 2D Transit brochure and Frequently Asked Questions sheet to learn 2D Transit can help your business grow.
Click here to download a printable version of the Select Default Printer tutorial.
Add warehouse address
Learn how to set, update, and delete warehouse addresses or identifiers for reporting purposes.
Navigate to the Warehouse Address page using the left navigation menu on the 2D Transit site.
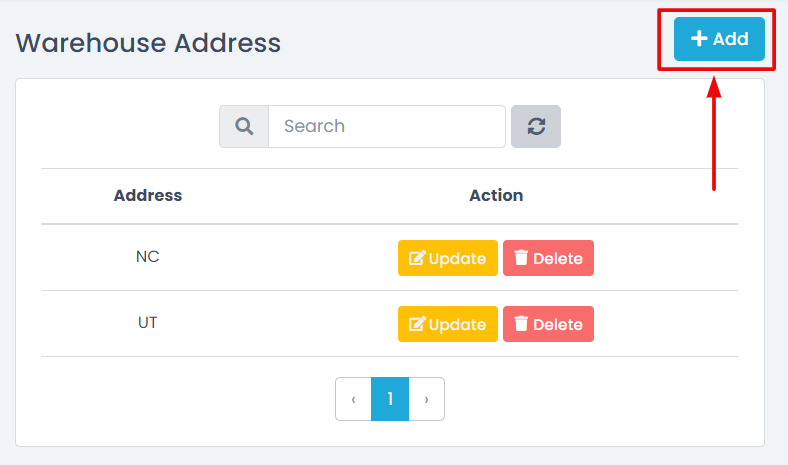
Click the + Add button found in the upper-right portion of the page.
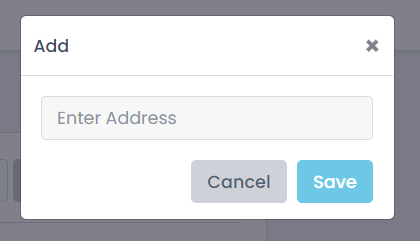
In the pop-up window, the field is required. Fill in the field with a warehouse address or other identifier and click the Save button when done.
Update warehouse address
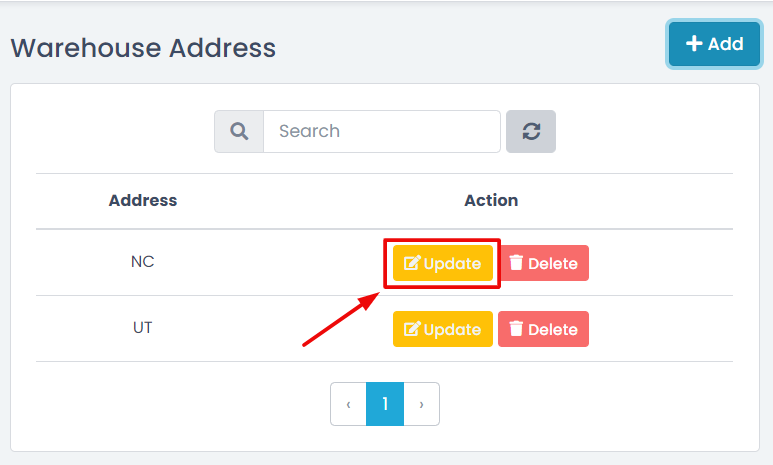
Locate an item in the warehouse address list that you want to update, and then click the Update button in the Action column for that row.
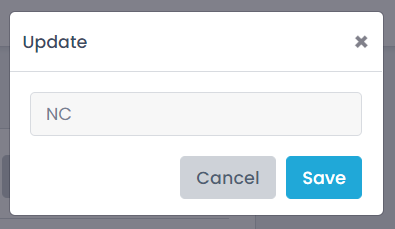
You will see a pop-up box pre-populated with the warehouse address or identifier from that row. Update the field as needed and click the Save button when done.
Delete warehouse address
Locate an item in the warehouse address list that you want to delete, and then click the Delete button in the Action column for that row.
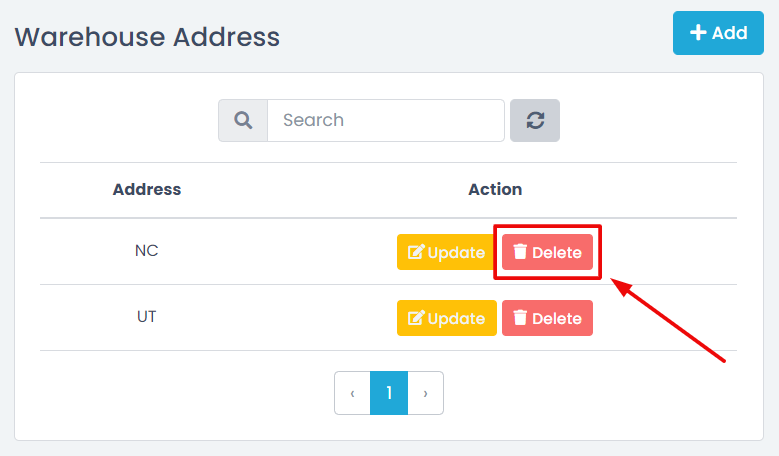
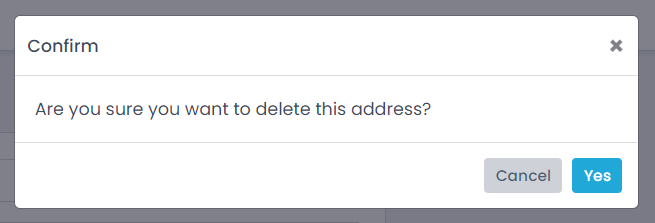
A pop-up window will ask if you’re sure that you want to delete the address. Click the Yes button to confirm that you want to proceed.
Downloads
View our 2D Transit brochure and Frequently Asked Questions sheet to learn 2D Transit can help your business grow.
Click here to download a printable version of the Manage Warehouse Addresses tutorial.
Add custom shipping address
Learn how to save shipping addresses so you can quickly select them from a list rather than manually enter them every time you create a combined 2D label.
Click your 2D Transit username in the upper-right portion of the page and select Settings from the drop-down menu to navigate to the Settings page.
On the Settings page, click the Custom Shipping Address menu item to navigate to the Custom Shipping Address page.
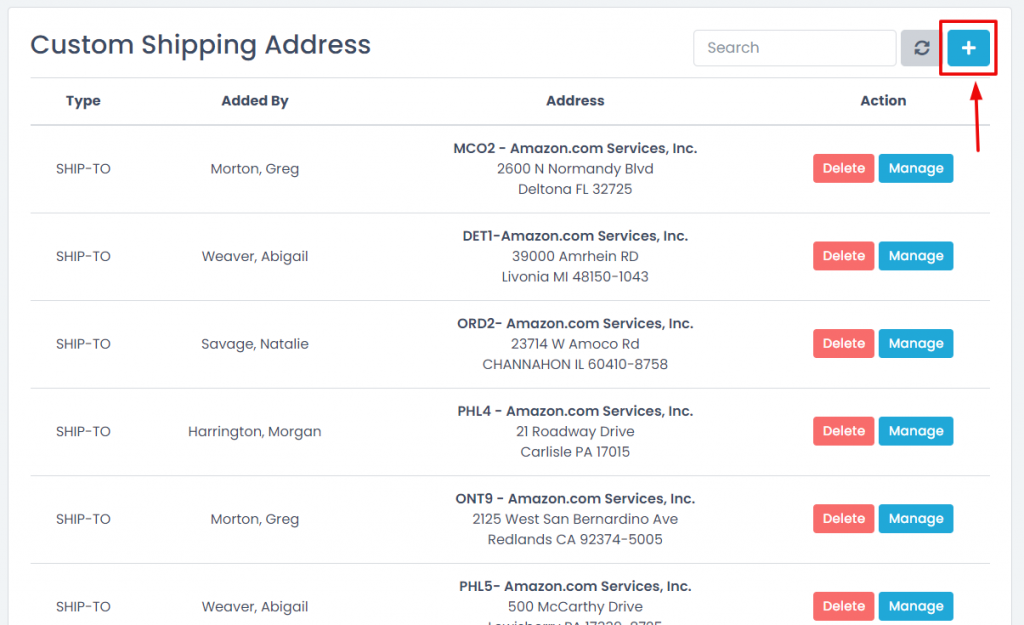
To add a custom shipping address, click the + button found in the upper-right portion of the page.
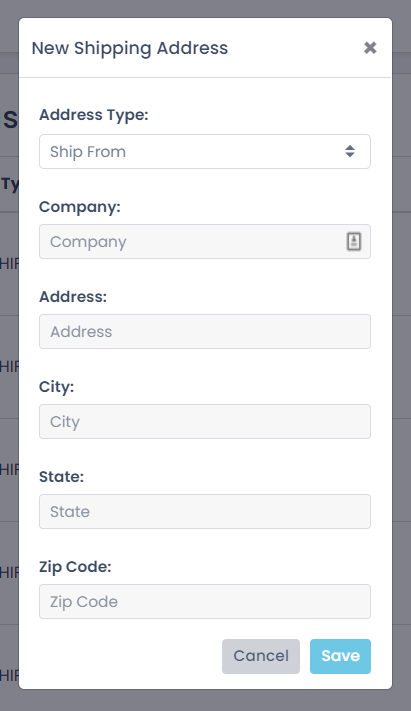
In the pop-up window, all fields are required. Fill in the fields and click the Save button when done.
Update custom shipping address
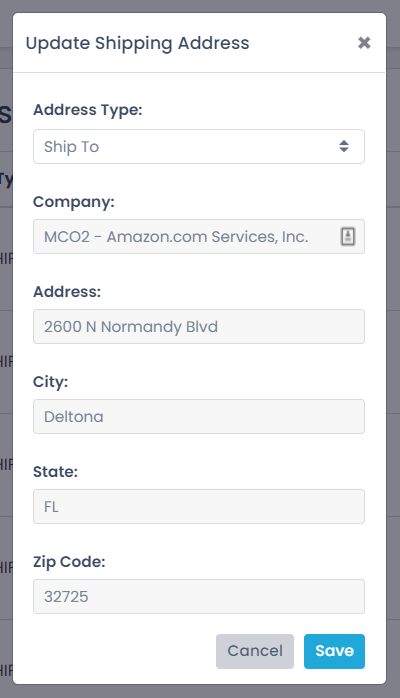
In the shipping addresses list, find a custom shipping address you want to update and click the Manage button in the Action column for that row.
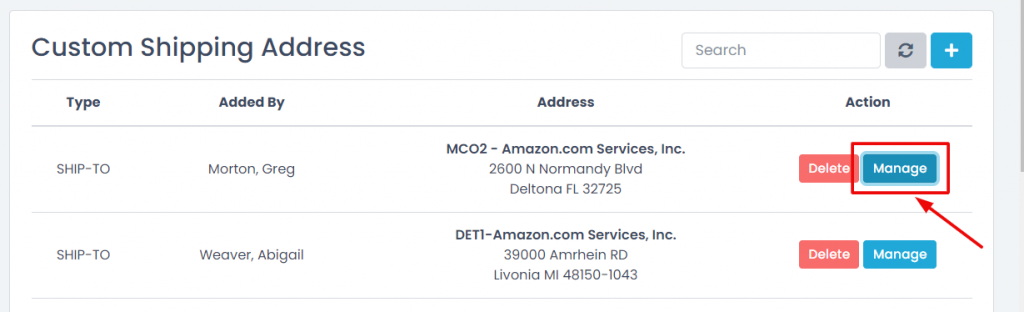
You will see a pop-up box pre-populated with the custom shipping address from that row. Update the fields as needed and click the Save button when done.
Delete custom shipping address
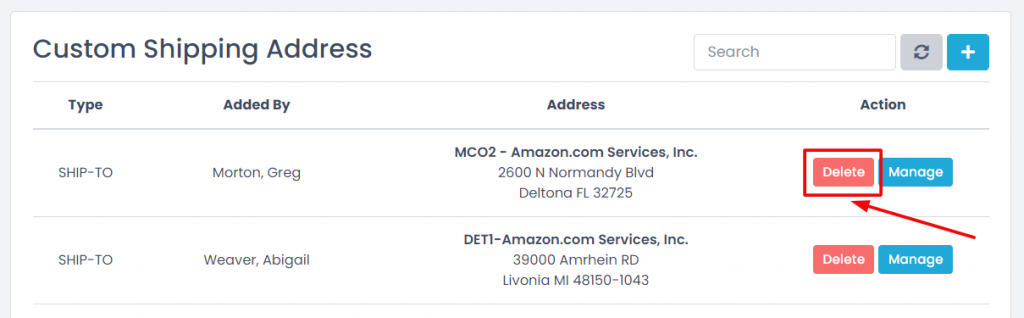
In the shipping addresses list, find a custom shipping address you want to delete and click the Delete button in the Action column for that row.
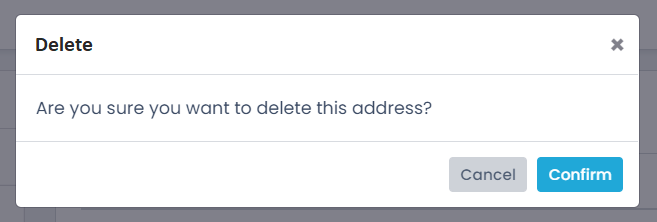
A pop-up window will ask if you’re sure that you want to delete the address. Click the Confirm button to proceed.
Downloads
View our 2D Transit brochure and Frequently Asked Questions sheet to learn 2D Transit can help your business grow.
Click here to download a printable version of the Manage Custom Shipping Address tutorial.
Set the time zone in 2D Transit
Learn how to set the time zone to be used for time-stamping entries in the print history, shipment plans, and shipment plan reports. All entries will be stamped using a single time zone, regardless of warehouse address or shipping address.
Click your 2D Transit username in the upper-right portion of the page and select Settings from the drop-down menu to navigate to the Settings page.
On the Settings page, click the Time Zone menu item to navigate to the Time Zone page.
From the Select Time Zone drop-down menu, select your preferred time zone for reporting purposes. The default time zone is (GMT -7:00) America/Los_Angeles. Click the Save button when done.

Downloads
View our 2D Transit brochure and Frequently Asked Questions sheet to learn 2D Transit can help your business grow.
Click here to download a printable version of the Select Timezone tutorial.